
Lesson 33 of 38 · Guided walkthrough 1 - 12-18 min
Walkthrough: Codex App: end-to-end
Install the Codex desktop app, point it at a real project, set a safe workspace-write sandbox with on-request approvals, run an isolated Git worktree task, verify it in the integrated terminal, review and commit the diff, then add a plugin and a standalone automation that reports findings into Triage.
This is a calm, click-by-click tour of the Codex desktop app from a cold install through your first committed change and your first scheduled automation. The real lesson underneath the clicks is how to grant an autonomous coding agent power gradually: you start read-only and approval-gated, then open up just enough permission to let Codex edit inside a Git worktree where nothing leaks into your main branch. Each setting you touch - sandbox mode, approval policy, run mode - is a deliberate dial on the trust you extend, and the order you turn them in is the whole point. By the end you will have a clean, reviewed commit, a connected plugin, and a standalone automation feeding findings into your Triage inbox, plus a mental model you can reuse across the Codex CLI and IDE extension since they share the same configuration. Every quoted phrase below is taken from the official Codex docs.
What you'll learn
- How to escalate an agent's permissions on purpose: read-only to inspect, workspace-write to let it edit, and why danger-full-access is a line you almost never cross.
- The difference between the sandbox (what Codex is physically allowed to touch) and the approval policy (when it must stop and ask you) - two independent dials that combine into your safety posture.
- Why running your first task in a Git worktree quarantines edits to a throwaway branch, so a bad change can never dirty your real working tree.
- How to verify before you trust: use the thread's integrated terminal to run tests and git status inside the worktree before a single line is staged.
- How the Review pane turns an agent's output into a deliberate human decision - reading every diff hunk, staging selectively, and writing a clear commit message.
- How plugins extend Codex with external services (like GitHub) under your existing guardrails, invoked on demand by typing @ in a thread.
- How standalone automations run unattended on a schedule and report into Triage - and why approval_policy "never" means the sandbox, not a prompt, is your only seatbelt.
- Why the same configuration model carries across the Codex app, CLI, and IDE extension, so this mental model transfers everywhere you use Codex.
Why this matters
Sandbox and approvals are two dials, not one switch
The single most important idea in this walkthrough is that Codex's safety is governed by two independent settings that people often collapse into one. The sandbox mode answers a physical question: what is Codex allowed to touch? read-only lets it look but it must ask before any edit, command, or network call; workspace-write lets it edit and run commands inside your project folder automatically, but still requires approval to reach outside the workspace or hit the network; danger-full-access removes the sandbox entirely. The approval policy answers a behavioral question: when must it pause and ask you? on-request is the balanced default that prompts only for actions beyond its sandbox. You compose them. workspace-write plus on-request - the posture you set in steps 5 and 6 - means safe in-workspace work flows without nagging, while anything riskier stops at a prompt you control. Understanding this composition is what lets you tune Codex for any task instead of toggling a single 'careful/reckless' switch. Crucially, even in workspace-write the .git.agents, and .codex paths stay read-only, so the agent can't quietly rewrite your Git history or its own agent config, and network access is off until you explicitly enable it.
Worktrees and the Review pane are the human checkpoint in the agentic loop
Agentic coding only works if a human stays in the verification loop, and this walkthrough builds two structural checkpoints so that trust is earned, not assumed. The first is the Worktree run mode: rather than editing your live checkout, Codex spins up a separate Git worktree on the same machine, so its changes live on an isolated branch and your current branch is physically untouchable. That converts 'what if the agent breaks something?' from a worry into a contained, discardable experiment. The second checkpoint is the inspect-then-commit discipline of steps 10 through 13: you open the thread's integrated terminal to run git status and your tests against the agent's work, then open the Review pane to read the diff hunk by hunk, stage only what you reviewed, and write the commit message yourself. The agent proposes; you dispose. This is the difference between a tool that writes code for you and a tool that commits code on your behalf - the worktree gives you a safe place to look, and the Review pane makes shipping a deliberate human act rather than an automatic side effect.
Automations remove the human - so the sandbox becomes your only seatbelt
The final step crosses an important threshold: a standalone automation starts fresh runs on a schedule and reports results into Triage, your inbox, auto-archiving any run that has nothing to report so the queue stays clean. This is genuinely powerful - a recurring agent that scans for issues while you sleep - but it inverts the safety model you spent the whole lesson building. When org policy permits, these runs execute with approval_policy 'never', meaning there is no human at the keyboard to approve anything. Every guardrail you relied on earlier collapses down to one: the sandbox. That is precisely why the lesson front-loads the sandbox discipline. An unattended run in read-only or a tightly scoped workspace-write is a safe assistant; the same prompt under danger-full-access with no approvals is an unsupervised process with full machine access. The takeaway for any agentic workflow is to match autonomy to blast radius: the more you remove the human, the tighter the sandbox must be, and an optional reviewer agent can screen escalations only while approvals are still interactive - it offers nothing once you've set approvals to never.
The Codex App task lifecycle
How one task flows from install to a committed change and an unattended automation, with trust escalating at each stage.
- Install, sign in, open projectDownload the app, authenticate with ChatGPT, and point Codex at a clean Git repo.
- Set the two safety dialsSandbox to workspace-write, approvals to on-request - safe in-workspace edits flow, riskier actions pause.
- New thread in Worktree modeSend a scoped task; Codex edits inside an isolated Git worktree so your main branch stays untouched.
- Verify in the integrated terminalRun git status and tests inside the worktree to confirm the change before staging anything.
- Review pane: stage and commitRead the diff hunk by hunk, stage only what you reviewed, and write the commit message yourself.
- Add a plugin and invoke with @Install a plugin (e.g. GitHub) under your existing guardrails, then call it on demand by typing @ in a thread.
- Standalone automation to TriageSchedule unattended runs that report findings to Triage - with approval_policy 'never', the sandbox is the only seatbelt.
Before you start
- A ChatGPT account (Plus, Pro, Business, or Enterprise) or an OpenAI API key. Note: if you sign in with an API key, some functionality might not be available.
- A supported OS: macOS (Apple Silicon or Intel) or Windows. Linux currently offers a notification signup only.
- Git installed and at least one local Git repository with a clean working tree you can experiment in safely.
- For the plugin step: an account for the service you connect (for example GitHub), authenticated through ChatGPT.
Step by step
Download and install the Codex app
Download the Codex app for your OS, then install and open it
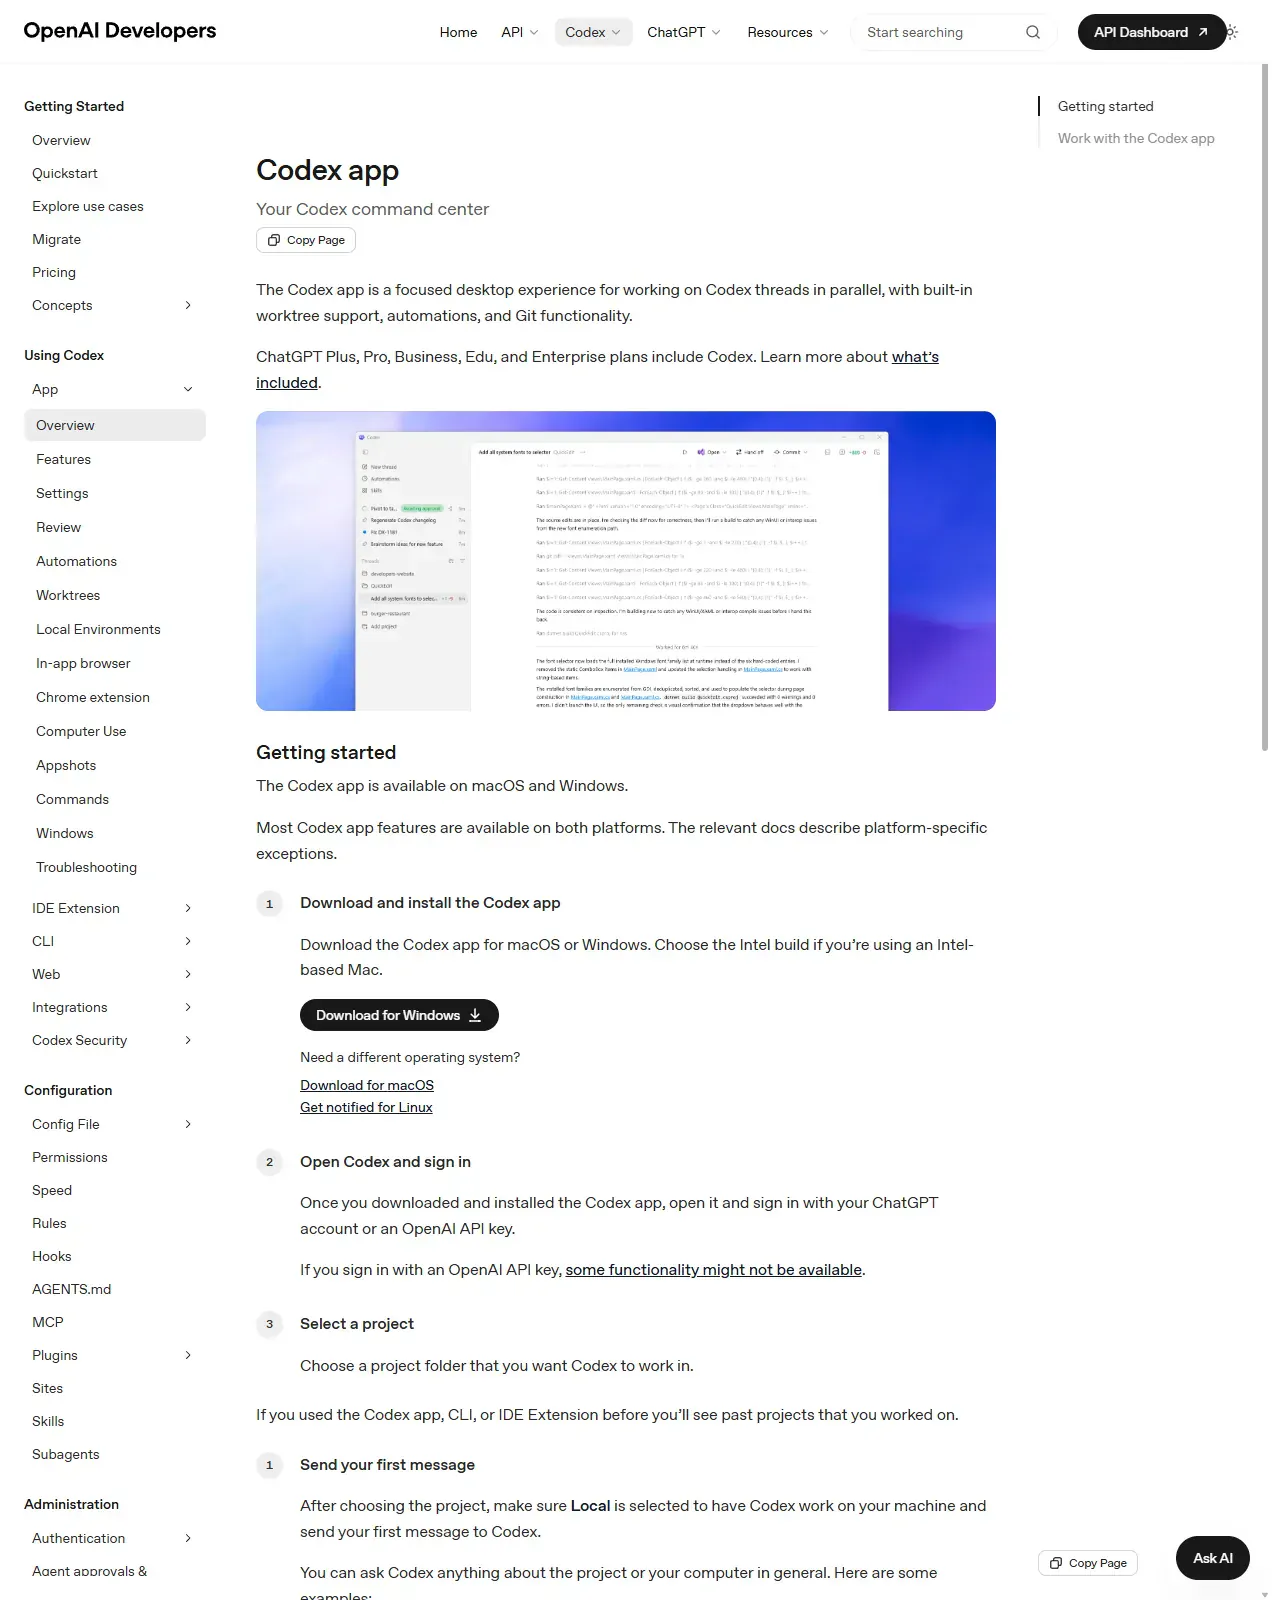
From the Codex app page, the docs say to "Download the Codex app for macOS or Windows. Choose the Intel build if you're using an Intel-based Mac." Linux currently offers only a notification signup, so use macOS or Windows for this lesson. When the install finishes, the app opens to a sign-in screen, that's your cue for the next step.
- 1Pick the right Mac build. On macOS the Apple Silicon and Intel builds are separate. Choose the Intel build only if you're on an Intel-based Mac; otherwise take the default Apple Silicon build.
- 2Linux is notify-only. There is no Linux app yet. The Linux option just signs you up to be notified when one ships.
Voiceover Start by grabbing the Codex app for your operating system, then run the installer and open it once it's finished.
Open the app and sign in
Open the app and click Sign in, then authenticate with your ChatGPT account
The docs say: "Once you downloaded and installed the Codex app, open it and sign in with your ChatGPT account or an OpenAI API key." Prefer ChatGPT sign-in. "If you sign in with an OpenAI API key, some functionality might not be available." When sign-in succeeds the browser hands you back to the app and your account and recent projects appear.
- 1Prefer ChatGPT sign-in. ChatGPT sign-in unlocks the full app. API-key sign-in is supported but, per the docs, some functionality might not be available.
- 2Browser hand-off. Authentication completes in your browser and then returns you to the app. Approve the request you expect, nothing else.
Voiceover With the app open, click Sign in and authenticate using your ChatGPT account to connect everything up.
Choose a project folder
Click Open project (or pick a recent project) and select your repo
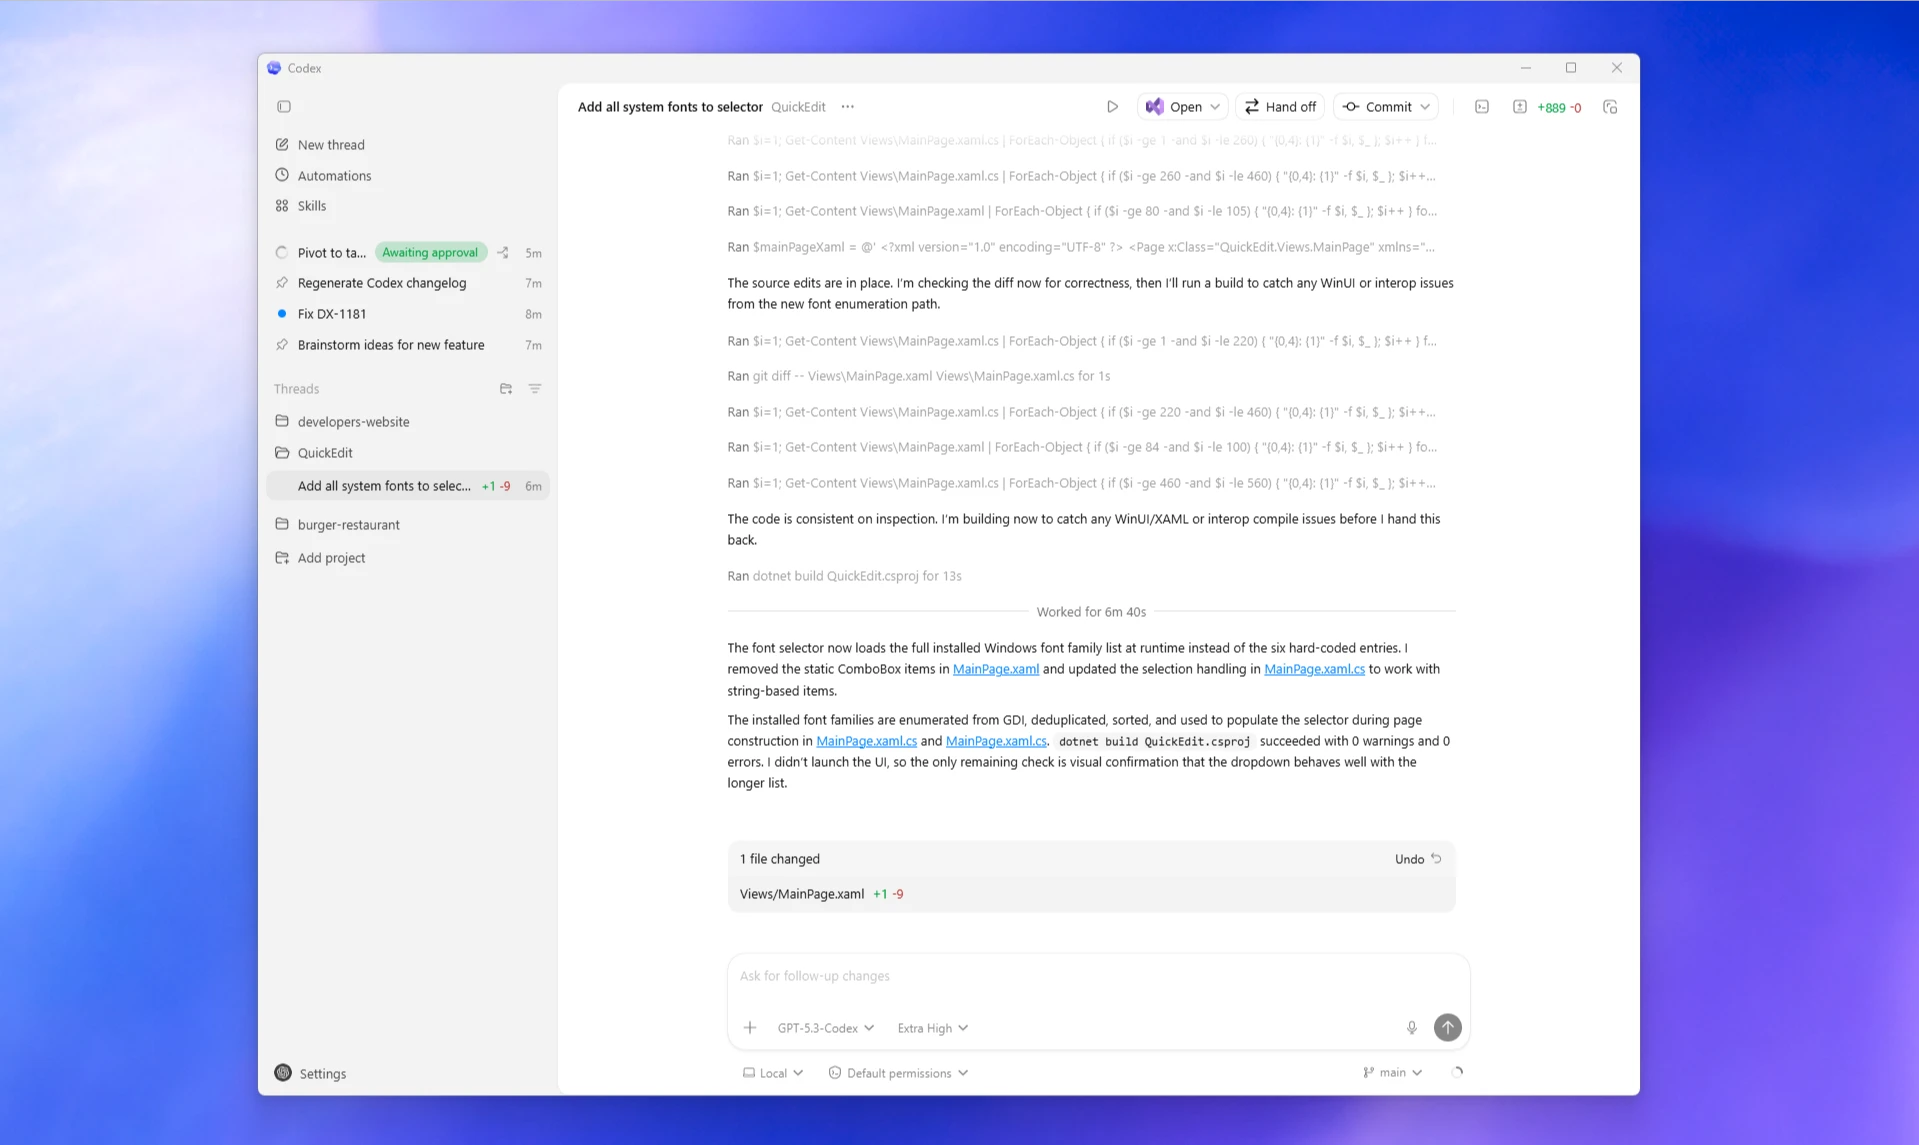
The docs say to "Choose a project folder that you want Codex to work in." If you've used the Codex app, CLI, or IDE Extension before, "you'll see past projects that you worked on", in the capture, the left sidebar lists developers-website, QuickEdit and burger-restaurant above Add project. Pick a real Git repository with a clean working tree so the diff later is easy to read. Once chosen, the project name appears in the sidebar and the composer unlocks.
- 1Start in a clean repo. Pick a repo with no uncommitted changes so the upcoming diff shows only what Codex did.
- 2Past projects show up. If you've used the app, CLI, or IDE Extension before, previously worked-on projects appear in the list for quick re-entry.
Voiceover Now click Open project and select the repository you'd like to work in from your local folders.
Confirm the sandbox starts in read-only
Open the in-app settings and check the sandbox mode
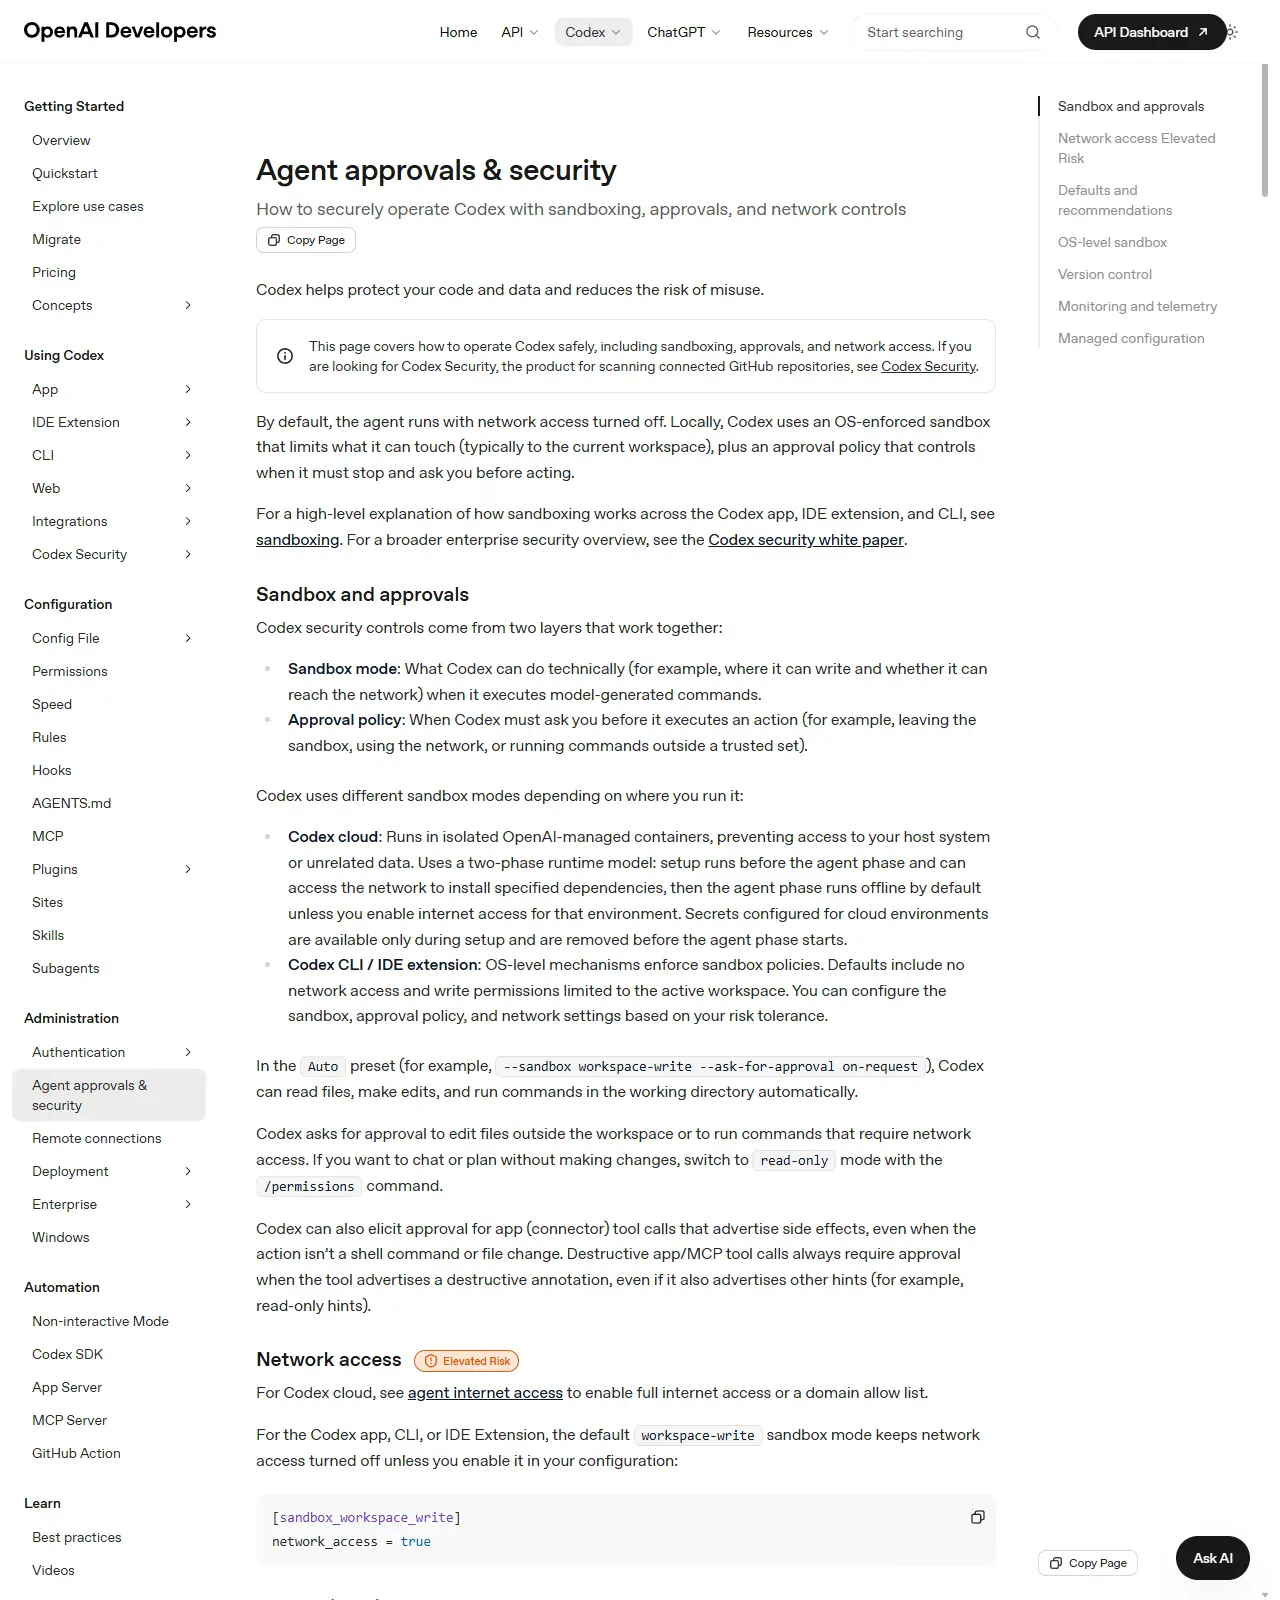
Codex agents in the app inherit the same configuration as the CLI and IDE extension; use the in-app controls for common settings or edit config.toml for advanced options. Start by confirming read-only, where "Codex can read files and answer questions. Codex requires approval to make edits, run commands, or access network." The screen here is the official reference page these labels come from; in the app, open Settings and the sandbox control should currently read read-only.
- 1Read-only is the safe default. In read-only, Codex can answer questions but must ask before it edits a file, runs a command, or touches the network.
- 2Three sandbox modes. The modes are read-only, workspace-write, and danger-full-access. Stick to the first two; danger-full-access removes the sandbox entirely.
Voiceover Open the in-app settings and confirm the sandbox is starting in read-only, so nothing on disk can be changed yet.
Set the sandbox to workspace-write
Change the sandbox mode to workspace-write
Switch to workspace-write, where "Codex can read files, make edits, and run commands in the workspace. Codex requires approval to edit outside the workspace or to access network." Network stays off by default, and protected paths like .git.agents, and .codex remain read-only. The screen shows the workspace-write section of the same docs page; after the change, the settings control now reads workspace-write.
- 1Avoid danger-full-access. That mode is "No sandbox; no approvals" and carries an explicit risk warning. You do not need it for normal work.
- 2Network stays off. workspace-write disables network access by default. It's enabled only via config: [sandbox_workspace_write] network_access = true.
Voiceover Change the sandbox mode to workspace-write, which lets Codex edit files inside your project folder while you work.
Keep approvals on-request
Set the approval policy to on-request
The approval policy is the second dial: it controls when Codex must pause and ask, independent of what the sandbox allows. on-request is the balanced default, permitted in-workspace work flows without prompts, and Codex stops to ask before anything its sandbox blocks, like writing outside the workspace or reaching the network. The screen shows the approval-policies section of the same docs page; once set, your settings should read workspace-write and on-request together.
- 1on-request is the balanced choice. You're only prompted when Codex tries to edit outside the workspace or reach the network. Everything safe inside the workspace just runs.
- 2Reviewer agent option. When approvals are interactive, eligible requests can route through a reviewer agent that screens sandbox escalations, blocked network calls, and side-effecting commands before they run.
Voiceover Set the approval policy to on-request, so Codex checks in with you before running anything that needs your sign-off.
Start a new thread and choose Worktree
In the new-thread composer, switch the run mode from Local to Worktree
The composer offers Local, Worktree, and Cloud. The quickstart's default is Local, "make sure Local is selected to have Codex work on your machine", and Worktree is the same machine with one extra layer of isolation: click the selector at the bottom left of the composer (it reads Local ⌄ in the capture) and choose Worktree. The selector now reads Worktree, so changes stay isolated in a separate Git worktree and your main branch is untouched.
- 1Local and Worktree both run locally. The run-mode selector sits at the bottom left of the composer. Local works directly in your checked-out project. Worktree spins up a separate Git worktree on the same machine. Cloud runs remotely instead.
- 2Why Worktree first. A worktree quarantines edits to a separate working tree, so a bad change can't dirty your current branch. It's the safest place to learn.
Voiceover Start a new thread, then in the composer switch the toggle from Local across to Worktree to keep changes isolated.
Send your first task message
Type a concrete task in the composer and press Enter
Send a scoped first message, for example: "Add input validation to the signup form and write a test for it." Because you're in workspace-write, Codex edits files inside the isolated worktree; on-request means anything outside it still pauses for approval. The capture shows a task mid-run: plan and command lines stream down the thread, a "Worked for 6m 40s" divider marks the work, and the "1 file changed. Views/MainPage.xaml +1 −9" card with its Undo control is your evidence the task produced edits.
- 1Be specific. A narrow, well-scoped prompt produces a smaller, reviewable diff than a vague one. Name the file and the expected behavior.
- 2Watch the sidebar. As Codex works, plans, sources, summaries, and file previews show up as artifacts in the sidebar so you can follow its reasoning.
Voiceover Type out a clear, concrete task describing what you want done, then press Enter to send it off.
Approve any prompted action
Read the approval request, then approve or reject it
If Codex needs to edit outside the workspace or touch the network, on-request surfaces a prompt. Read exactly what it wants to run before approving. Decline anything you didn't expect. Inside workspace-write.git.agents, and .codex stay read-only regardless. In the capture, the thread "Pivot to ta…" in the sidebar carries an Awaiting approval badge, that is how a paused task looks from outside; open the thread to read the full request.
- 1Read before you approve. Check the exact command or path in the prompt. Approve only what matches your intent; reject anything surprising.
- 2Protected paths. Even in workspace-write.git.agents, and .codex remain read-only, so Codex can't quietly rewrite your Git internals or agent config.
Voiceover When an approval request appears, read what Codex is asking to do, then approve it or reject it as needed.
Open the integrated terminal to verify the work
Open the thread's integrated terminal and run your checks
# # verify the change inside the isolated worktree before committing$ git statusOn branch codex/signup-validationChanges not staged for commit: modified: src/forms/signup.ts modified: src/forms/signup.test.ts$ npm test -- signup> jest signup✔ PASS src/forms/signup.test.ts (4 passed, 4 total)
Each thread has an integrated terminal for running commands. Use it to run a quick git status and your tests inside the worktree, confirming the change does what you asked before you commit anything.
- 1Terminal scoped to the thread. Each thread carries its own integrated terminal, so the commands you run stay scoped to that task and its worktree.
- 2Verify, then trust. Green tests here are your evidence. Don't stage anything until the change behaves the way the prompt asked.
Voiceover Open the thread's integrated terminal and run a few checks yourself to verify the work looks right.
Open the Review pane and inspect the diff
Open the Review pane and read the Git diff hunk by hunk
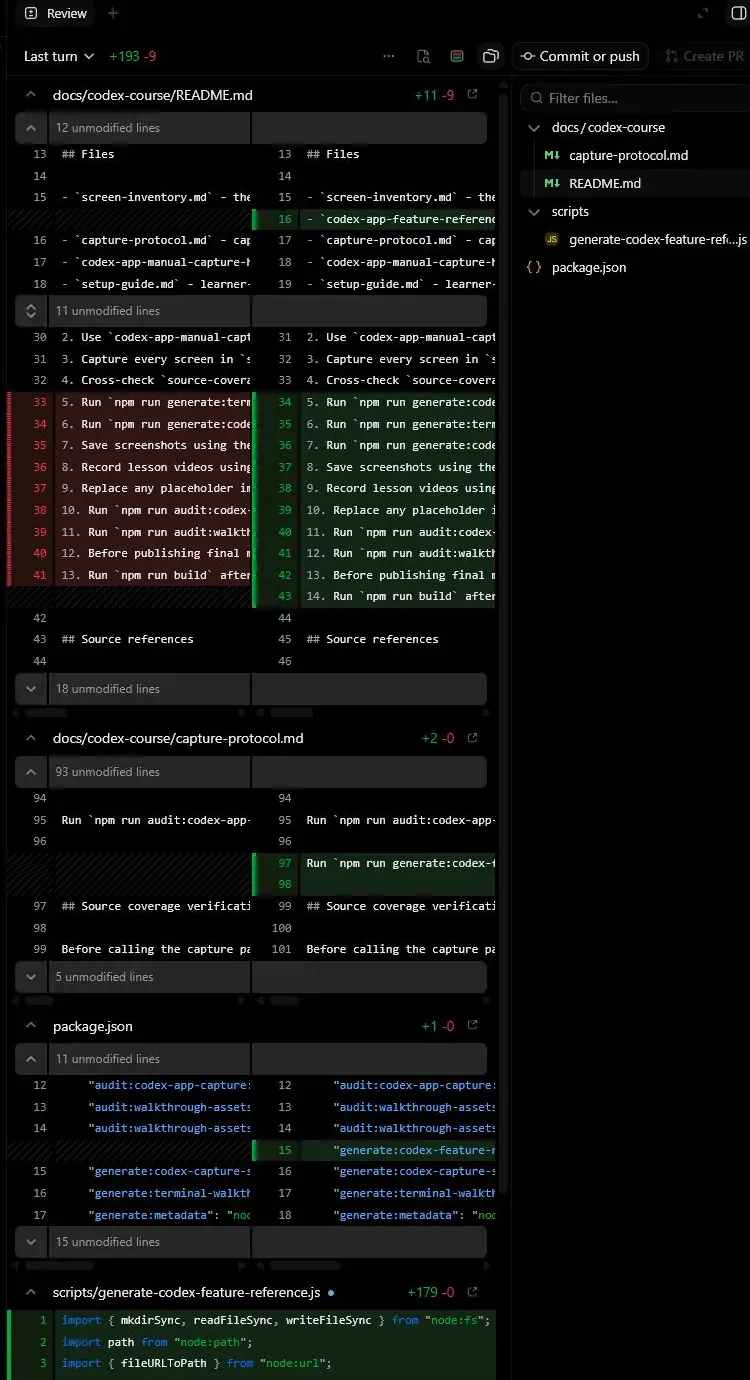
The Review pane is where you "Inspect diffs, address PR feedback, stage files, commit, and push." The red and green hunks fill the centre of the pane, a hunk is one contiguous block of changed lines in a diff. Read each hunk so you understand exactly what changed. Never commit a diff you haven't read.
- 1Read every hunk. The diff is your last checkpoint before the change becomes a commit. Confirm each change traces back to your prompt.
- 2Works for worktree tasks. From the Review pane you can stage, commit, push, and address PR feedback for the worktree task without leaving the app.
Voiceover Open the Review pane and read through the Git diff carefully, working your way down hunk by hunk.
Stage the files you want to commit
Select and stage the reviewed files in the Review pane
Staging marks a file's changes for inclusion in the next commit, unstaged work stays in the worktree. The changed-file list sits beside the diff; stage only the files you reviewed and intend to ship, and each one shows as selected once staged. Selective staging lets you leave out anything experimental and keep the commit focused on the validation change and its test.
- 1Stage intentionally. Only stage what belongs in this change. Leave noise and scratch files out of the commit.
- 2Tight diffs review faster. A focused diff of the code plus its test is far easier for a reviewer (and future-you) to understand.
Voiceover Select the files you've reviewed and are happy with, then stage them ready for committing.
Write a message and commit
Type a commit message, then click Commit
In the Review pane you can commit and push, the Commit or push control sits at the top right of the pane. Write a clear conventional message such as "feat: add signup form validation + test" and commit. The commit lands on the worktree branch and the pending-change list clears. From the same pane you can push and address PR feedback when you're ready.
- 1Clear commit messages. Describe what changed and why. These messages are what reviewers and future-you read first during review.
- 2Push from the same pane. After committing, the Review pane lets you push and handle PR feedback for the worktree task.
Voiceover Write a short, descriptive commit message, then click Commit to save those staged changes.
Open the Plugins directory and add a plugin
Open Plugins, choose a plugin (such as GitHub), and click the plus button or Add to Codex
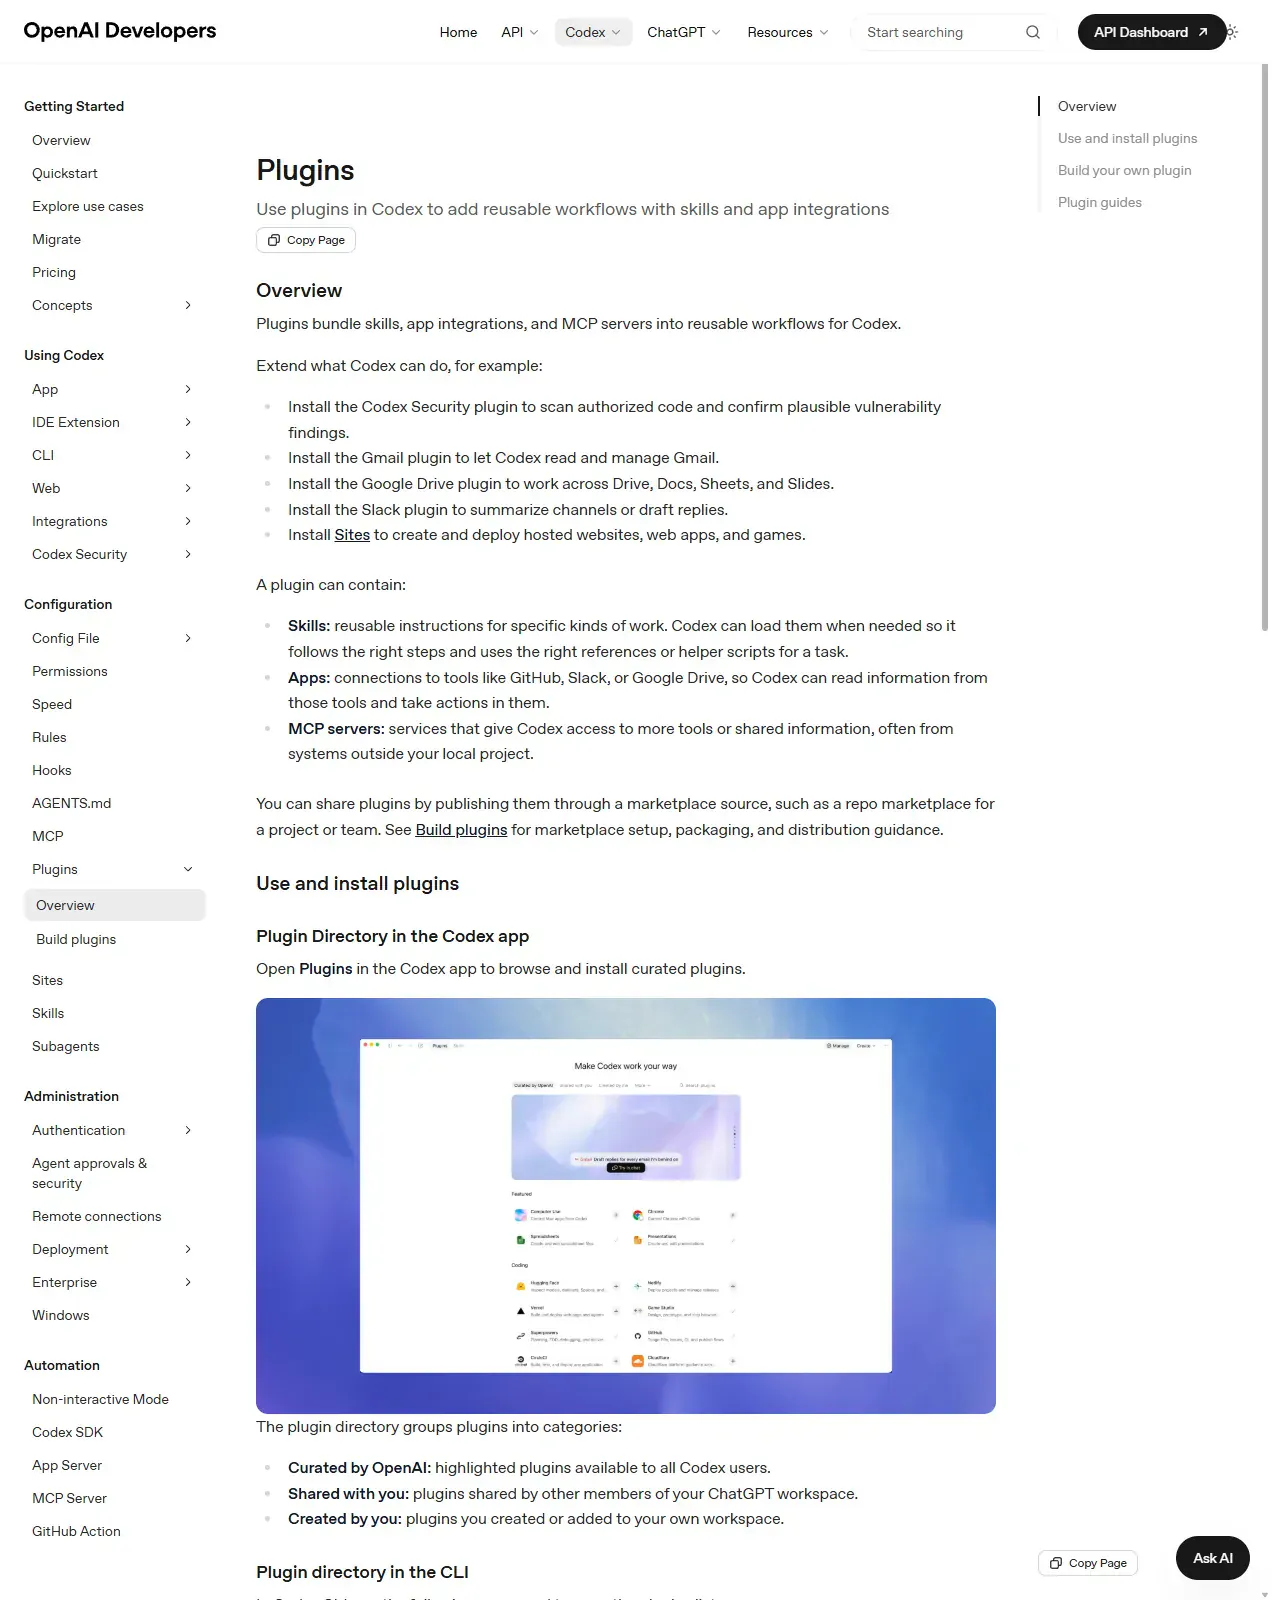
The Plugins directory is split into "Curated by OpenAI," "Shared with you," and "Created by you." Open a plugin's details and install it using the control "labeled as plus button or Add to Codex." The docs page shown here includes the directory capture and the three category names you'll see in the app. Once installed, the plugin shows as installed in the directory. Installing makes its workflows available, but your existing approval settings still apply.
- 1Add to Codex. The install control shows as a plus button or an Add to Codex button. GitHub is one example among several available plugins.
- 2Approvals still apply. A plugin's workflows obey the same sandbox and approval settings you set earlier. Installing a plugin doesn't loosen your guardrails.
Voiceover Open the Plugins directory, choose the GitHub plugin, and click Add to Codex to install it.
Authenticate and invoke the plugin
Complete authentication if prompted, then type @ in a thread to invoke the plugin
"Some plugins ask you to authenticate during install. Others wait until the first time you use them." Connected external services keep their own authentication and data-sharing policies. Once connected, in a thread "Type @ to invoke the plugin or one of its bundled skills explicitly." Typing @ opens a picker that now lists the plugin and its bundled skills.
- 1Type @ to invoke. Inside a thread, typing @ lets you call a specific plugin or one of its bundled skills on demand.
- 2Separate auth. External services authenticate separately and remain subject to their own authentication, privacy, and data-sharing policies.
Voiceover Authenticate if you're prompted to, then type the @ symbol in the composer to invoke the plugin.
Create a standalone automation that reports to Triage
Create a standalone automation: write its prompt, set a schedule, and save
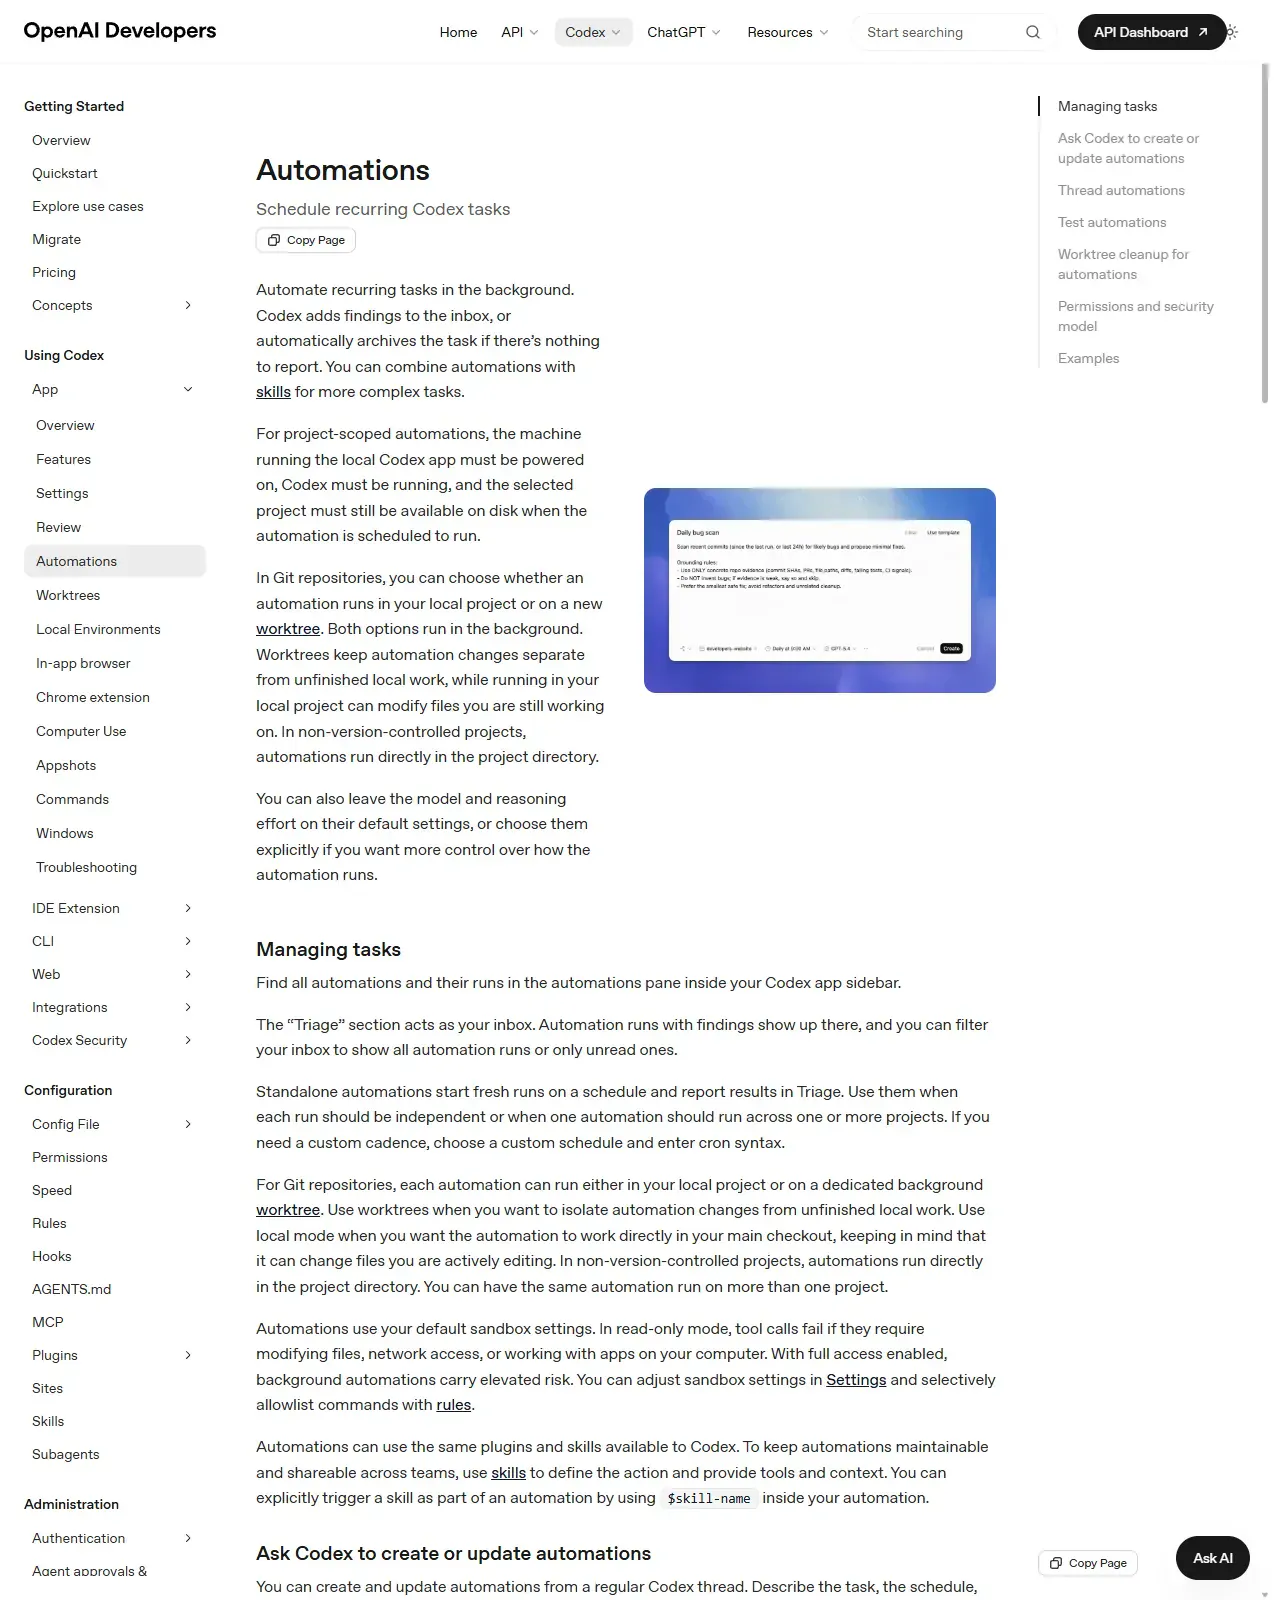
Standalone automations "start fresh runs on a schedule and report results in Triage." Give the automation a prompt for the recurring task and pick a schedule (minute intervals, daily, weekly, or a custom schedule with cron syntax). Codex "adds findings to the inbox, or automatically archives the task if there's nothing to report." Once saved, the automation appears in your Automations list, and its first run reports into Triage, or auto-archives if there is nothing to report.
- 1Schedule the cadence. Use minute intervals, daily, or weekly schedules, or choose a custom schedule and enter cron syntax, a compact five-field schedule string, for example 0 9 * * 1 means 9am every Monday.
- 2Triage is your inbox. Automation runs with findings show up in Triage; runs with nothing to report archive themselves automatically so the inbox stays clean.
- 3Mind the run policy. Standalone automations run with approval_policy "never" when org policy permits, so keep the sandbox tight since these runs won't pause to ask.
Voiceover Create a standalone automation by writing its prompt, setting a schedule, and saving it so results report to Triage.
End-to-end recap
- Installed the Codex app for macOS or Windows, signed in with ChatGPT, and pointed it at a clean Git project folder.
- Set a safety-first posture: workspace-write sandbox plus on-request approvals, with .git.agents, and .codex staying read-only and network off by default.
- Ran the first task in an isolated Git worktree, verified it in the thread's integrated terminal, then staged and committed a clean diff in the Review pane.
- Added a plugin (such as GitHub) via the plus button / Add to Codex, authenticated it, and learned to invoke it in a thread with @ while existing approval settings still apply.
- Created a standalone automation whose findings report into the Triage inbox, auto-archiving runs with nothing to report, and noted it runs with approval_policy "never" when org policy permits.
Voiceover script & storyboard
Read-aloud narration for recording the video, an intro line, one line per screen in order, then an outro. Pair each line with its matching step above.
- IntroIn this walkthrough we'll set up the Codex app from scratch, run your first task, review and commit the changes, and add a plugin and a scheduled automation.
- 1Start by grabbing the Codex app for your operating system, then run the installer and open it once it's finished.
- 2With the app open, click Sign in and authenticate using your ChatGPT account to connect everything up.
- 3Now click Open project and select the repository you'd like to work in from your local folders.
- 4Open the in-app settings and confirm the sandbox is starting in read-only, so nothing on disk can be changed yet.
- 5Change the sandbox mode to workspace-write, which lets Codex edit files inside your project folder while you work.
- 6Set the approval policy to on-request, so Codex checks in with you before running anything that needs your sign-off.
- 7Start a new thread, then in the composer switch the toggle from Local across to Worktree to keep changes isolated.
- 8Type out a clear, concrete task describing what you want done, then press Enter to send it off.
- 9When an approval request appears, read what Codex is asking to do, then approve it or reject it as needed.
- 10Open the thread's integrated terminal and run a few checks yourself to verify the work looks right.
- 11Open the Review pane and read through the Git diff carefully, working your way down hunk by hunk.
- 12Select the files you've reviewed and are happy with, then stage them ready for committing.
- 13Write a short, descriptive commit message, then click Commit to save those staged changes.
- 14Open the Plugins directory, choose the GitHub plugin, and click Add to Codex to install it.
- 15Authenticate if you're prompted to, then type the @ symbol in the composer to invoke the plugin.
- 16Create a standalone automation by writing its prompt, setting a schedule, and saving it so results report to Triage.
- OutroAnd that's the full loop, from install to a committed change, a plugin, and an automation running on its own. You're ready to put Codex to work.
Resources
Checkpoint