Lesson 36 of 38 · Guided walkthrough 4 - 12-18 min
Walkthrough: Claude Cowork: plugins, skills & local work
Browse the Anthropic & Partners plugin marketplace, inspect or manage a role plugin, connect Google Drive, toggle the connector on inside a task, review Tool permissions so risky tools need approval, invoke a plugin skill with "/", and run an end-to-end task on a local file, all in Claude Cowork, with browse-before-install and approve-before-risky habits baked in.
This is a calm, click-by-click tour of Claude Cowork: the desktop surface that brings Claude Code's agentic engine to everyday knowledge work, and the one place where plugins, skills, connectors, hooks and sub-agents all come together to actually do the job. Cowork left research preview and went generally available on macOS and Windows in April 2026, so what you see here is the real, shipped product, not a preview. The order of this walkthrough is deliberate and safety-first: you browse before you install, authenticate before you toggle, scope access per task, set risky tools to need approval, then review every output before you trust it. By the end you will have a single working role plugin, a Google Drive connector authenticated as you and switched on for one conversation only, and one finished task run end-to-end on a local file with each tool call approved by hand. Everything happens in the Claude app's graphical interface. Cowork has no command line, so there is nothing to memorise except the habit loop: browse, scope, approve, verify.
What you'll learn
- How Cowork differs from plain chat: it runs the agentic loop (plan, act with tools, observe, refine) over your files and connected services, and it is the only surface where a plugin's hooks and sub-agents actually execute.
- What a plugin really is, a single installable bundle of skills, connectors, sub-agents and hooks, and why installing one is a deliberate trust decision, not a casual click.
- The browse-before-install discipline: reading a plugin's description, bundled skills and connected services in the Anthropic & Partners marketplace before committing, and testing one plugin at a time.
- How connectors work as OAuth integrations that you authenticate as yourself, and why on Team/Enterprise each person grants access individually even after an admin enables the connector org-wide.
- Per-task scoping as the core safety model: a connector enabled in one conversation is off by default in the next, so every task's reach is explicit and auditable.
- Tool permissions as a human checkpoint, keeping read-only tools on Always allow while interactive, write, send, upload and delete tools stay on Needs approval so Claude pauses before anything risky.
- Invoking a specific skill with "/" instead of free-text prompting, then running it on a real local file and approving each tool call, so the result is narrow, predictable and easy to verify against the source.
Why this matters
Why Cowork is the surface where the agentic loop comes alive
Plain chat answers questions; Cowork does work. It carries Claude Code's agentic capabilities into a desktop app aimed at knowledge work rather than just coding, which means Claude can plan a task, reach for tools and connectors, act on your files, observe the result and refine, the full loop this course keeps returning to. That is also why hooks and sub-agents only run here: a hook is an automation that fires at defined points in a session, and a sub-agent is a focused role Claude spins up to handle part of the work in parallel. Neither has anywhere to execute in a single-shot chat reply, so they show grayed out there and only become live inside a Cowork task. Opening the Cowork tab first (Step 1) is not a formality, it is what unlocks the full power of every plugin you install.
Plugins, skills and connectors are different layers, treat them that way
These three words get used interchangeably, but they sit at different levels and confusing them leads to over-trusting a setup. A skill is a plain-language instruction file that teaches Claude how to do one task well, write in a brand voice, review a document, format a report. A connector is an OAuth bridge to an external service such as Google Drive that lets Claude read your data through Anthropic's cloud. A plugin is the package that bundles skills, connectors, sub-agents and hooks into one installable role. When you install a role plugin you are accepting everything inside it at once, which is exactly why the walkthrough has you browse the contents first, install just one, and use Manage to inspect its source, version, skills and connector set before giving it real work. One plugin, tested, beats five installed blind.
Scope-and-approve is the whole point, not friction to skip
The most important habit in this walkthrough is the layered control: scope access per task, then approve each risky action. Connectors are enabled per conversation, so turning Drive on for one task does not leave it on for the next, access stays explicit and easy to audit. On top of that, Tool permissions split a connector's actions into Always allow (safe, read-only), Needs approval (interactive, write, send, upload, delete) and blocked. Keeping the risky tier on Needs approval means Claude stops and waits for your confirmation before it can change, send or delete anything, a human checkpoint in front of every consequential move. Because Cowork connectors reach external services through Anthropic's cloud and you authenticate as yourself, the access Claude has is precisely the access you granted, no more. Treating the first output as a draft to verify against the source closes the loop: scope narrowly, approve deliberately, trust only after you have checked.
The Cowork safety-first pipeline
How one task flows from browsing a plugin to a verified deliverable, browse, scope, approve, verify.
- Browse & install a role pluginIn Customize > Plugins, open the Anthropic & Partners marketplace, read a role plugin's skills and connectors, then install just one to test.
- Connect Google DriveUnder Customize > Connectors, add Google Drive, click Connect, and authenticate as yourself, granting only the scopes the job needs.
- Scope the connector per taskOpen a new Cowork task and toggle Drive on for this conversation only, it stays off by default in the next task.
- Set risky tools to Needs approvalIn Tool permissions, keep read-only tools on Always allow while write, send, upload and delete stay on Needs approval.
- Invoke a skill with "/"Type "/" in the composer and pick a skill from the installed plugin so Claude applies one exact capability instead of guessing.
- Run on a local file, approving each callAttach the file, describe the task, and confirm every tool call as it appears so nothing touches Drive or the file unexpectedly.
- Verify the deliverableCheck the output against the source file, confirm numbers, names and claims, treating the first result as a draft before you trust it.
Before you start
- A Claude Team or Enterprise plan. Plugins themselves work on any paid plan (Pro, Max, Team, Enterprise), but Cowork, and the hooks and sub-agents that only run inside it, is a Team/Enterprise feature, so the Cowork tab must be visible in your sidebar.
- The Claude desktop app on macOS or Windows, signed in to the workspace where you want plugins and connectors to live (every capture in this tour is the desktop app).
- A Google account with Drive access for the connector step, and at least one local file (for example a .docx or .csv) you want Claude to work on.
- Permission in your workspace to install plugins and add connectors. Some are organisation-managed and may be locked, and on Team/Enterprise each person must authenticate a connector individually even after it is enabled for the org.
Step by step
Open the Cowork tab
Click "Cowork" in the left sidebar
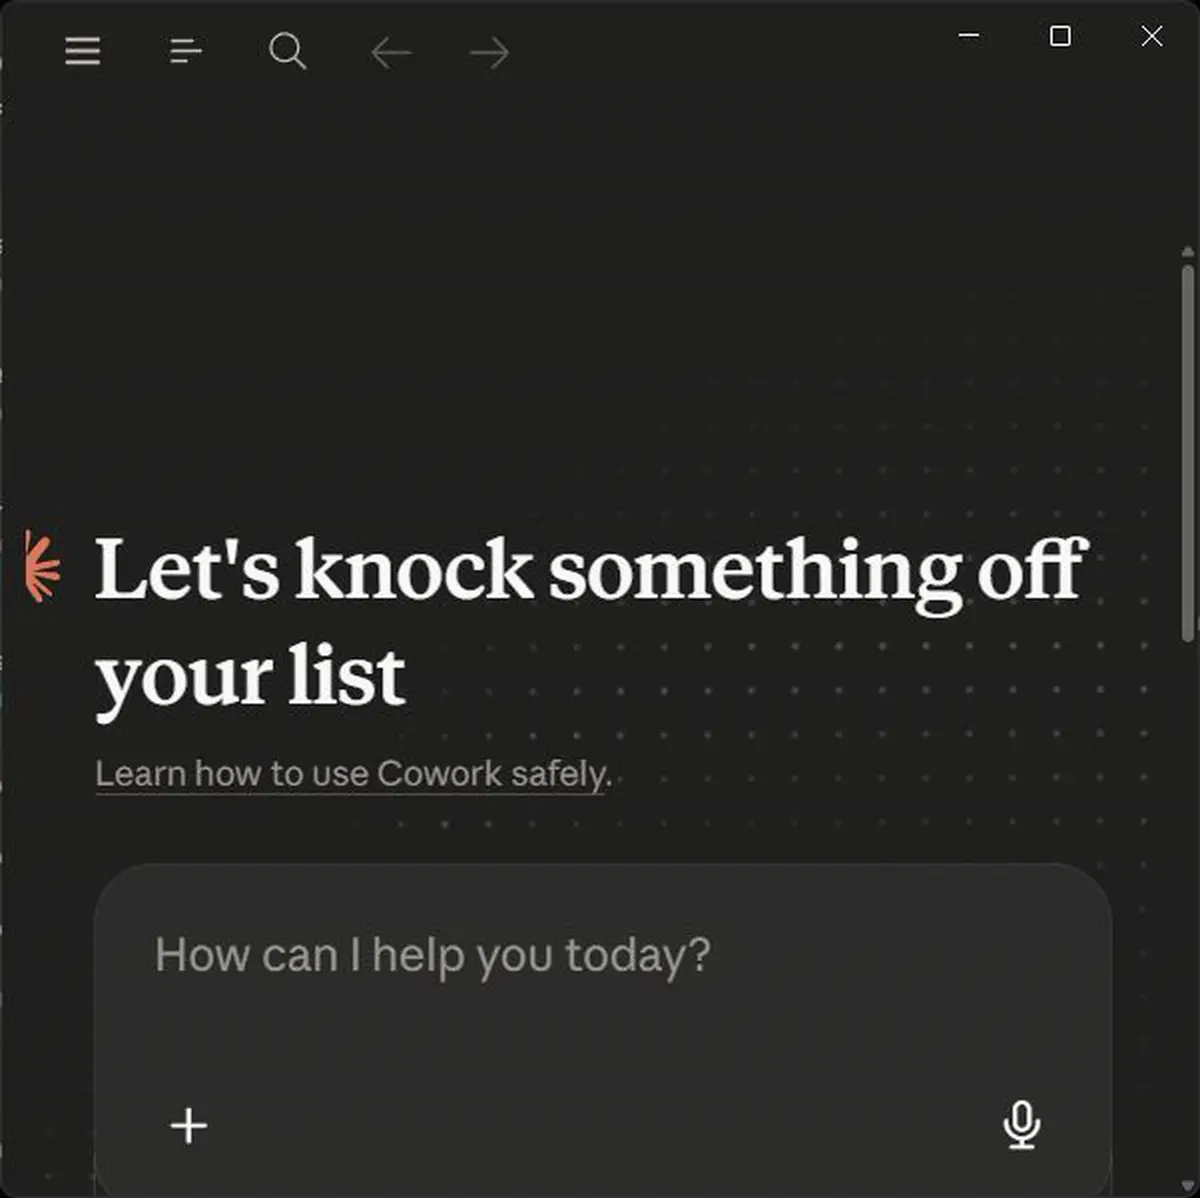
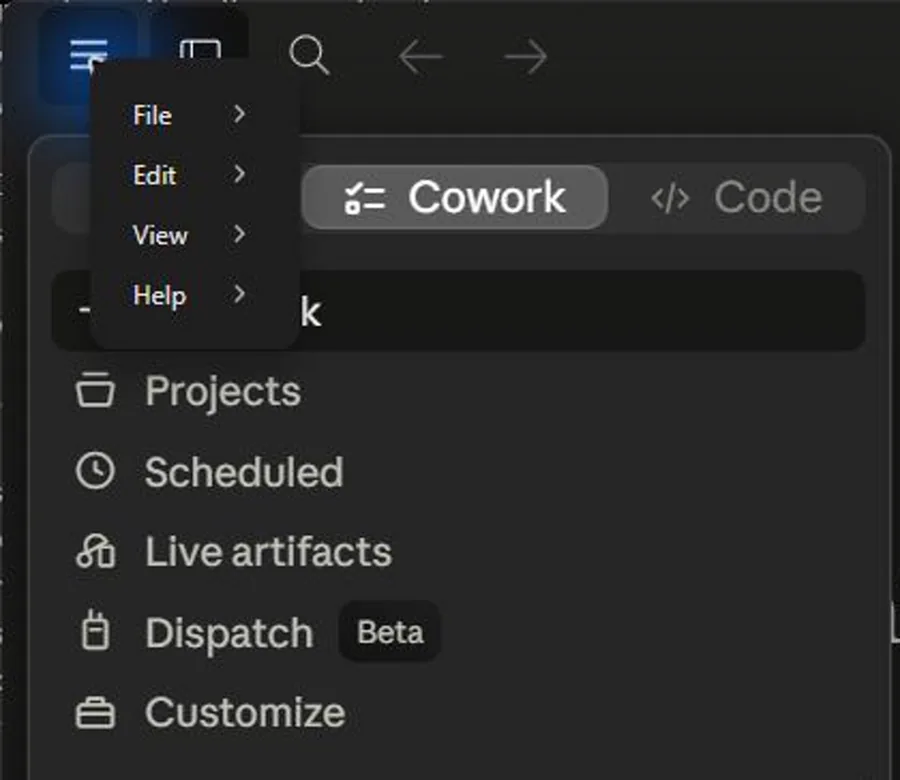
Cowork is where plugins, connectors, hooks and sub-agents run together. Open this tab first, because hooks and sub-agents only run in Cowork, in plain chat they appear grayed out. You should land on the Cowork home, a Let's-knock-something-off-your-list headline above the task composer. If you cannot see the sidebar at all, it is collapsed: the Reference screens gallery at the end of this lesson shows the expanded sidebar with the Cowork switch at the top.
- 1Team/Enterprise only. No Cowork tab? Your plan does not include it. Ask your workspace owner to enable Cowork on a Team or Enterprise plan.
- 2Why start here. Configuring plugins from the Cowork tab lets you use their full power, hooks and sub-agents included.
Voiceover Start in the left sidebar and click Cowork to open the workspace where your tasks, files and tools all live together.
Open Customize in the sidebar
Click "Customize" in the left sidebar
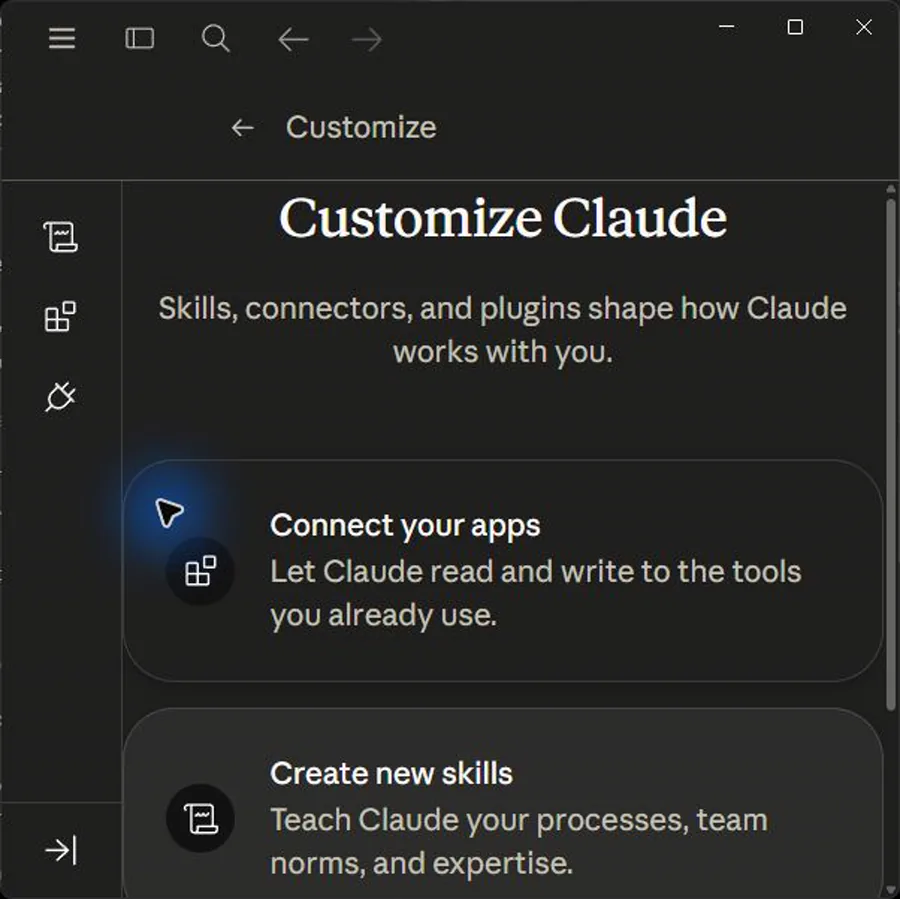
Customize is the single hub for Plugins and Connectors. It sits with your account controls near the bottom of the left sidebar.
- 1Find it lower-left. Customize lives near the bottom of the left sidebar, by your account controls.
- 2One hub, two tabs. Everything you need today is under Customize: the Plugins tab and the Connectors tab.
Voiceover Now click Customize in the sidebar. This is where you manage plugins, connectors and skills that shape how Cowork behaves.
Open the Plugins tab
Open the Plugins tab, then click the + next to Personal plugins
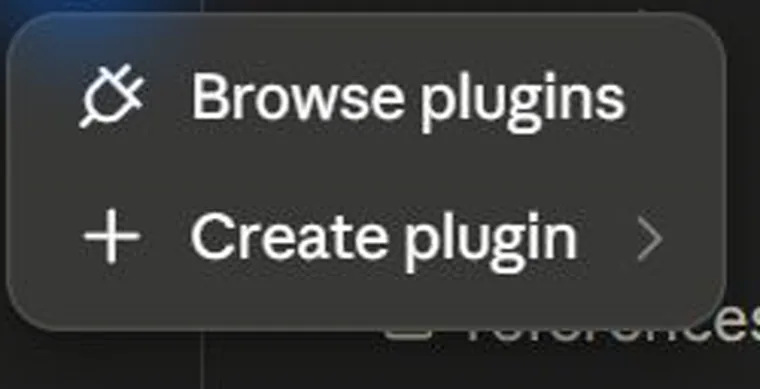
The Plugins tab lists what is already installed, scan it first so you do not duplicate something your org pushed to you. Clicking the + beside Personal plugins opens the small menu shown here: Browse plugins (the route you take next) and Create plugin.
- 1Check what's installed. Scan the current list so you do not duplicate a plugin your org already pushed to you.
- 2Org-managed lock. Organisation-managed plugins cannot be edited and may not be uninstallable, that is expected.
Voiceover Open the Plugins tab, then click the plus beside Personal plugins, choose Browse plugins to see what is available.
Browse the available plugins
Click "Browse plugins"
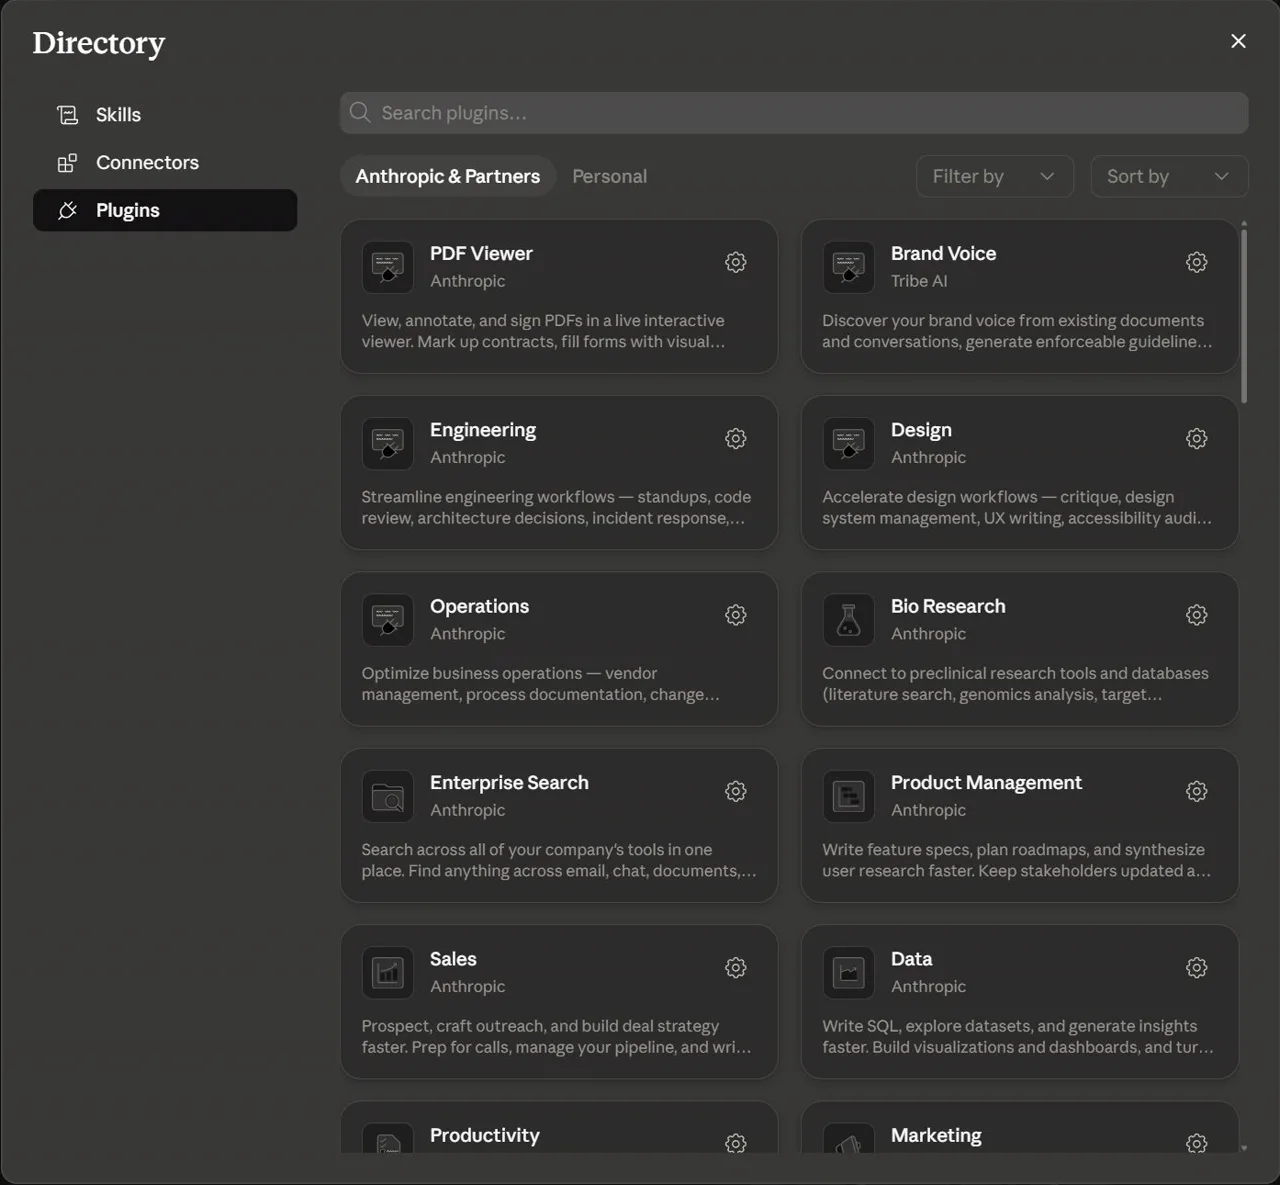
"Browse plugins" opens the gallery of available plugins grouped by marketplace. You are still only browsing, nothing is installed yet.
- 1Browse, don't commit. Read each plugin's description and bundled skills before deciding. Install is a deliberate next step.
Voiceover Click Browse plugins to see what's available. Have a quick look through before installing anything, so you pick what actually fits your work.
Choose the Anthropic & Partners marketplace
Select the "Anthropic & Partners" marketplace
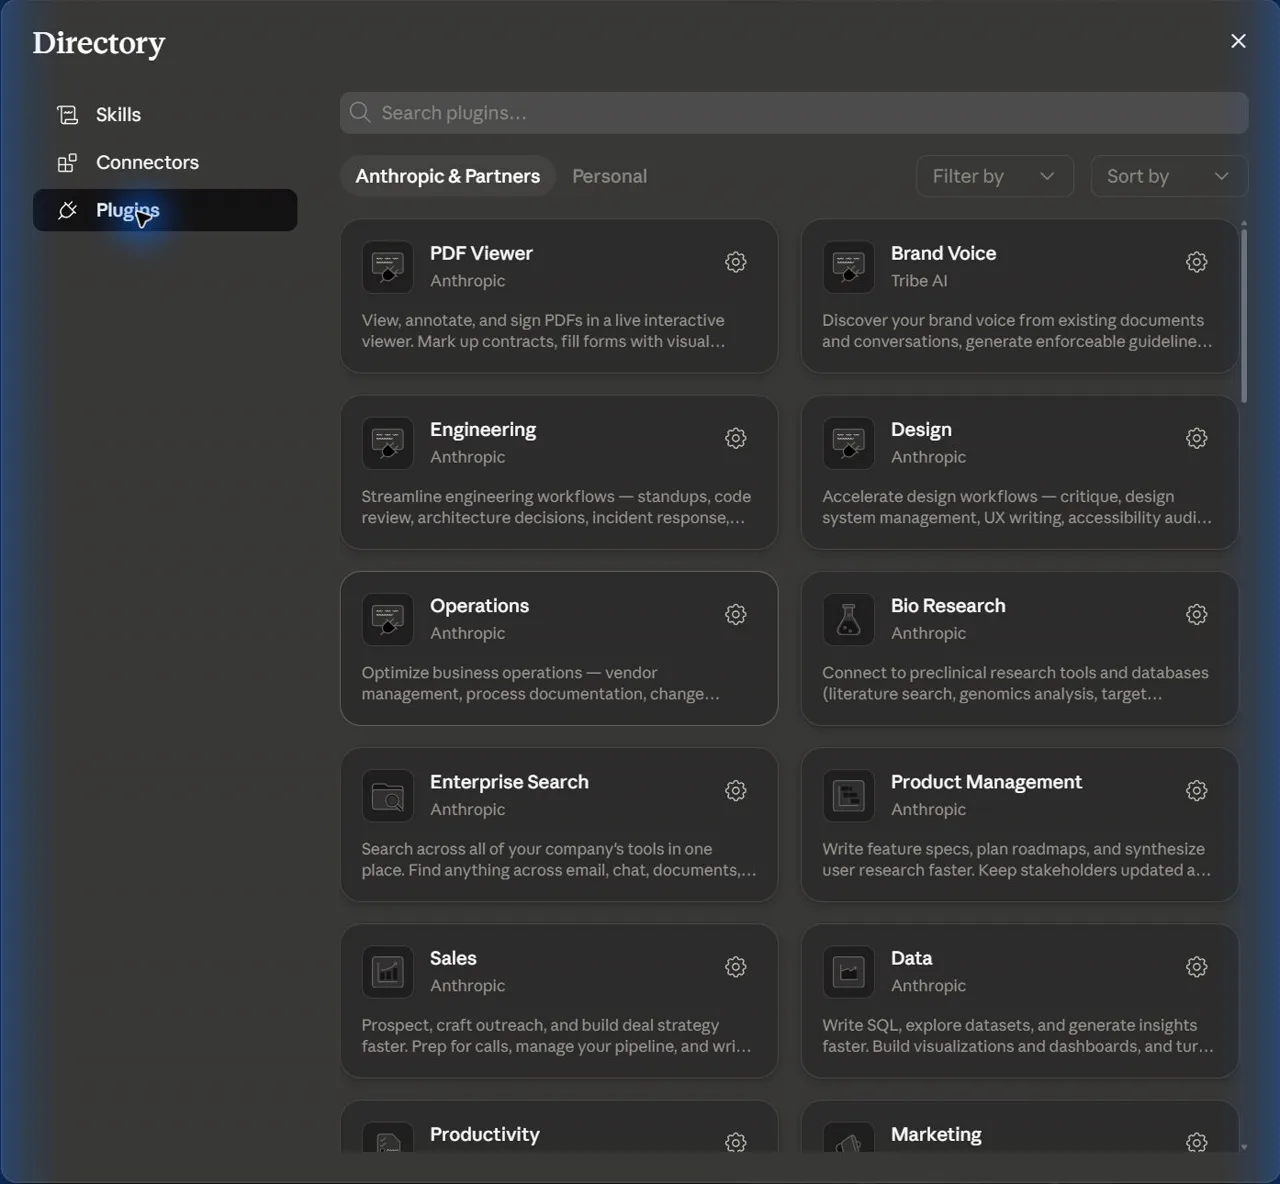
Anthropic & Partners is the default marketplace and holds general role plugins. Personal plugins are shown separately when your workspace has custom or user-installed plugins.
- 1Pick your domain. Look at the chip row under the search bar. Anthropic & Partners is selected, with Personal beside it. That row is the marketplace switch; everything else on this screen is unchanged from the last step.
- 2Add your own later. Under "Personal plugins" click "+" then "Add marketplace", then choose "Browse Anthropic sources" or "Add from a repository" for a GitHub/git URL.
Voiceover Select the Anthropic and Partners marketplace. It groups role-based plugins built for everyday office tasks like writing, research and review.
Open a role plugin
Click the role plugin you want, then install or manage it
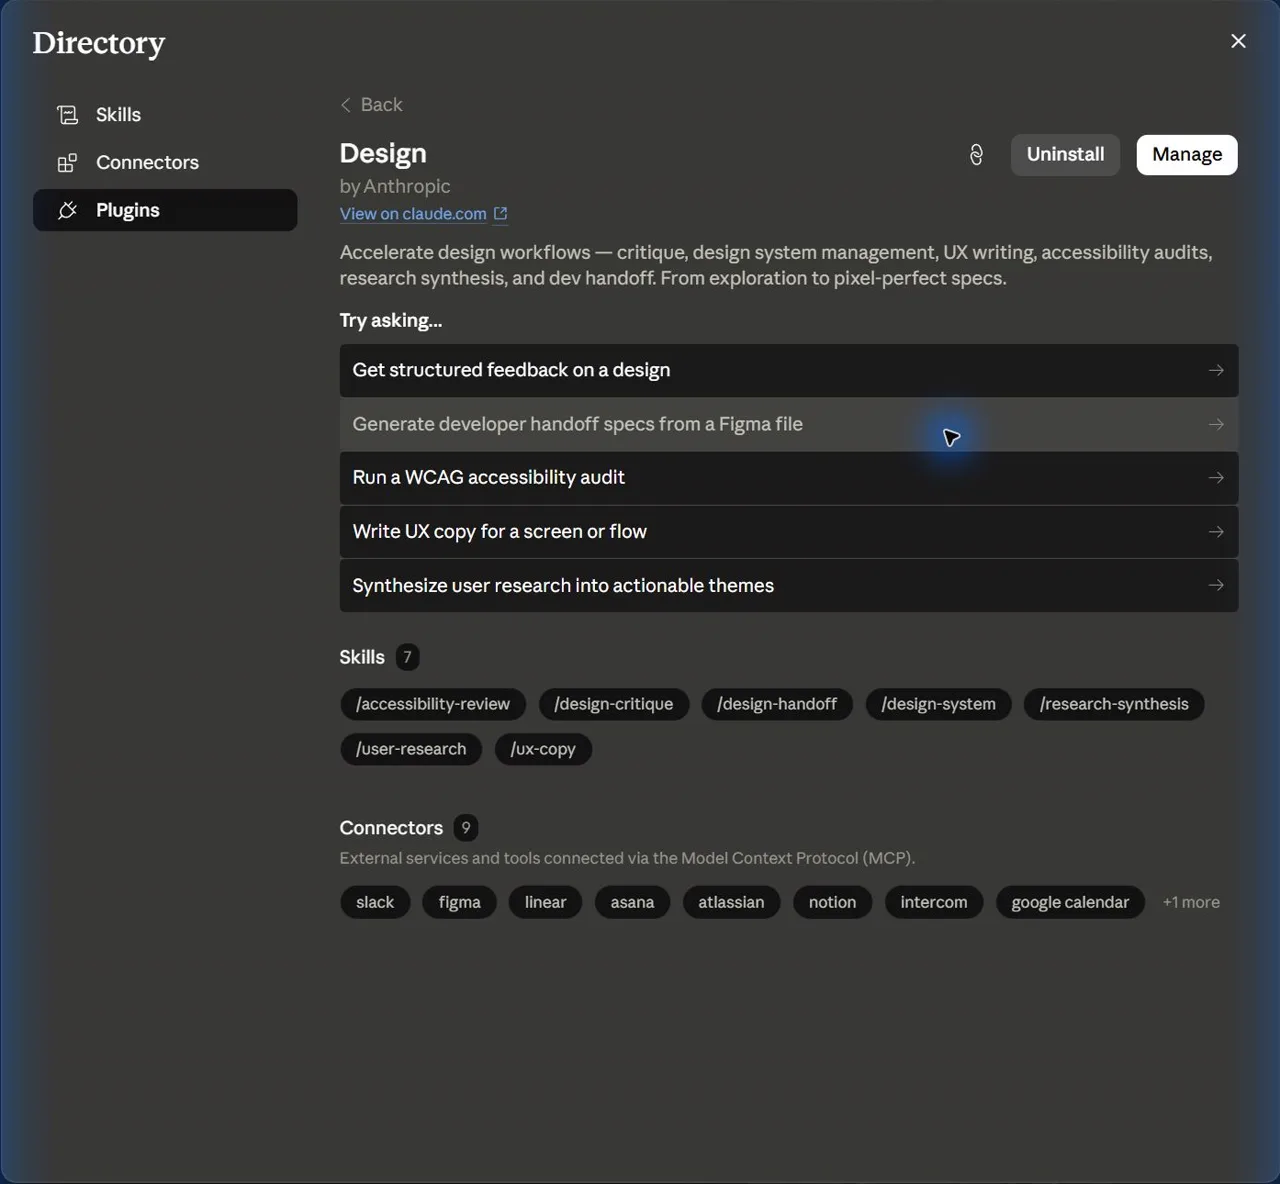
Opening a role plugin shows its description, example prompts, bundled skills, and connected services. If it is not installed yet, install it; if it is already installed, use Manage to review it before giving it real work.
- 1One at a time. Install a single plugin first, test it, then add others. Fewer moving parts means easier debugging.
- 2Grayed-out items. Hooks and sub-agents are active here in Cowork. In plain chat they appear grayed out because they only run in Cowork.
Voiceover Open a role plugin that matches what you do. If it is new, install it; if it is already installed, use Manage to inspect what it adds.
Customize the installed plugin (optional)
From the installed plugin page, click "Customize" in the upper right corner
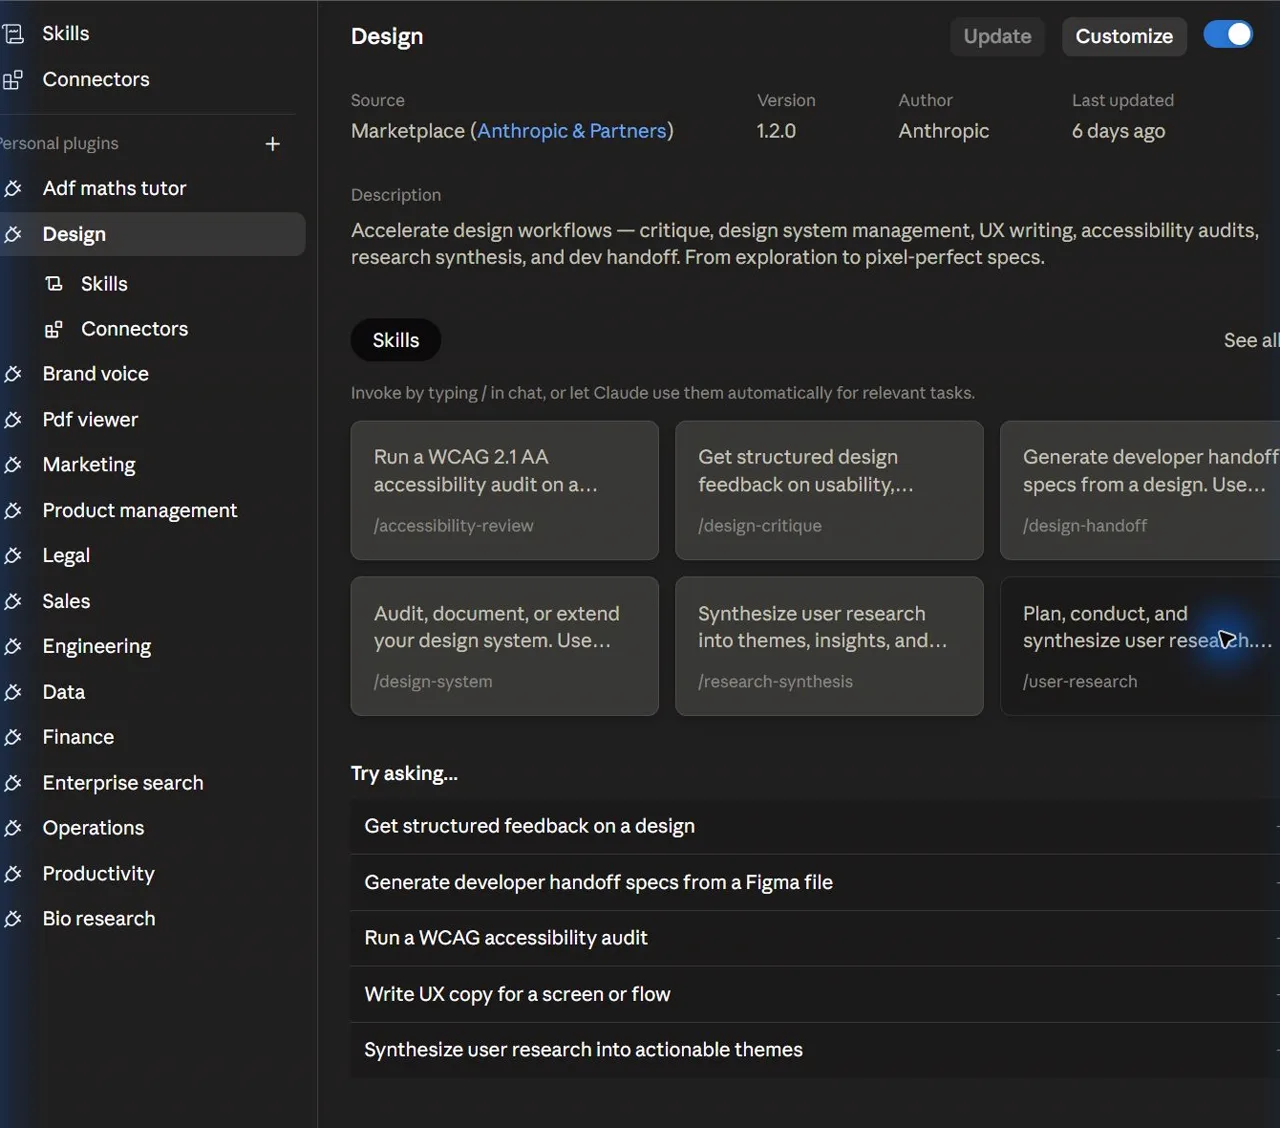
The Manage view shows the installed plugin source, version, author, skills and connector set. Customize opens a new Cowork task pre-filled with a prompt asking Claude to tailor the plugin before you give it real work.
- 1It opens a task. "Customize" launches a fresh Cowork task with a ready-made prompt, you steer the customisation in conversation, not in a settings form.
Voiceover If you'd like, open Manage and click Customize in the upper right to tweak the plugin. This step is optional, so skip it if the defaults suit you.
Open Connectors under Customize
Open "Customize > Connectors"
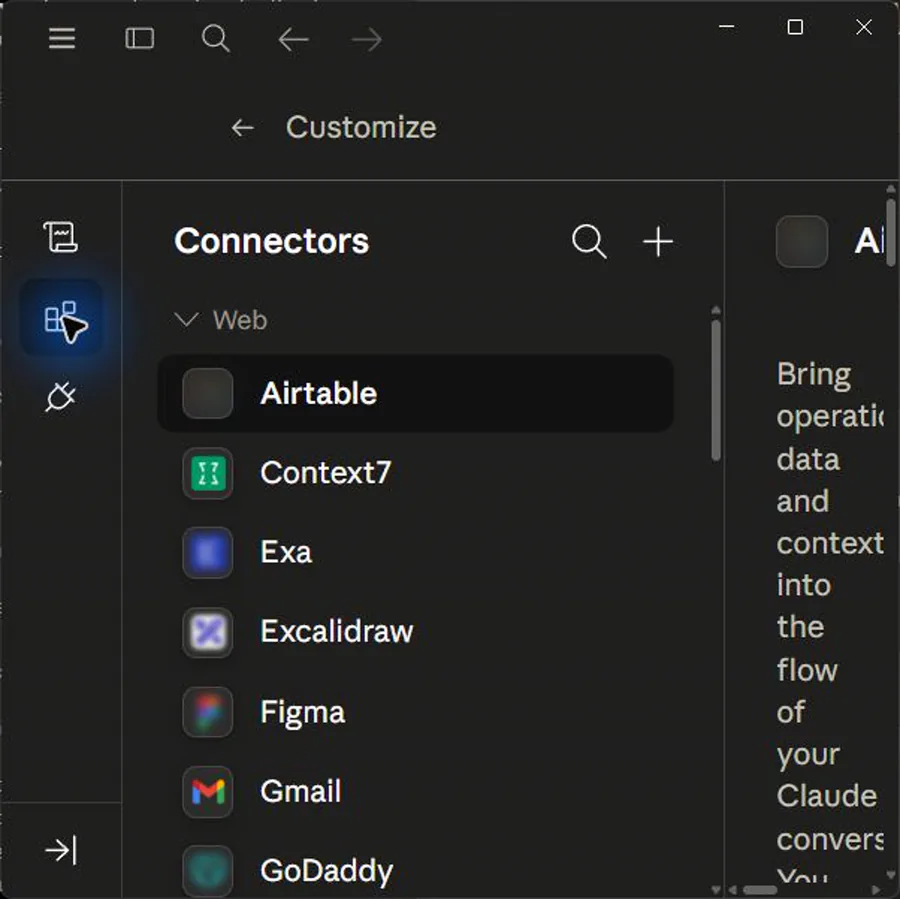
Connectors link Claude to external services like Google Drive. This is the primary, settings-side place to add and manage them.
- 1Two ways in. You can also reach this from chat: click "+" (or type "/"), hover "Connectors", then "Manage connectors".
Voiceover Back in Customize, open the Connectors section. Connectors link Claude to outside tools and accounts like your file storage.
Add a new connector
Click the "+" button next to Connectors
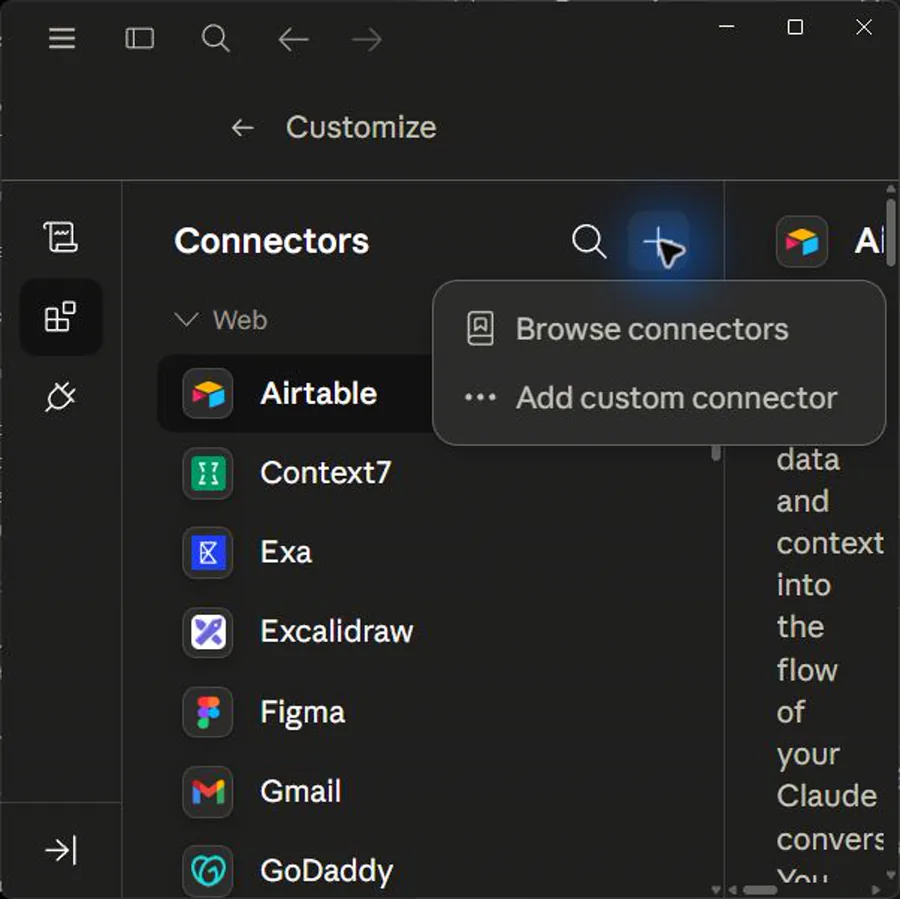
This opens the add menu, choose Browse connectors to open the catalogue and find Google Drive. Adding a connector here makes it available to enable later, per task.
- 1Available, not active. Adding a connector here does not auto-use it. You still toggle it on inside each task.
Voiceover Click the plus next to Connectors to add a new one. You'll choose the service and grant access in the next couple of steps.
Connect Google Drive and authenticate
Click the Google Drive connector, review its description and capabilities, then click "Connect"
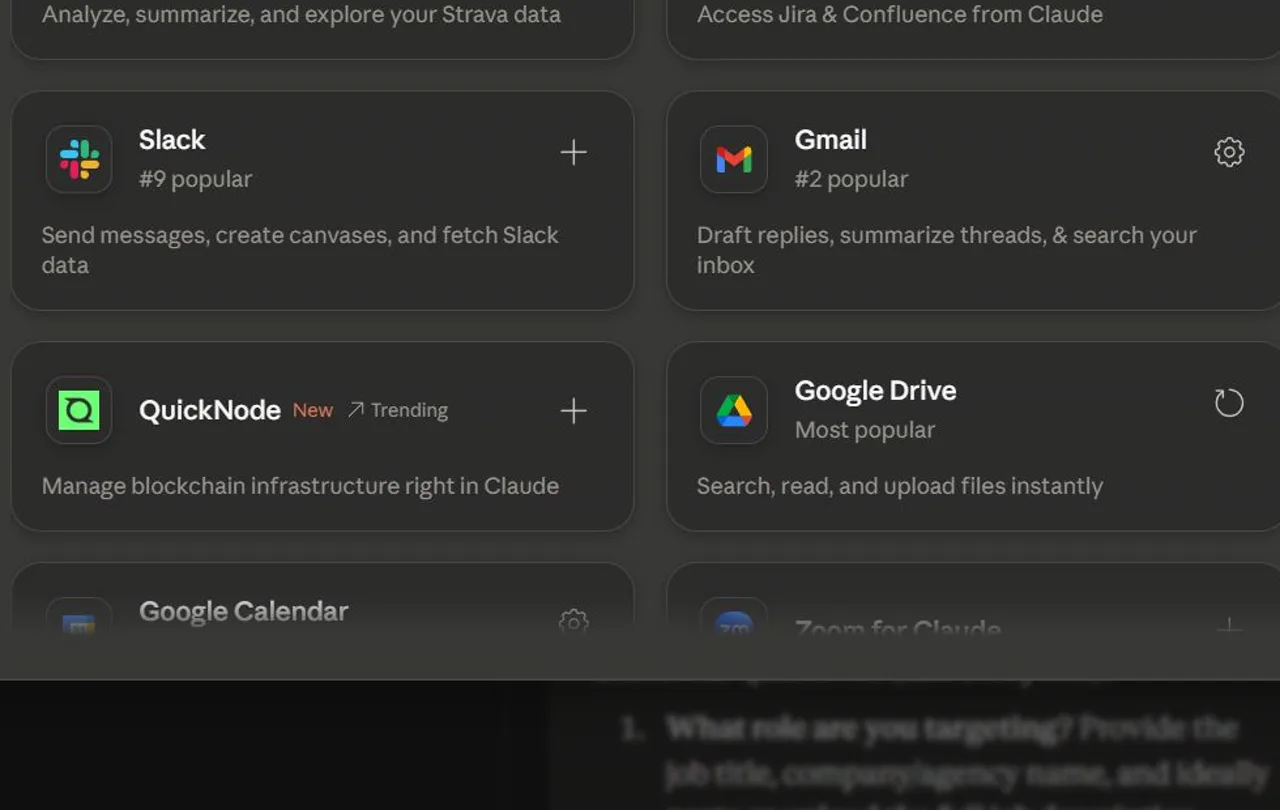
On some connectors the button reads "Install" instead of "Connect". Either way, follow the authentication prompts to sign in to Google and approve the requested scopes. Grant the narrowest access that still does the job. After you approve in the Google window it closes, and Google Drive shows as connected back in the Connectors list, that is your success check before moving on. (If the card shows a settings cog rather than +, it is already connected on this workspace.)
- 1Read the scopes. The Google consent screen lists exactly what Claude can see, read it before clicking Allow.
- 2Authenticate as yourself. On Team/Enterprise, each person authenticates individually. Sign in with the account that owns the Drive files you intend to work on.
Voiceover Pick Google Drive, click Connect, then approve the request in the Google window so Claude can reach your files when you allow it.
Open a Cowork task
Start a new task in the Cowork tab
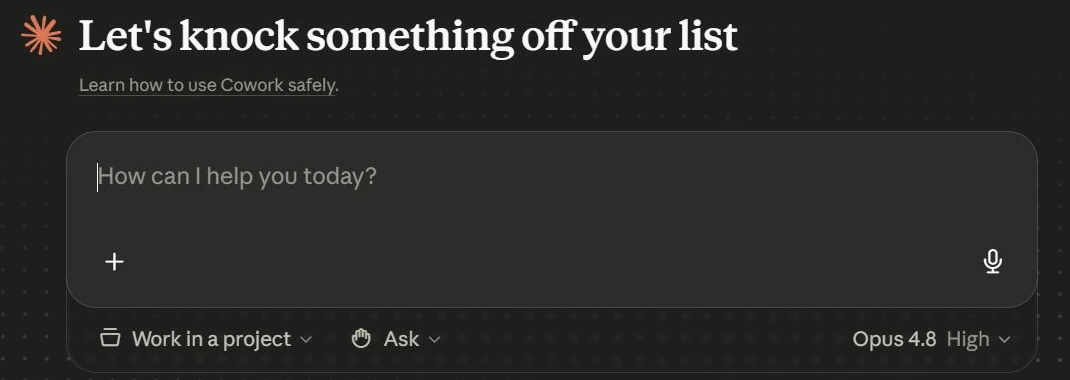
Connectors are enabled per conversation, so you need an actual task open to switch Google Drive on. This keeps each task's access explicit and auditable. The Work in a project control in this composer picks the folder Cowork works in, the Reference screens gallery shows its menu.
- 1Scope is per task. A connector enabled in one task is not automatically on in the next, that is by design.
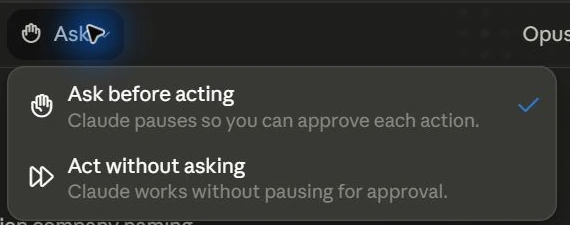
- 2Ask mode is the safety net. Next to the composer sits the permission mode control set to Ask. Claude pauses for your approval before each action. The Reference screens gallery shows the menu behind it; leave Act without asking alone until a workflow is proven.
Voiceover Head back and start a new task in Cowork. Each task is its own conversation, with its own tools and its own settings.
Toggle Google Drive on for this task
Click "+" (or type "/"), hover "Connectors", then toggle Google Drive on
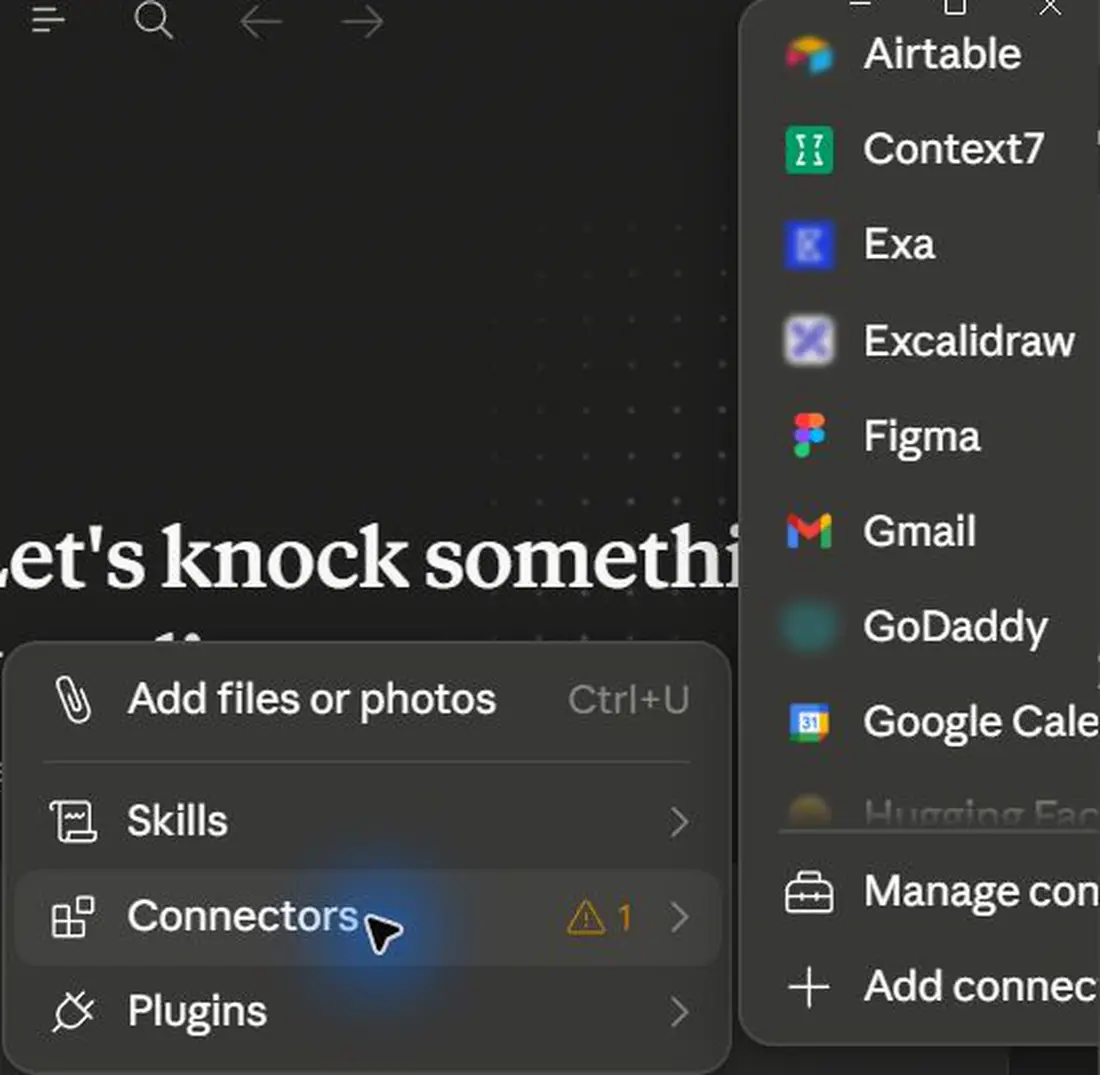
Toggling it on tells Claude it may use Google Drive for this conversation only, each row in this submenu has a toggle on its right edge (just off-frame in this capture; scroll the submenu if Drive is not visible at first, services list alphabetically). An active toggle shows filled. Leaving it off keeps the task untouched by Drive.
- 1On means usable. Claude only reaches for a connector that is toggled on for this specific conversation.
- 2Turn off when done. For sensitive work, toggle the connector off once the task is finished.
Voiceover Click the plus, hover over Connectors, and toggle Google Drive on. Remember, connectors are per-conversation, so you set this for each task.
Review connector Tool permissions
Open Tool permissions and confirm risky tools are set to Needs approval
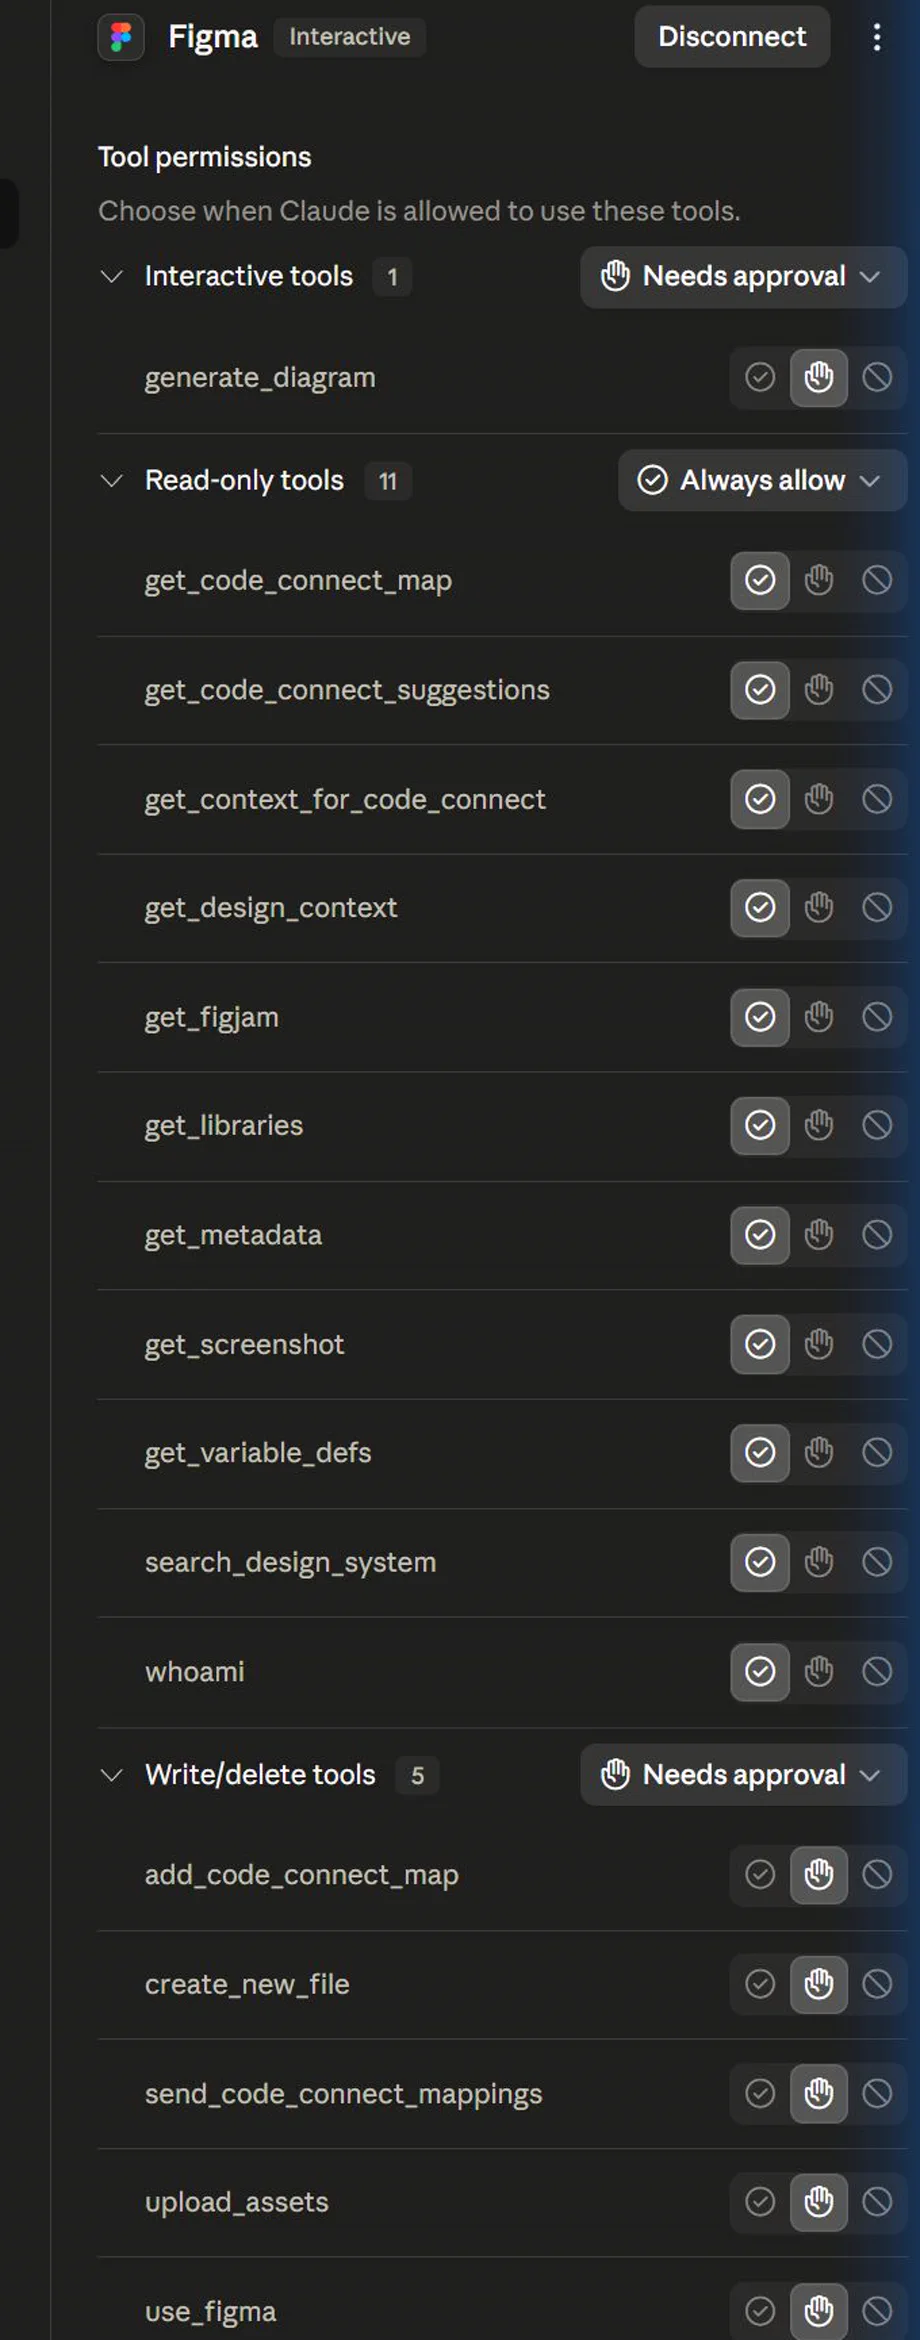
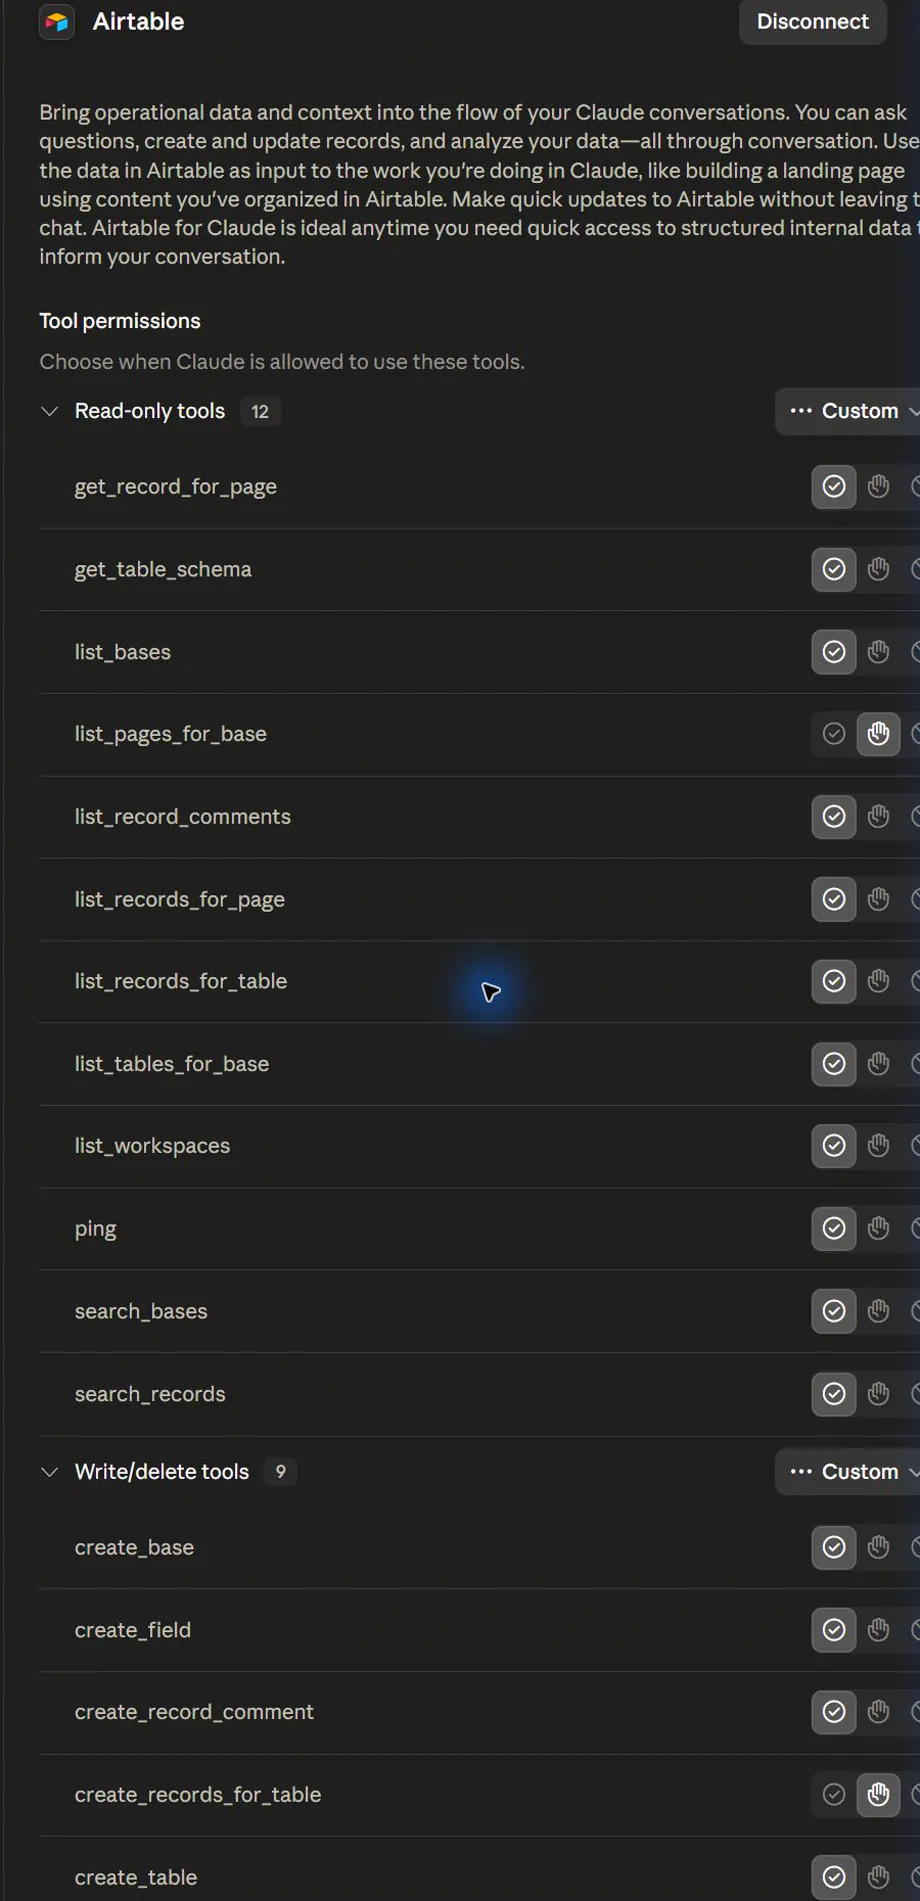
Go to Customize > Connectors and click the connector's name to open its Tool permissions. (We show the Figma connector because it has all three tool categories. Google Drive exposes the same Always allow / Needs approval / Blocked controls.) Keep read-only tools on Always allow only when appropriate, and keep interactive or write/delete tools on Needs approval for approve-first work. You should see read-only tools grouped separately from interactive and write/delete tools, each group with its own setting. The Reference screens gallery below includes a second connector (Airtable) where a single read-only tool has been bumped to Needs approval, you can override per tool, not just per category.
- 1Approve before acting. Needs approval keeps a human checkpoint in front of interactive, write, upload, send, or delete actions.
- 2Block when unsure. If a tool can touch sensitive records or you do not understand its effect, leave it on Needs approval or block it.
Voiceover Open Tool permissions and check the connector's defaults. Keep risky tools on Needs approval so Claude stops for your confirmation before acting.
Invoke a plugin skill with "/"
Type "/" in the task composer and pick a skill from your installed plugin
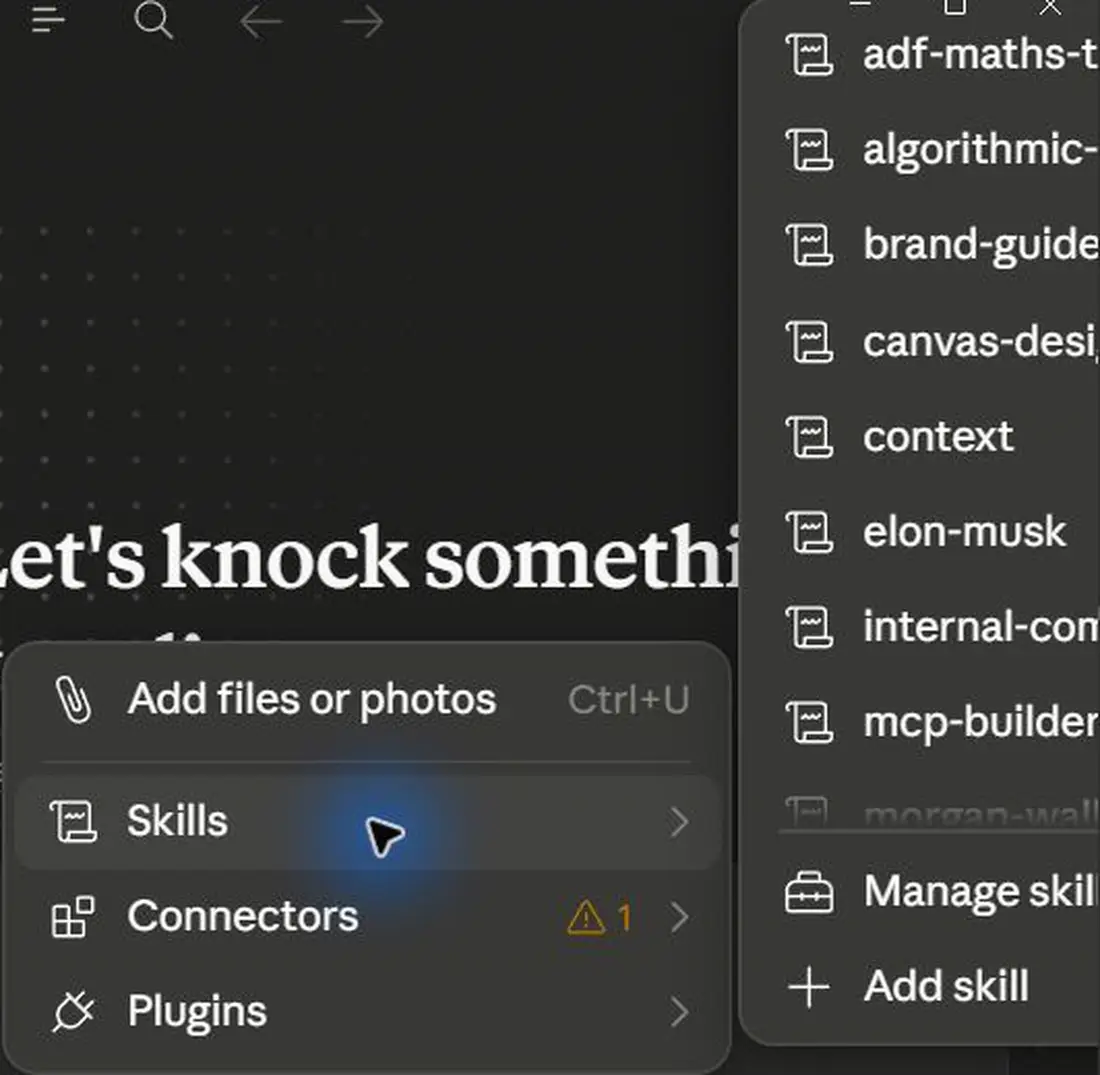
Typing "/" (or clicking "+") lists the skills your role plugin added. Selecting one tells Claude exactly which capability to apply instead of leaving it to guess. The list you see contains every skill available to you, personal skills you have added (as in this capture) alongside the skills your installed plugin contributed, each named like /design-critique. Pick one of the plugin's skills; seeing it inserted into the composer is your success check.
- 1Slash to discover. The "/" menu shows every skill from your installed plugins in one place.
- 2Be specific. Choosing the exact skill gives a tighter, more predictable result than a vague free-text ask.
Voiceover Type a forward slash to bring up your skills, then pick the one you want. This invokes a skill from the plugin you installed earlier.
Run the skill on a local file, approving each tool call
Attach your local file, describe the task, send it, and approve each On-demand tool call as it appears
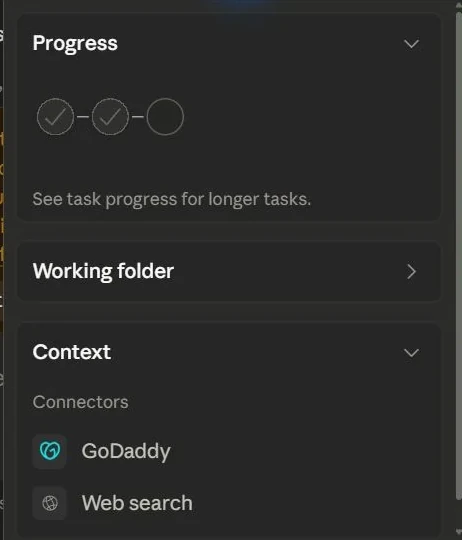
Hand Claude a real local file and a clear instruction, then confirm the tool calls one by one. Because access is per task and tool calls are approved, you stay in control the whole way. While Claude works, the right-hand panel shows three things worth watching: Progress (step ticks for longer tasks), Working folder (where outputs land), and Context (which connectors this task can reach, yours should list Google Drive; this capture shows a task with different connectors loaded).
- 1Watch the approvals. With risky tools set to Needs approval, confirm each tool call so nothing touches Drive or your file unexpectedly.
- 2One file, one goal. Keep the first run narrow, a single file and a single objective, so the result is easy to verify.
Voiceover Attach a local file, describe the task plainly, and approve each tool call as it comes up so you stay in control of every action.
Review the output
Open the result, check it against the source file, then confirm or refine

Compare what Claude produced against your original file and the skill you invoked. Treat the first output as a draft to verify, not a finished deliverable, before saving or sharing it.
- 1Verify before trust. Spot-check the output against the source, confirm numbers, names and claims before relying on it.
- 2Refine in place. If something is off, ask Claude to adjust in the same task so the context and connector stay loaded.
Voiceover Open the result and check it against the source. Treat this first output as a draft, then refine it until it's genuinely right.
Reference screens
Course screenshots and visual references for the lesson flow. Re-check the live product before paid delivery or public launch.

End-to-end recap
- You opened the Cowork tab first, then Customize, because hooks and sub-agents only run in Cowork, they appear grayed out in plain chat.
- From Customize > Plugins you clicked Browse plugins, picked the default Anthropic & Partners marketplace, and installed or managed a single role plugin to test before scaling up.
- You learned that an installed plugin's Manage surface shows source, version, skills, connectors and the "Customize" button, and that custom marketplaces are added under Personal plugins via "+" then "Add marketplace".
- Under Customize > Connectors you clicked "+" to add Google Drive, clicked Connect, and followed the authentication prompts, granting only the access needed.
- Inside a Cowork task you toggled the connector on for that conversation only and reviewed Tool permissions so risky tools need approval before acting.
- You invoked a plugin skill with "/", ran it end-to-end on a local file with per-call approvals, then reviewed the output against the source before trusting it.
Voiceover script & storyboard
Read-aloud narration for recording the video, an intro line, one line per screen in order, then an outro. Pair each line with its matching step above.
- IntroWelcome to Claude Cowork. In this walkthrough you'll set up plugins and connectors, then run a skill on your own files, step by step.
- 1Start in the left sidebar and click Cowork to open the workspace where your tasks, files and tools all live together.
- 2Now click Customize in the sidebar. This is where you manage plugins, connectors and skills that shape how Cowork behaves.
- 3Open the Plugins tab, then click the plus beside Personal plugins, choose Browse plugins to see what is available.
- 4Click Browse plugins to see what's available. Have a quick look through before installing anything, so you pick what actually fits your work.
- 5Select the Anthropic and Partners marketplace. It groups role-based plugins built for everyday office tasks like writing, research and review.
- 6Open a role plugin that matches what you do. If it is new, install it; if it is already installed, use Manage to inspect what it adds.
- 7If you'd like, open Manage and click Customize in the upper right to tweak the plugin. This step is optional, so skip it if the defaults suit you.
- 8Back in Customize, open the Connectors section. Connectors link Claude to outside tools and accounts like your file storage.
- 9Click the plus next to Connectors to add a new one. You'll choose the service and grant access in the next couple of steps.
- 10Pick Google Drive, click Connect, then approve the request in the Google window so Claude can reach your files when you allow it.
- 11Head back and start a new task in Cowork. Each task is its own conversation, with its own tools and its own settings.
- 12Click the plus, hover over Connectors, and toggle Google Drive on. Remember, connectors are per-conversation, so you set this for each task.
- 13Open Tool permissions and check the connector's defaults. Keep risky tools on Needs approval so Claude stops for your confirmation before acting.
- 14Type a forward slash to bring up your skills, then pick the one you want. This invokes a skill from the plugin you installed earlier.
- 15Attach a local file, describe the task plainly, and approve each tool call as it comes up so you stay in control of every action.
- 16Open the result and check it against the source. Treat this first output as a draft, then refine it until it's genuinely right.
- OutroThat's the full loop: review or manage a plugin, wire up a connector, and run a skill on your files. Set it up once, then let it do the heavy lifting.
Resources
Checkpoint