Lesson 35 of 38 · Guided walkthrough 3 - 10-15 min
Walkthrough: Claude Chat: connectors & projects
Connect Google Drive and Gmail to Claude Chat through the Connectors Directory, complete each Google authentication flow, enable both connectors for a single conversation, review Tool permissions so risky tools need approval, and ask Claude to read from Drive and Gmail, relying on approve-first controls plus per-action approval prompts to keep Claude from changing anything.
This is a calm, click-by-click tour of wiring real connectors into a Claude chat, the moment Claude stops being a closed chatbot and starts reaching into your actual work. You will open the + menu, reach the Connectors Directory, link Google Drive and Gmail through Google's own OAuth flows (OAuth is the standard sign-in-with-Google window where you approve exactly what an app may access), then keep Claude deliberately restrained before you ask it to do anything. Two ideas anchor the whole exercise. First, a connector inherits your permissions and nothing more: if your Google account cannot open a file or read a message, the connector cannot either, so connecting is not the same as exposing everything. Second, the act of giving an AI live access to your files and inbox introduces a real attack surface, a document or email could itself carry hidden instructions, so reading is comparatively low-stakes while anything that writes, sends, or deletes deserves a human checkpoint. That is why Tool permissions and the per-action approval prompt sit at the centre of this tour. On a personal plan (Pro or Max) you lean mostly on the approval prompt; on Team or Enterprise an Owner can set org-wide Always allow / Needs approval / Blocked policies that individuals cannot override. Either way the safe habit is identical: connect on least privilege, verify what Claude can actually see, and approve every consequential action on purpose.
What you'll learn
- How to reach the Connectors Directory from inside a chat (the composer + menu, hover Connectors, Manage connectors, then the + beside the Connectors heading), and why this is a different + from the one you use for attachments.
- The difference between connecting a service (a one-time OAuth grant that links your account) and enabling it for a conversation (a per-chat toggle), and why a connected service stays dormant until you switch it on.
- Permission inheritance as the core safety model: a connector can only ever reach what your own Google account can already see, so Claude's access is a subset of yours, never a superset.
- How to read and set Tool permissions. Always allow, Needs approval, Blocked, and the rule of thumb that read-only tools may be allowed while interactive, write, send, upload, and delete tools stay on Needs approval.
- Why the per-action approval prompt is your real-time checkpoint: Claude surfaces a prompt before consequential actions instead of acting silently, so you approve or decline each one deliberately.
- How to phrase tightly scoped read-only requests (naming the file, adding "do not edit" or "do not send") so Claude stays inside the lane you intended.
- Where governance lives on each plan: personal plans (Pro/Max) lean on the approval prompt, while Team/Enterprise Owners can enforce org-wide tool policies that individual members cannot override.
Why this matters
Connecting is not the same as exposing, inheritance is the safety floor
The single most reassuring fact about connectors is also the easiest to miss: Claude inherits your permissions and stops there. If a Drive file is not shared with your Google account, or an email lives in a mailbox you cannot open, the connector cannot reach it, the grant you approve in Google's window does not widen your access, it mirrors it. Anthropic's own guidance is explicit that you can only sync content to Claude that you already have permission to view in the source, and that even an allowed write action still requires the underlying permission in the source system to succeed. That is why "connect" is a low-anxiety verb here. The deliberate move is the layer above it: scope each connection to the account you actually mean (least privilege, connect the mailbox you need, not every Google identity you own), and remember you can disconnect any connector later from Customize > Connectors without losing your chat history. Connecting opens a door the width of your own keyring; it never forges new keys.
Reading is cheap, writing is the blast radius, why approve-first is the whole game
Once a connector is live, the risk profile splits cleanly. Reading and summarising are reversible and contained, worst case, Claude shows you something you could already see. Writing, sending, replying, uploading, or deleting is not reversible the same way, and it is exactly where a compromised request does damage. The reason this matters more for AI than for ordinary software is prompt injection: the documents and emails Claude reads are untrusted input, and a malicious file or message can carry hidden instructions that try to steer Claude into taking an action, exfiltrating data through a connector that can send, for example. A connector that can write as you is therefore an exfiltration path if Claude is ever steered off-task. The mitigation built into this walkthrough is structural, not hopeful: keep write/send/delete tools on Needs approval, and treat the per-action prompt as a hard checkpoint. Notably, Claude's Gmail connector already reflects this philosophy, it reads and drafts but does not auto-send, so every outbound message still leaves through a human hand. The takeaway for any connector you add later: ask which tools can change the world, and gate those first.
Where this fits the agentic loop and the rest of the course
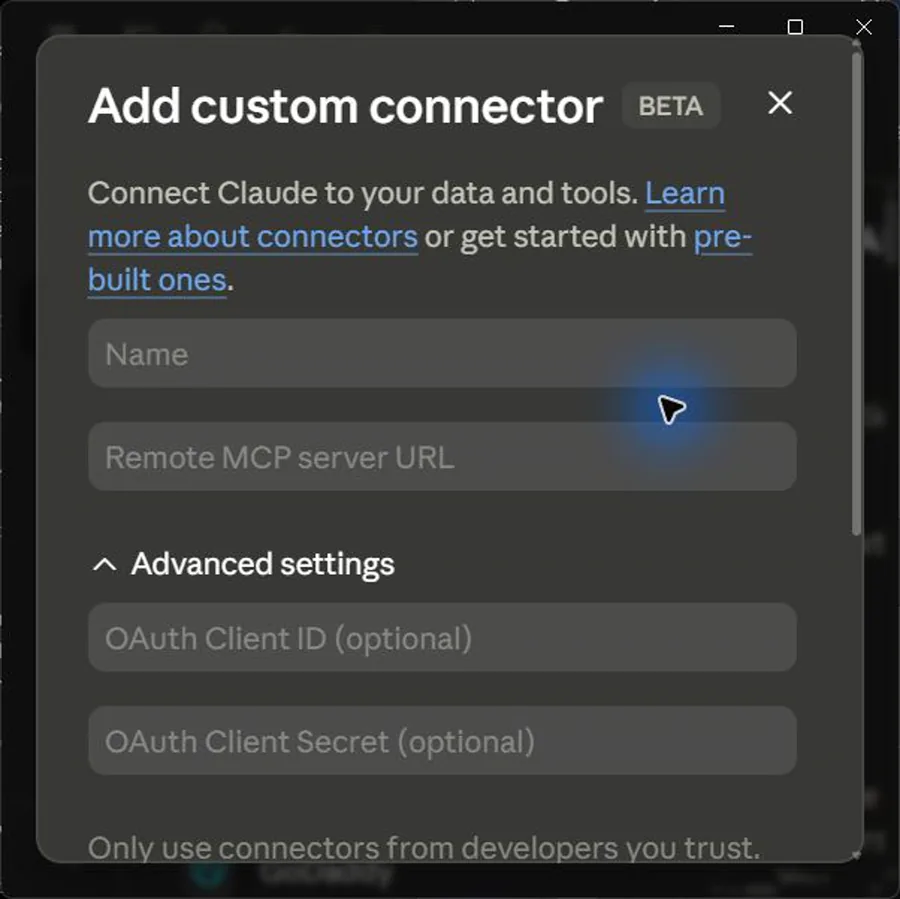
This walkthrough is the controlled introduction to the loop every agentic workflow runs: perceive (read context from a real system), reason (decide what to do), act (take an action), and repeat. Connectors are the perceive-and-act edges, the points where the model touches the world outside the chat, and Tool permissions plus the approval prompt are the governor on the act step. Get the habit right on two read-only Google services and it transfers directly to higher-stakes surfaces you will meet beyond this tour: custom and remote-MCP connectors, connectors you point at a third-party tool server yourself, where the trust question is sharper because you are vetting an outside developer, not an official Google grant, multi-connector workflows where one chat reaches several systems at once, and Team/Enterprise deployments where an Owner sets policy centrally so individuals inherit safe defaults instead of configuring them by hand. The discipline you are practising, connect on least privilege, verify what the agent can see, approve consequential actions deliberately, is the same discipline that scales from one careful chat to an org-wide automation policy. The Add custom connector form in the Reference screens at the end of this lesson shows what adding one looks like, note its built-in warning to only use connectors from developers you trust.
From closed chatbot to governed connector access
The five-stage pipeline this tour walks: connect, authenticate, enable per-chat, gate the risky tools, then read under approve-first.
- Connect from the directoryReach the Connectors Directory via the composer + and add Google Drive, then Gmail, one Connect per service.
- Authenticate with GoogleEach Connect opens Google's own OAuth window; the grant mirrors your account access, it never widens it.
- Enable per conversationA connected service stays dormant until you toggle Drive and Gmail on for this specific chat.
- Review Tool permissionsLeave read-only on Always allow only when safe; keep write, send, upload, and delete on Needs approval.
- Read under approve-firstAsk tightly scoped read-only requests; the per-action prompt is the checkpoint before any consequential action.
Before you start
- A Claude account. Directory connectors are available on all plans, but free users are limited to one custom connector, official Google connectors come from the directory, so any plan can follow this tour.
- A Google account with Drive and Gmail you are comfortable granting Claude access to. Claude inherits your own permissions, if you cannot reach a file or message, the connector cannot either.
- On Team or Enterprise, the workspace Owner (or Primary Owner) must enable connectors org-wide first, and each user authenticates their own Google account individually.
- A modern browser signed in to claude.ai. This tour uses the web app; Claude Desktop and Mobile follow the same menus.
Step by step
Open a new chat on claude.ai
Go to claude.ai and click New chat
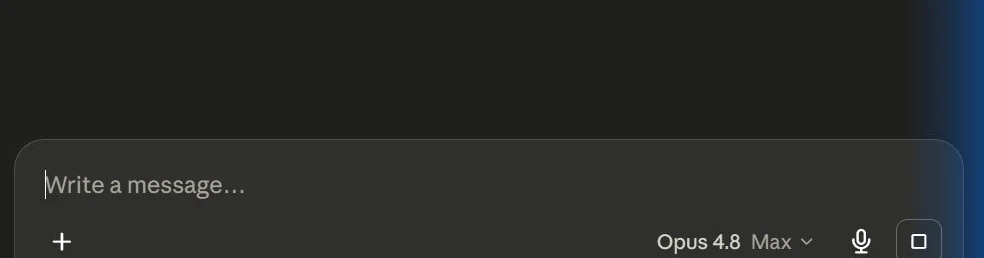
Start from a fresh conversation so the connectors you enable apply cleanly to this chat. The message composer with the + button sits at the lower left.
- 1Find the + button. Look at the lower-left of the message box. That plus icon is your entry point to attachments, skills, and connectors.
- 2Slash works too. Typing / in the composer opens the same menu as clicking +, if you prefer the keyboard.
Voiceover Head to claude dot ai and click New chat, so you're starting from a clean conversation before we add anything.
Open the + menu
Click the + button in the lower left (or type /)
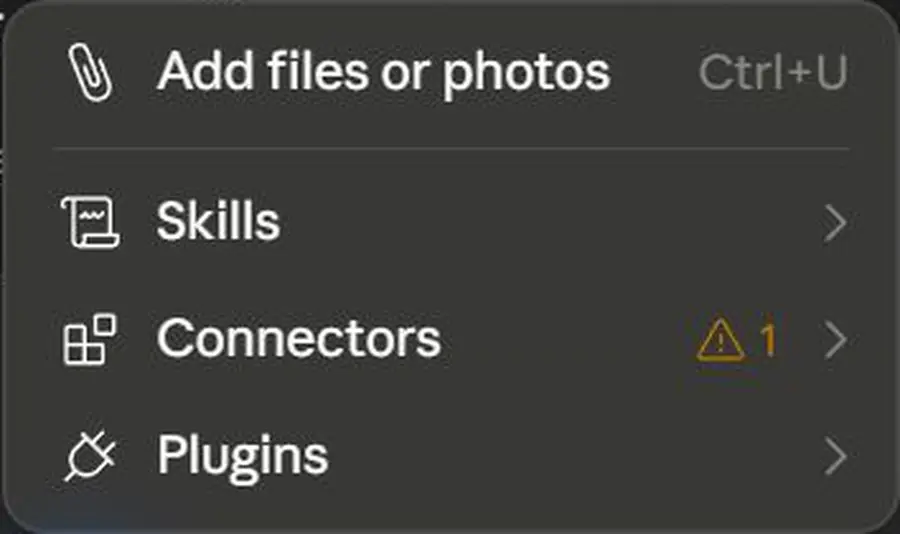
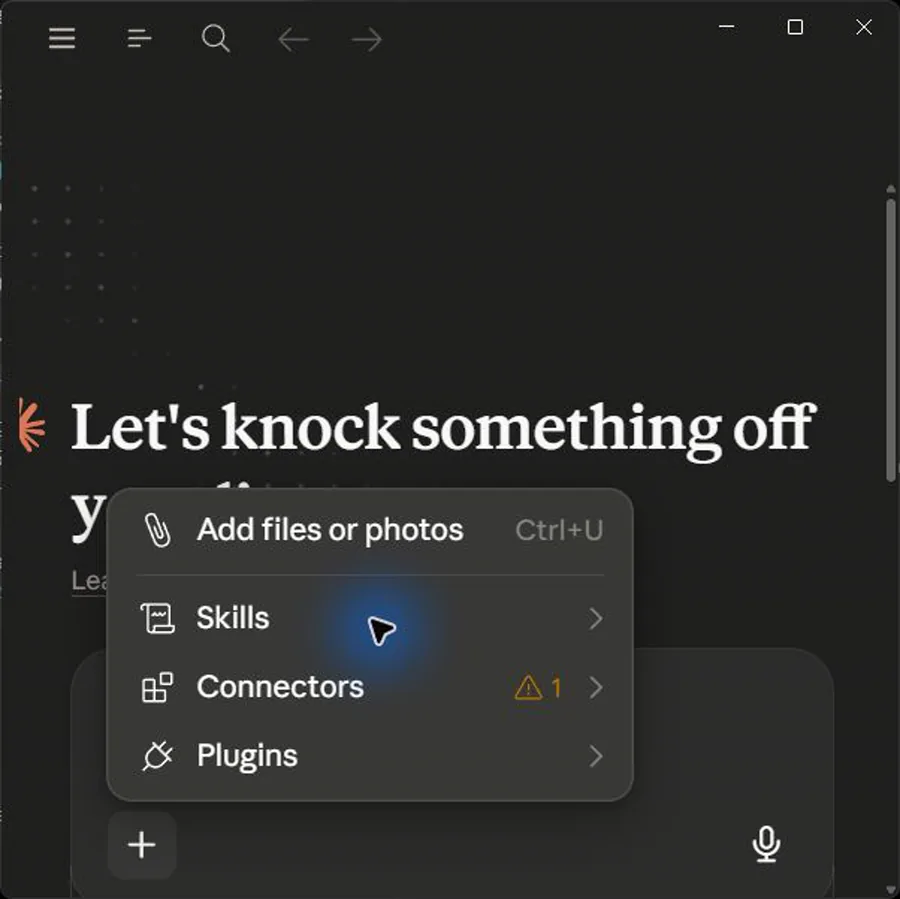
This opens the in-chat menu listing attachments, skills, and Connectors. It is the same menu whether you click + or type a forward slash.
- 1Scan for Connectors. One row in this menu is labelled Connectors. That is where you are headed next.
- 2Nothing connected yet. On a fresh account this list is short. Connecting services here is exactly what adds capabilities.
- 3Lost? See the wider view. The Reference screens gallery at the end of this lesson shows this same menu zoomed out, so you can see exactly where it sits in the window.
Voiceover Down in the lower left, click the plus button. If you'd rather use the keyboard, just type a forward slash instead.
Hover Connectors and open Manage connectors
Hover over Connectors, then click Manage connectors
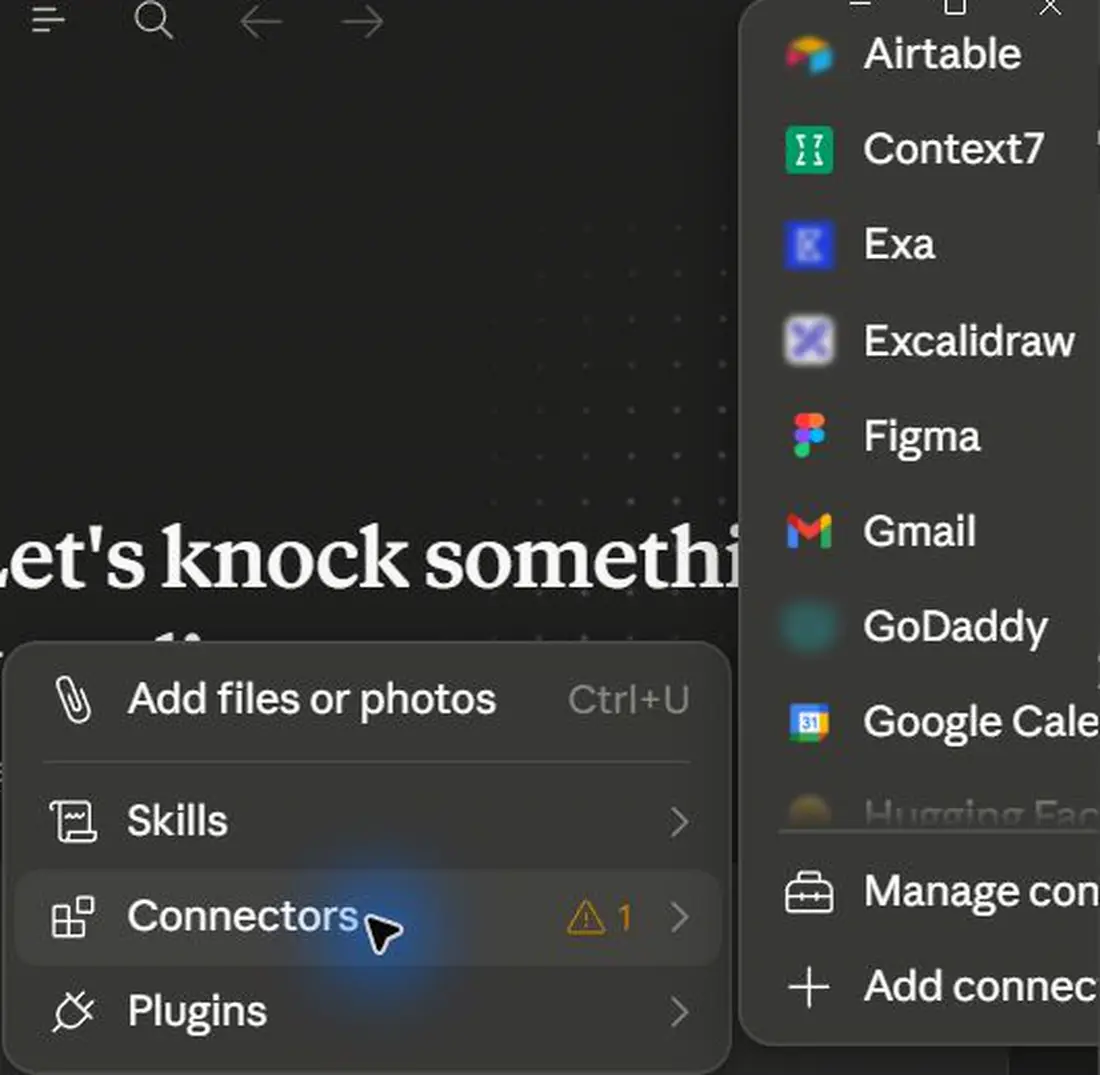
Hovering Connectors expands a submenu. Manage connectors takes you to the full setup view where you can add new services, not just toggle existing ones.
- 1Manage vs toggle. Manage connectors is for adding and configuring. The toggles in this same submenu turn already-connected services on or off.
- 2Settings route. You can reach the same place via Customize > Connectors in Settings if the chat menu is ever hidden.
Voiceover Hover over Connectors in that menu, then click Manage connectors to open the settings where you'll add your accounts.
Click the + next to the Connectors heading
On the Connectors page, click the + next to the Connectors heading
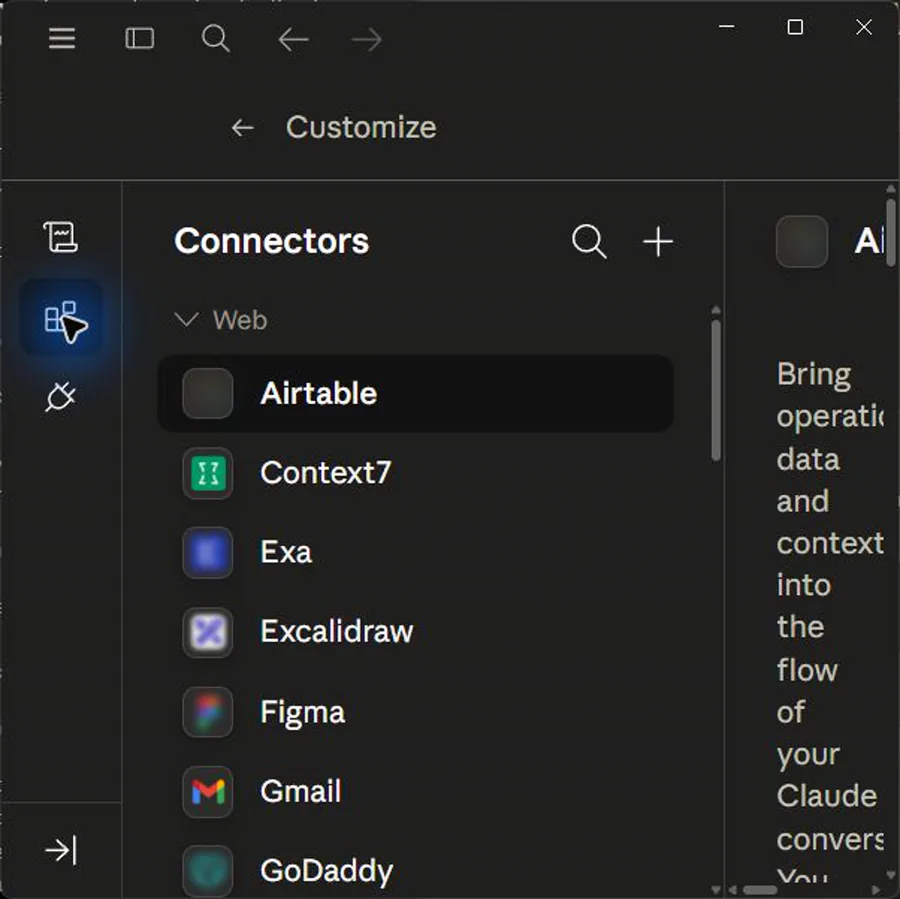
The + beside the Connectors heading opens the directory of available services. This is the single button that starts every new connection. It is a different + from the composer + you used earlier.
- 1The right plus. This + sits next to the word Connectors at the top of the panel, not the composer + from step 2.
- 2Owner gate (Team/Enterprise). If there is nothing to add on a Team or Enterprise plan, your workspace Owner has not enabled connectors org-wide yet.
Voiceover Next to the Connectors heading, click the plus button. This is where you go to add a brand new connector.
Browse the Connectors Directory
In the Connectors Directory, search or scroll to find Google services
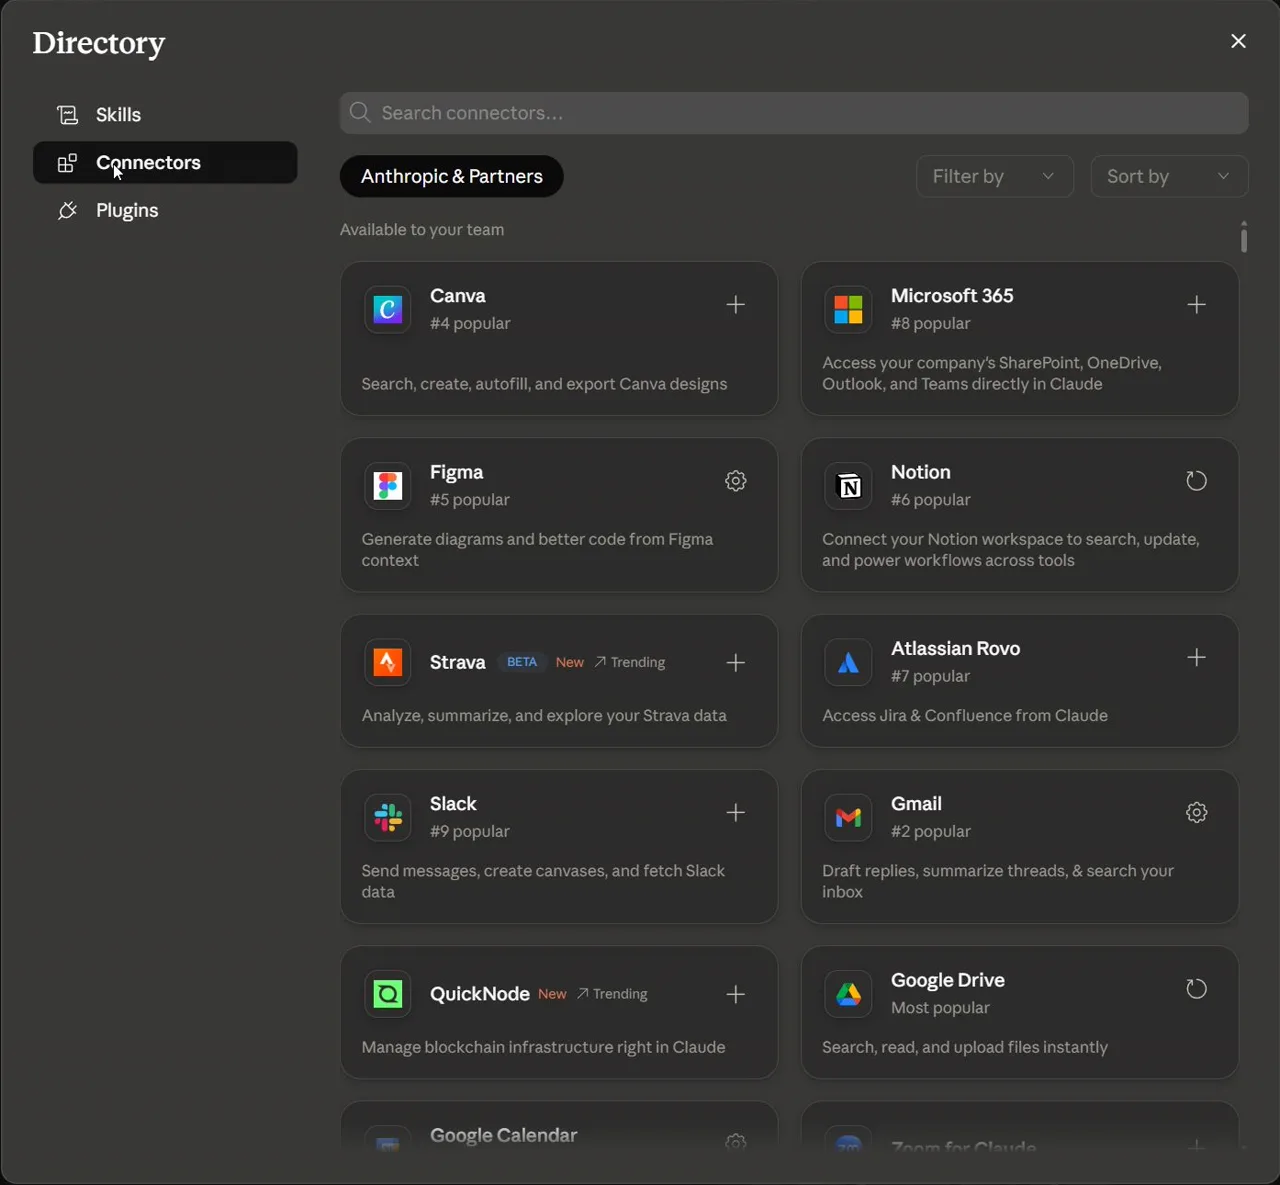
The Connectors Directory opens showing available connectors. Search by name or scroll the full list to find official services like Google Drive and Gmail.
- 1Search by name. Type Drive or Gmail to jump straight to the Google connectors instead of scrolling.
- 2Read the capabilities. Each card describes what the connector can do. Worth a glance before you connect anything.
Voiceover You're now in the Connectors Directory. Search or scroll through the list until you find the Google services you want.
Open Google Drive and click Connect
Click Google Drive, review its description, then click Connect
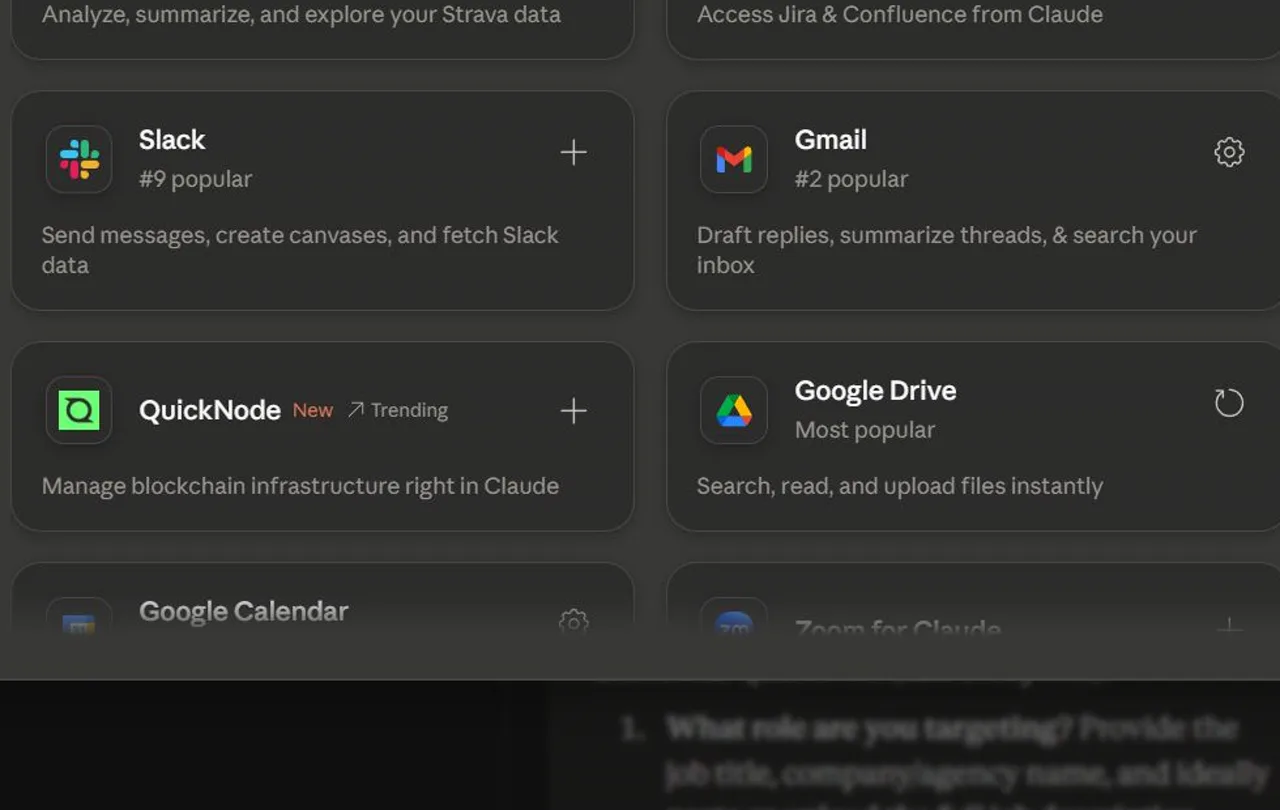
Selecting Google Drive shows its description and capabilities. Click Connect to begin linking your Google account. Clicking the card opens Drive's detail panel with a Connect button; clicking Connect pops Google's sign-in window (next step). If you see a settings cog instead of +, the connector is already linked on this workspace.
- 1Connect, not Install. Official directory services show a Connect button. Custom or MCP entries may show Install instead, same idea.
- 2What it unlocks. Drive lets Claude search and read your files. Claude can only see what your own Google account can see.
Voiceover Click Google Drive, have a quick read of what it can access, and when you're happy, click Connect to begin.
Complete the Google authentication prompts
In the Google window, pick your account and approve access for Claude

A Google authentication window opens. Follow the prompts to grant Claude access to your account. Claude inherits your existing permissions in Drive, it cannot see anything you could not already see.
- 1Check the account. Confirm the Google account shown is the one whose Drive you actually want Claude to read.
- 2Review what is requested. Read the access Google lists before approving. This is the real grant, handled by Google, not by Claude.
- 3Back to Claude. After approving, the window closes and Google Drive shows as connected in your connectors list.
Voiceover Google will ask you to sign in. Pick the account you want to use, then approve access so Claude can read your files.
Connect Gmail the same way
Reopen the Connectors Directory, click Gmail, click Connect, then approve in Google

Repeat the directory flow for Gmail: open the directory, select Gmail, click Connect, and complete the Google authentication prompts. Drive and Gmail are separate connectors, so each needs its own Connect and its own grant. When the Google window closes, Gmail joins Google Drive as connected in your connectors list, that is your sign both grants worked.
- 1Two grants, two services. Gmail does not piggyback on the Drive grant. Authenticate it separately.
- 2Least privilege. Only connect the mailbox you need. You can disconnect any connector later from the Customize > Connectors panel.
Voiceover Now do the same for Gmail. Reopen the directory, click Gmail, click Connect, and approve access just as you did before.
Return to the chat and reopen Connectors
In the composer, click + (or type /) and hover Connectors
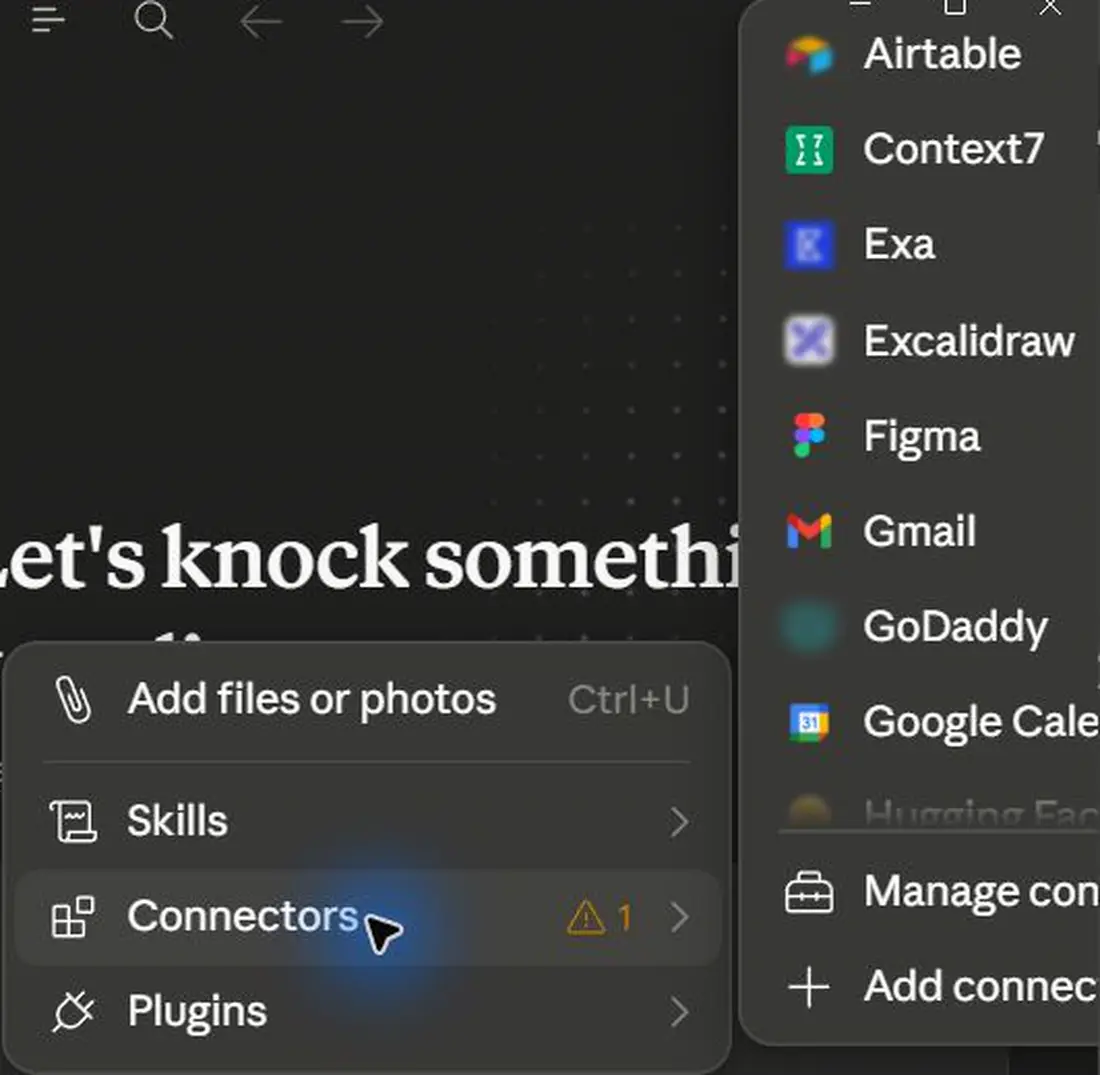
Back in your conversation, reopen the + menu and hover Connectors. Both Google Drive and Gmail now appear as toggles for this chat. Scroll the submenu if Drive is not visible at first, services list alphabetically. Seeing both names listed is your success check for this step.
- 1Per-chat control. Connectors are toggled per conversation, so enabling them here affects only this chat.
- 2Off until you toggle. A connected service does nothing in a chat until you switch it on here.
Voiceover Head back to your chat, click the plus button or type a slash, then hover over Connectors to see what's available.
Toggle Google Drive and Gmail on for this chat
Toggle Google Drive on, then toggle Gmail on
Each service row has a toggle on its right edge (just off-frame in this capture, scroll right or widen the window). Switch Drive and Gmail on; an active toggle shows filled, and Claude can now reach both for this conversation.
- 1On means reachable. An active toggle shows filled beside the service name. Confirm both Google Drive and Gmail read as on before you move to the next step.
- 2Easy to revoke. Toggling a connector back off instantly stops Claude using it, without disconnecting your Google account.
Voiceover Toggle both Google Drive and Gmail on here, so Claude can reach them during this conversation when you ask it to.
Review connector Tool permissions
Open Tool permissions and confirm risky tools are set to Needs approval
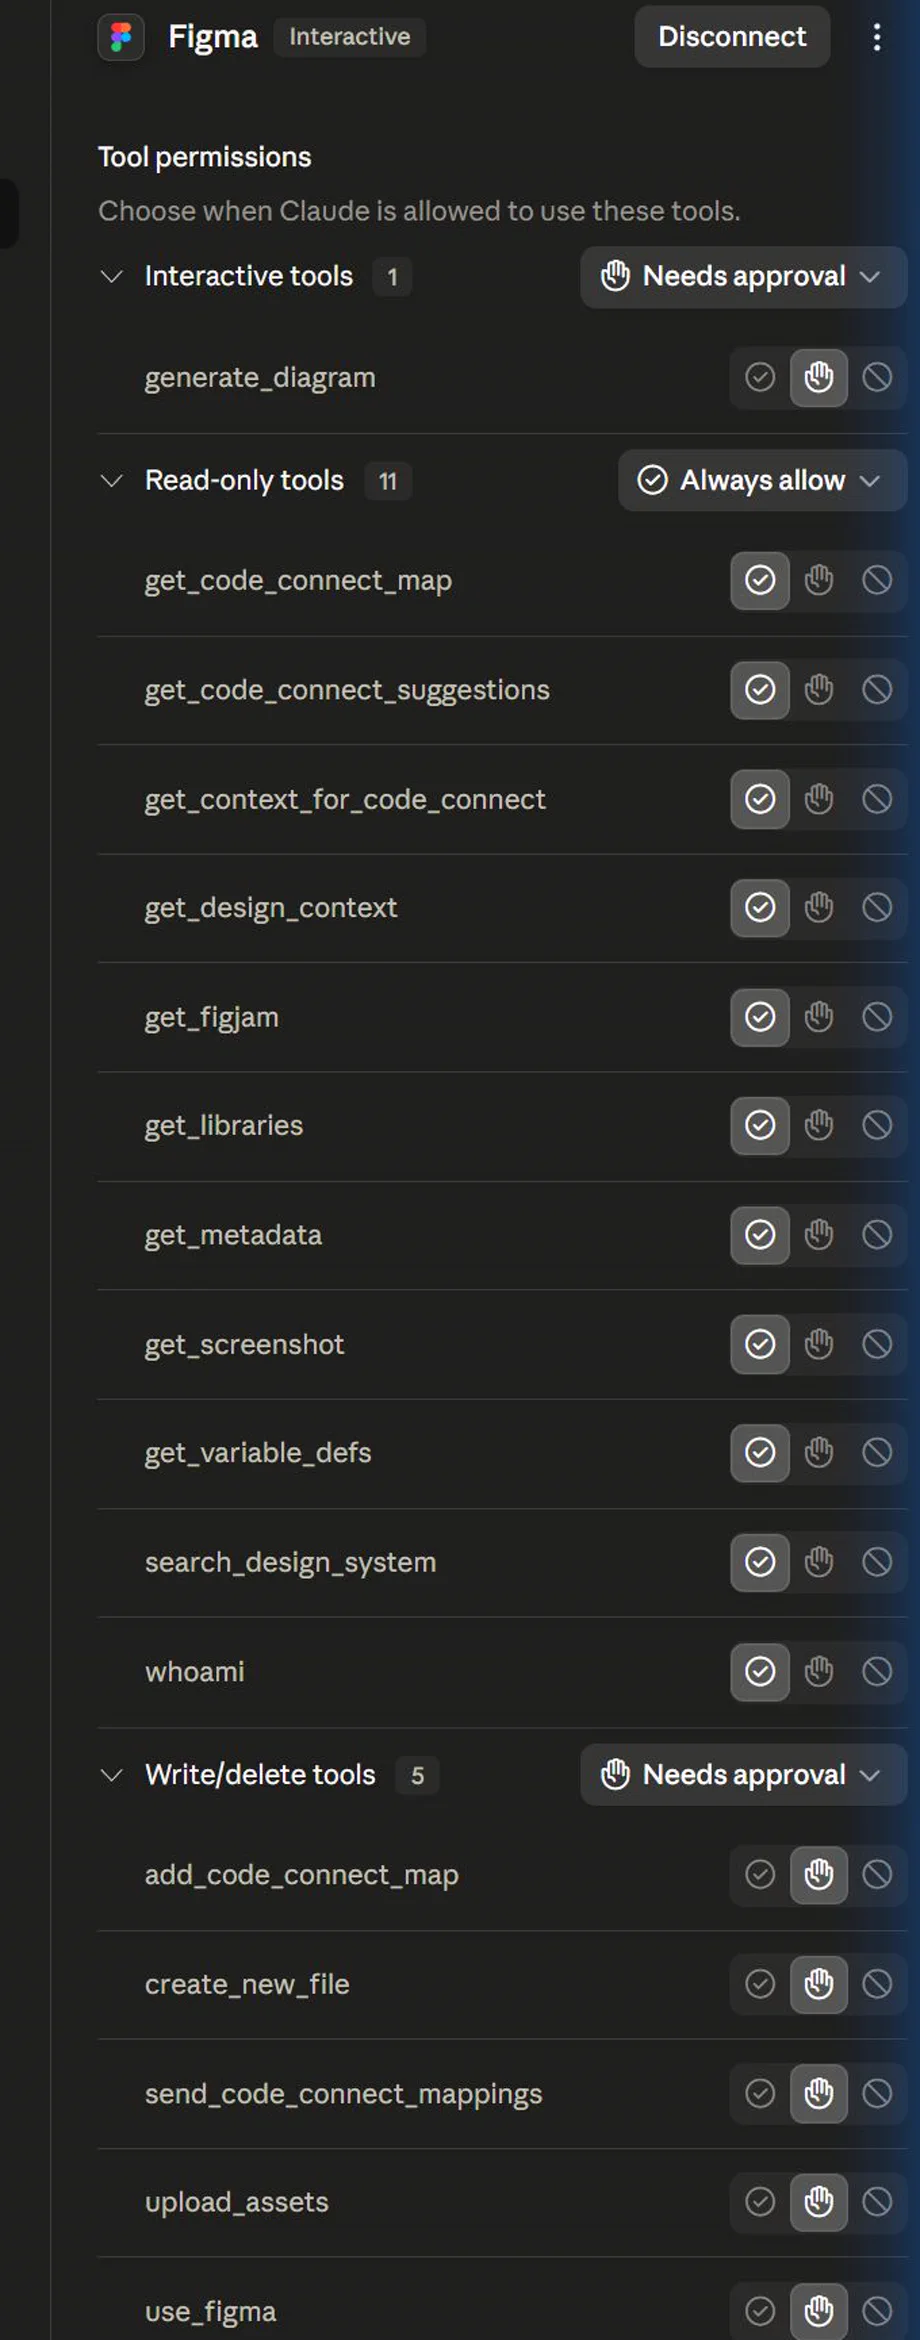
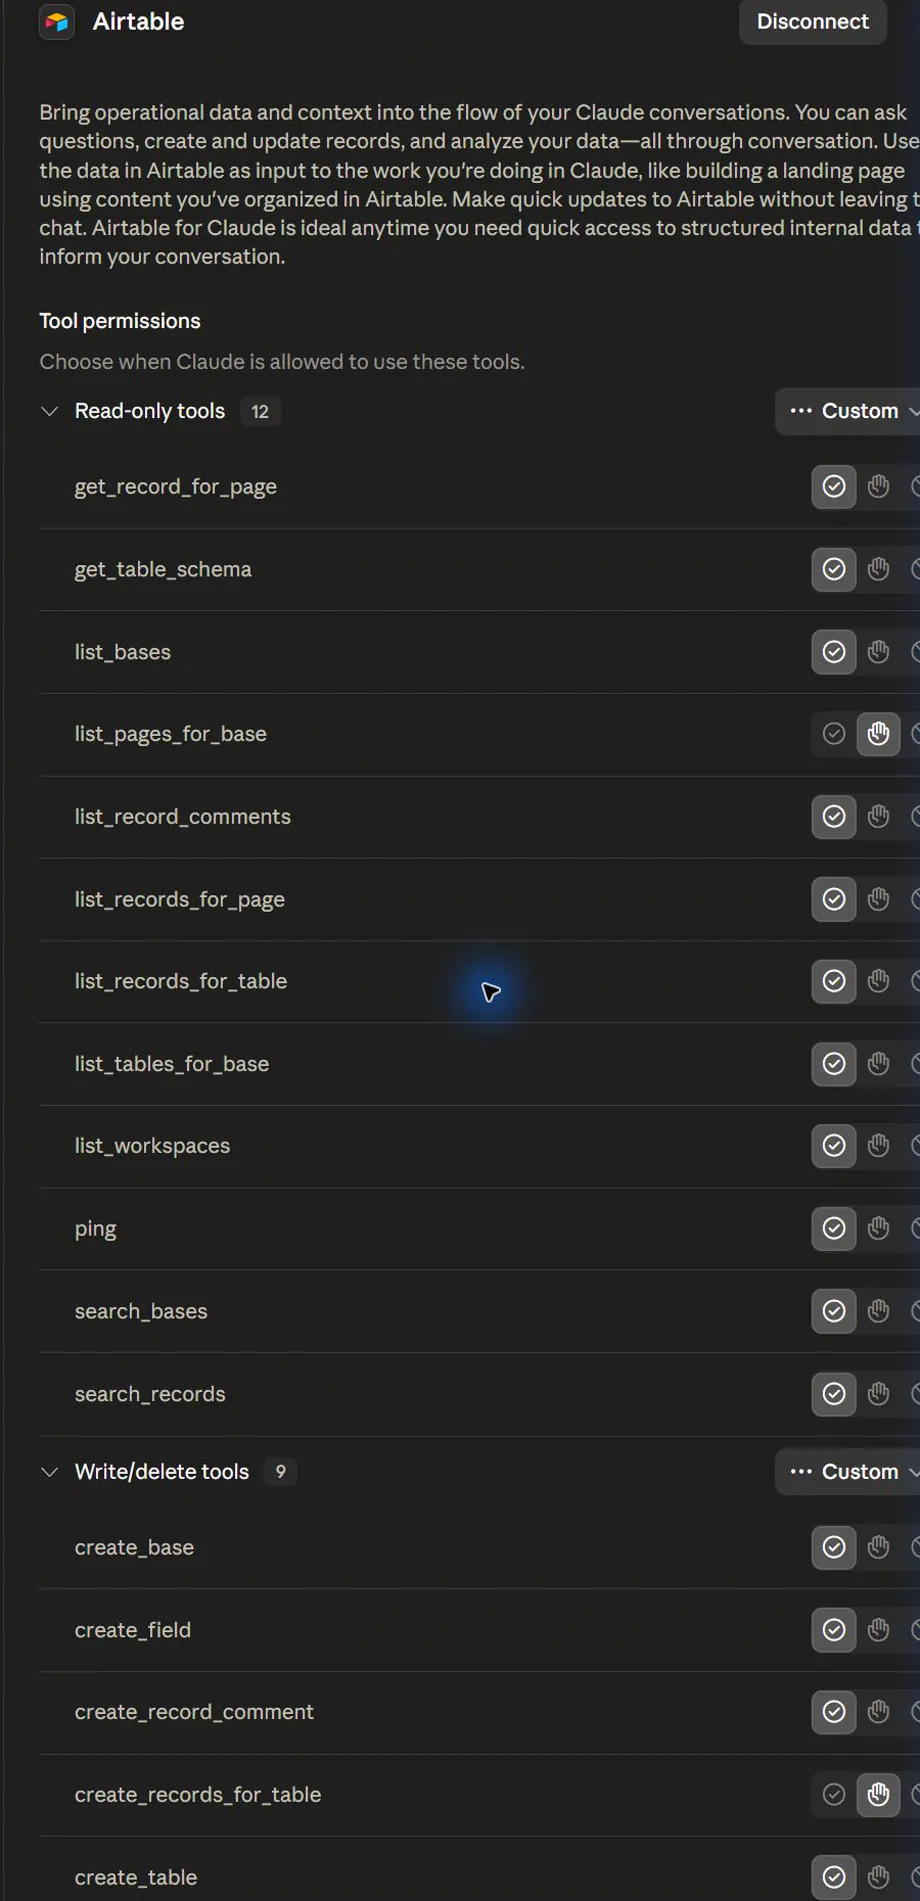
Go to Customize > Connectors and click the connector's name to open its Tool permissions. (We show the Figma connector here because it has all three categories. Drive and Gmail expose the same Always allow / Needs approval / Blocked controls.) You should see tools grouped into read-only and interactive/write categories, each with its own permission setting. Keep read-only tools on Always allow only when appropriate, and keep interactive or write/delete tools on Needs approval so a human checkpoint stays in the loop. The Reference screens gallery below shows a second connector (Airtable) where one read-only tool has been individually set to Needs approval, proof you can tighten single tools, not just whole categories.
- 1Approval by category. Read-only tools may be safe to allow. Interactive and write/delete tools should stay on Needs approval until your team has a reason to loosen them.
- 2Block when unsure. If a connector action is unclear or too broad, use Blocked or keep Needs approval until the workflow is proven.
Voiceover Open Tool permissions and check the defaults. Read-only tools can be allowed when they are genuinely safe, but interactive and write or delete tools should stay on Needs approval.
Understand the per-action approval prompt
Note that Claude asks before it takes an action, you approve or decline each one

When a connector wants to take an action that needs approval, Claude surfaces a prompt rather than acting silently. Reading is lower-stakes; for anything that writes, sends, uploads, or changes records, you can decline.
- 1Approve deliberately. Treat each prompt as a checkpoint. Decline any write action until you have verified what Claude can see.
- 2Admin-only restriction. Always allow / Needs approval / Blocked controls may be workspace-managed. If you cannot change them, treat the approval prompt as your checkpoint.
Voiceover Just so you know, Claude will check in with you before taking any action, giving you a clear prompt to approve or decline.
Ask Claude to read from Drive
Type: Search my Google Drive for the Q2 planning doc and summarise it, do not edit anything

Because risky tools are approval-gated, Claude should read only what you asked for and stop before higher-risk actions. Naming the file and adding do not edit keeps the request tightly scoped. You should see a visible Drive tool-call chip in Claude's reply (e.g. Searching Google Drive) before the summary appears, that chip is your confirmation it used the connector rather than guessing.
- 1Watch the tool call. Claude shows when it invokes the Drive connector. A good moment to confirm it is only reading.
- 2Name the file. Being specific about the document helps Claude find the right file faster in a large Drive.
Voiceover Try a read-only request. Ask Claude to find the Q2 document in your Drive and summarise it, making clear not to edit anything.
Ask Claude to summarise Gmail
Type: Search my Gmail for unread invoices this week and list them, do not send or reply to anything

Claude searches and summarises matching email. Listing rather than sending keeps it read-only in practice; if Claude ever proposed an action like a reply, the approval prompt would stop and ask first.
- 1Verify before you trust. Confirm the summary matches what is really in your inbox before you let Claude do anything more.
- 2Decline write actions. If a prompt to send or reply appears, decline it. You are still only verifying what Claude can read.
Voiceover Now lean on Gmail. Ask Claude to list any unread invoices from this week, and tell it not to send or reply to anything.
Optionally restrict actions org-wide (Team/Enterprise Owners only)
Owners: go to Customize > Connectors, select the connector, and set Tool permissions
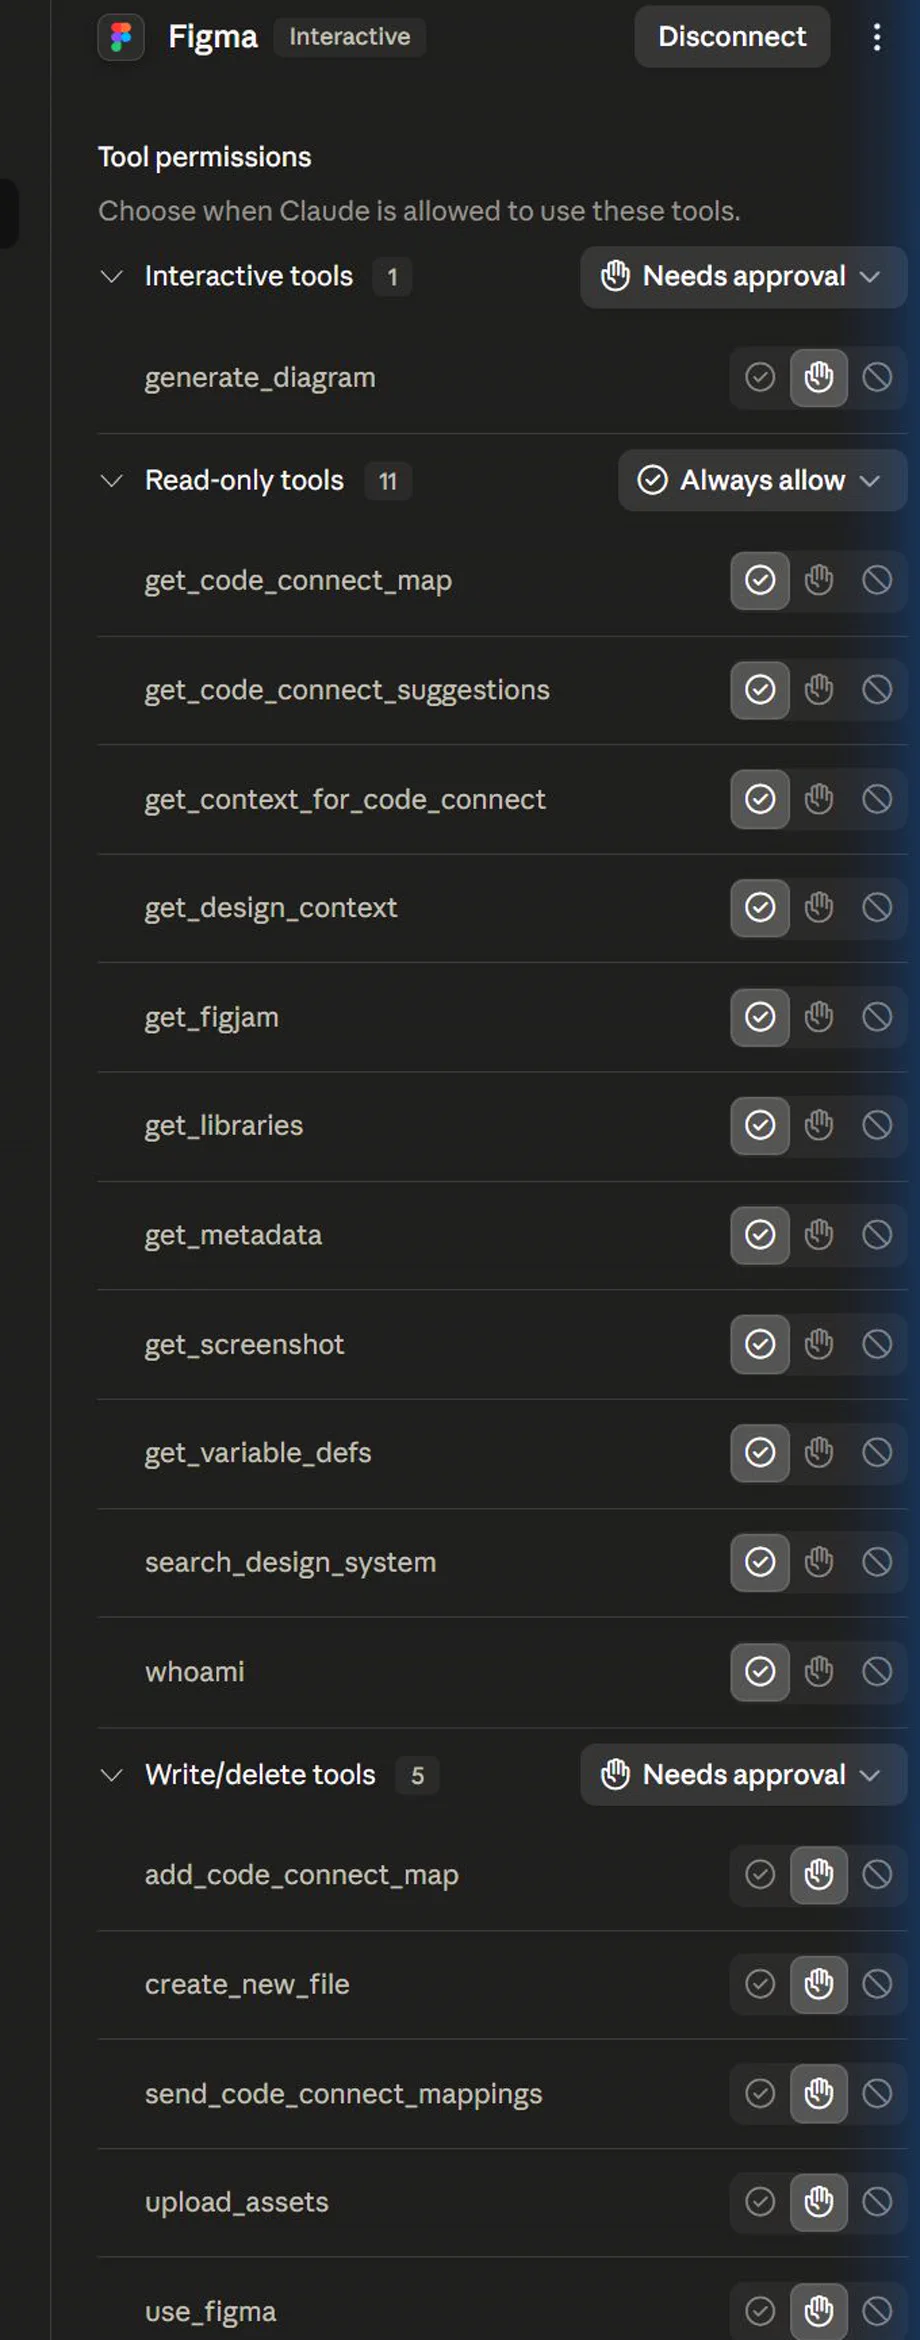
The panel itself looks identical to the one you reviewed in step 11, what changes is who sets it and how far it reaches. An Owner setting Always allow / Needs approval / Blocked here binds every member org-wide, and individuals cannot loosen it. Anyone can review their own connector's Tool permissions (you did in step 11); enforcing a policy across the workspace is the Team/Enterprise-only part.
- 1Org-wide, not per-chat. Tool permissions set here affect every member using the connector, not just your conversation.
- 2Personal-plan reality. On Pro or Max there is no org policy layer above you, your per-connector settings and the per-action approval prompt are the whole control surface.
Voiceover If you're an owner, you can go to Customize, then Connectors, and set Tool permissions to restrict actions across your whole organisation.
Reference screens
Course screenshots and visual references for the lesson flow. Re-check the live product before paid delivery or public launch.
End-to-end recap
- Opened the + menu in a Claude chat, hovered Connectors, chose Manage connectors, and clicked the + beside the Connectors heading to reach the Connectors Directory.
- Linked Google Drive and Gmail from the directory, clicking Connect on each and completing each service's Google authentication prompts. Claude inherits only the access your own Google account already has.
- Toggled both connectors on for this specific chat, since connections stay dormant until enabled per conversation.
- Reviewed Tool permissions and learned to leave risky interactive, write, upload, send, or delete tools on Needs approval unless the workflow is proven and governed.
- Asked Claude to search and summarise Drive files and Gmail messages, verifying safe read behaviour and declining any write action before trusting it further.
Voiceover script & storyboard
Read-aloud narration for recording the video, an intro line, one line per screen in order, then an outro. Pair each line with its matching step above.
- IntroLet's connect Claude to your Google Drive and Gmail, so it can read your files and email for you. It's a quick setup, and the important thing to remember is this: connectors only ever use your own permissions, reading is perfectly safe, and anything that writes or sends is gated behind an approval prompt you control.
- 1Head to claude dot ai and click New chat, so you're starting from a clean conversation before we add anything.
- 2Down in the lower left, click the plus button. If you'd rather use the keyboard, just type a forward slash instead.
- 3Hover over Connectors in that menu, then click Manage connectors to open the settings where you'll add your accounts.
- 4Next to the Connectors heading, click the plus button. This is where you go to add a brand new connector.
- 5You're now in the Connectors Directory. Search or scroll through the list until you find the Google services you want.
- 6Click Google Drive, have a quick read of what it can access, and when you're happy, click Connect to begin.
- 7Google will ask you to sign in. Pick the account you want to use, then approve access so Claude can read your files.
- 8Now do the same for Gmail. Reopen the directory, click Gmail, click Connect, and approve access just as you did before.
- 9Head back to your chat, click the plus button or type a slash, then hover over Connectors to see what's available.
- 10Toggle both Google Drive and Gmail on here, so Claude can reach them during this conversation when you ask it to.
- 11Open Tool permissions and check the defaults. Read-only tools can be allowed when they are genuinely safe, but interactive and write or delete tools should stay on Needs approval.
- 12Just so you know, Claude will check in with you before taking any action, giving you a clear prompt to approve or decline.
- 13Try a read-only request. Ask Claude to find the Q2 document in your Drive and summarise it, making clear not to edit anything.
- 14Now lean on Gmail. Ask Claude to list any unread invoices from this week, and tell it not to send or reply to anything.
- 15If you're an owner, you can go to Customize, then Connectors, and set Tool permissions to restrict actions across your whole organisation.
- OutroAnd that's it. Claude can now read from your Drive and Gmail when asked, while risky connector actions still wait for approval. Reading is lower-risk; writing is always your call.
Resources
Checkpoint