
Lesson 37 of 38 · Guided walkthrough 5 - 10-15 min
Walkthrough: Claude Code in the app
Open Claude Code inside the Claude desktop app, point it at a real project folder, and run your first safe edit end to end: read-only exploration, a generated CLAUDE.md, a visual diff you approve change by change, then a completed session.
This is the calm, click-by-click tour of Claude Code running inside the Claude desktop app - the Code tab, distinct from the Chat tab (no file access) and the Cowork tab (autonomous, cloud-backed agent work). What makes the desktop surface worth learning is the review loop built into the UI: every file change Claude proposes surfaces as a visual diff with Accept and Reject buttons, so nothing reaches your working tree until you say so. You will deliberately move through the workflow Anthropic recommends - explore first, then plan, then code - starting read-only so you and Claude share the same picture of the project before a single line is written. Along the way you will draft a CLAUDE.md with /init (the persistent project memory both the app and the CLI read at the start of every session), request one tightly scoped edit, review and comment on the diff line by line, accept it, save a learning, and finish in a session that runs in its own isolated Git worktree. The goal is not just to make an edit - it is to internalize a safe, repeatable rhythm you can trust on real code. Real captures of every control referenced here - the environment menu, the mode and effort controls, the sidebar - are collected in the gallery at the end of the lesson.
What you'll learn
- Where Claude Code lives in the desktop app: the Code tab (local file access with per-change review) versus Chat (no files) and Cowork (autonomous cloud agent), and why Code is the right surface for hands-on coding
- The five permission modes - Ask permissions, Accept edits, Plan mode, Auto, and Bypass - and why you switch from the Auto default to Ask permissions, with its diff-and-approve gate, while you learn
- The recommended agentic rhythm baked into the surface: explore read-only first, plan complex work before touching files, then code - so context comes before changes
- How CLAUDE.md works as durable, shared project memory: /init drafts it, you accept it as a diff, and both Desktop and the CLI load it at the start of every session
- Reading and steering a change through the visual diff: the +12 -1 stats indicator, file-by-file review, inline line comments submitted with Cmd/Ctrl+Enter, and the optional Review code self-check
- Why the Accept gate is the heart of the model: your files change only on approval, and Reject costs nothing because the edit was never written to disk
- Persisting knowledge and scaling up: the difference between user-authored CLAUDE.md rules and auto memory, plus skills and parallel worktree-isolated sessions for going further
Why this matters
The diff-and-approve gate is the whole point - treat the review, not the prompt, as the skill
It is tempting to judge an AI coding tool by how good its first draft is. The desktop Code tab is built on the opposite premise: the value is in the gate between Claude's proposal and your filesystem. In Ask permissions mode, Claude reads files and runs safe commands freely, but any edit pauses as a visual diff you can accept or reject line by line - nothing is written until you click Accept, and Reject is free because the change never touched disk. That is why the lesson starts read-only and asks for one small edit at a time: a tightly scoped diff is one you can actually verify, and a verified diff is the only kind worth keeping. As you get comfortable, the modes let you trade review for speed deliberately - Accept edits stops asking per file, Plan mode researches without editing source, and Auto runs with background safety checks that verify alignment with your request. The discipline to learn here is not prompt-writing; it is reviewing change before you write it, then choosing exactly how much of that review to delegate.
CLAUDE.md is shared, persistent memory - the highest-leverage artifact you produce
Running /init feels like a small step, but CLAUDE.md is the thing that makes every future session smarter. It is plain markdown that Claude loads at the start of each session, and it is shared configuration: the desktop app and the terminal CLI read the same CLAUDE.md and CLAUDE.local.md for a project, so a rule you write once - the real build command, the test runner, a convention Claude could not infer - applies everywhere you work on that repo. /init bootstraps it by analyzing your codebase (and folding in AGENTS.md.cursorrules, or .windsurfrules if present), but the durable value comes from the rules you add afterward that the tool could never discover on its own. Keep it tight, ideally under a couple of hundred lines, because it consumes context every session and Claude follows a focused file more reliably than a sprawling one. This is also where two memories diverge: CLAUDE.md is what you author and own; auto memory is what Claude accumulates on its own from a plain 'remember this'. Run /memory to audit exactly which instruction files are loaded - because what is in memory silently shapes everything Claude does next.
Sessions, worktrees, and the explore-plan-code loop - how this fits the rest of the course
Each Code session is its own conversation with its own history, project folder, and changes, and for a Git repo it runs in an isolated worktree, so parallel sessions never step on each other until you commit. That isolation is what lets the agentic loop scale: you can explore one task, plan a refactor in another, and let a long job run remotely, all without cross-contamination. The lesson walks the loop Anthropic recommends - explore read-only to build shared context, switch to Plan mode for anything multi-file so Claude maps the approach before editing, then execute and review. Note one app-specific detail the broader course should not blur: Shift+Tab cycles modes in the terminal CLI but not in Desktop, where you use the mode selector or Cmd/Ctrl+Shift+M. Everything you practice here - read before write, plan before code, review every diff, persist learnings to memory - is the same disciplined agentic loop the rest of the course applies in other surfaces; the desktop Code tab simply makes each step visible and approvable, which is the best place to build the habit before you trust faster modes or autonomous Cowork work.
The desktop Code session, stage by stage
The safe Claude Code flow inside the app: set up, build shared context, then gate every change behind a diff you approve.
- Open Code, point at Local folderSign in, click the Code tab, pick Local, and trust the project folder you deliberately selected
- Set model + Ask permissions modeChoose Opus/Sonnet/Haiku and switch the mode from its Auto default to Ask permissions so every edit pauses for review
- Explore read-only, then planAsk for an overview first; switch to Plan mode for anything multi-file before touching source
- /init drafts CLAUDE.mdGenerate persistent project memory both Desktop and the CLI load at the start of every session
- Request one small editA single, tightly scoped task so the resulting diff is easy to verify rather than rubber-stamp
- Review the visual diffOpen the +12 -1 indicator, step through files, and comment on lines (submit with Cmd/Ctrl+Enter)
- Accept to write to diskThe approval gate: your working tree only changes on Accept, and Reject costs nothing
Before you start
- A paid Claude plan - Pro, Max, Team, or Enterprise - is required to use the Code tab
- The Claude desktop app for macOS (Intel or Apple Silicon), Windows x64, or Windows ARM64; Claude Code is bundled, so no separate Node.js or CLI install is needed (the app is not available on Linux - use the CLI there)
- An Anthropic account to sign in with
- On Windows, Git for Windows must be installed so local sessions and worktrees work; most Macs already include Git (check with git --version)
Step by step
Install and sign in to the Claude app
Download the installer for your platform, run it, launch Claude, then sign in with your Anthropic account
Get the desktop app from the download links on the Claude Code docs (macOS universal, Windows x64, or Windows ARM64). Launch Claude from your Applications folder on macOS or the Start menu on Windows and sign in - Claude Code ships inside the app, so there is nothing else to install. Success is seeing the Chat, Cowork, and Code tabs across the top centre once you are signed in.
- 1One app, three tabs. The desktop app has Chat, Cowork, and Code tabs along the top center - you want Code.
- 2No CLI required. Claude Code is bundled in the app; you do not need to install Node.js or the claude CLI to follow this lesson.
Voiceover Start by downloading the Claude app installer, running it, then launching the app and signing in with your account.
Open the Code tab
Click the Code tab at the top center of the window
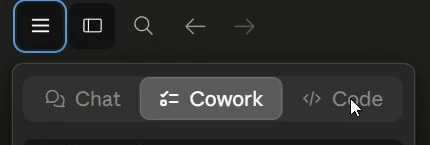
Code is the interactive coding assistant with direct access to your local files, where you review and approve each change in real time. If clicking Code prompts you to upgrade, you need a paid plan first; if it prompts you to sign in online, complete that and restart the app.
- 1Click here. Select Code - Chat has no file access, and Cowork is an autonomous agent that runs in a cloud VM. Neither is what we want.
- 2Hit a 403?. If the Code tab shows Error 403: Forbidden, sign out and back in from the app menu - that is the docs' top fix - then confirm your paid subscription.
Voiceover Once you're in, click the Code tab at the top centre to switch from chat over to coding.
Choose Local and select your project folder
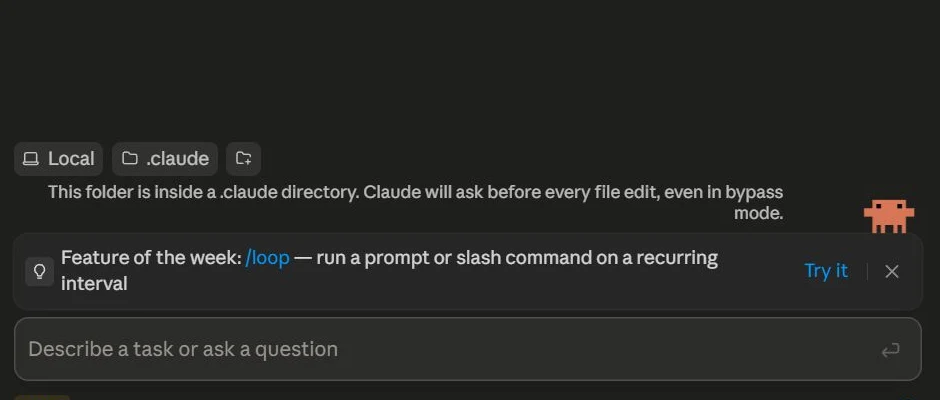
In the prompt area, select Local from the environment dropdown, then click Select folder and choose your project directory
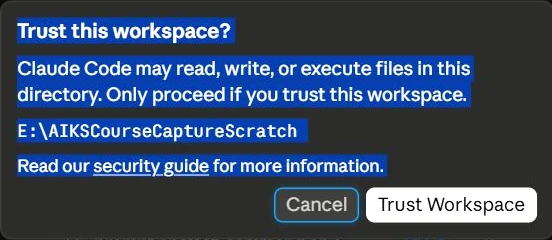
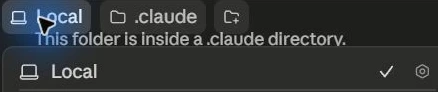
Local runs Claude on your machine using your files directly. The same environment dropdown also offers Remote (Anthropic's cloud, sessions continue after you close the app) and SSH (a machine you connect to), but Local keeps everything on your machine and is the clearest place to learn - the gallery has a capture of this dropdown with Local ticked. After you choose a folder, stop at the Trust this workspace prompt and confirm the path is genuinely the scratch or project folder you intended before proceeding. You'll know it worked when the workspace chips above the composer show your folder's name.
- 1Start small. Pick a small project you know well - it is the fastest way to see what Claude Code does and to spot anything off.
- 2Trust is the gate. Only trust a folder you deliberately selected. If the path is wrong, cancel and pick the right scratch or project folder before Claude can read or write files.
- 3Git on Windows. On Windows, Git for Windows must be installed for local sessions; restart the app after installing it. Each Git repo session also gets its own isolated worktree.
- 4Picked the wrong folder?. The project menu lets you create a new project or choose a different folder - there's a capture of it in the gallery at the end of the lesson.
Voiceover Select Local, then click Select folder and point Claude at the project you want to work on.
Pick a model and switch the mode to Ask permissions
Choose a model from the dropdown next to the send button, then open the mode selector (also next to the send button) and switch it to Ask permissions
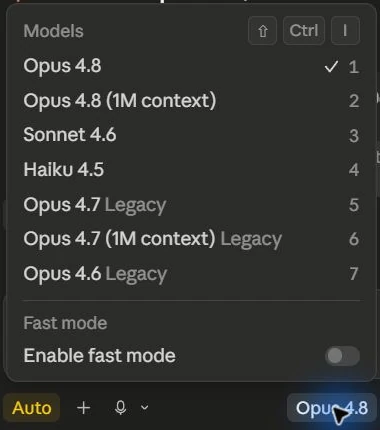
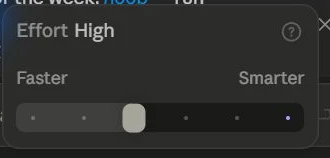
The model dropdown (Opus, Sonnet, Haiku) sits next to the send button and can be changed mid-session. The permission mode selector is also there - and note that current builds default to Auto mode (the menu reads 'Auto mode · Default'), which the app itself warns 'can modify or delete files without asking'. Actively switch it to Ask permissions for this lesson so every change pauses as a reviewable diff - the footer chips and the Auto warning tooltip are both captured in the gallery. Next to the model sits an effort slider running Faster to Smarter - higher effort thinks longer on each step; its menu is in the gallery too.
- 1Review before write. Ask permissions means Claude shows a diff and waits - nothing is written until you accept. Switch to it now and stay there for this lesson.
- 2Open the mode menu. To see all modes (Ask permissions, Accept edits, Plan mode, Auto mode, Bypass permissions), use the mode selector or press Cmd+Shift+M on macOS / Ctrl+Shift+M on Windows.
Voiceover Pick a model that suits the task, then switch the permission mode from its Auto default to Ask, so every edit pauses for your review.
Start read-only: ask Claude to explore
Type "Explore this project read-only and explain the folder structure." and press Enter
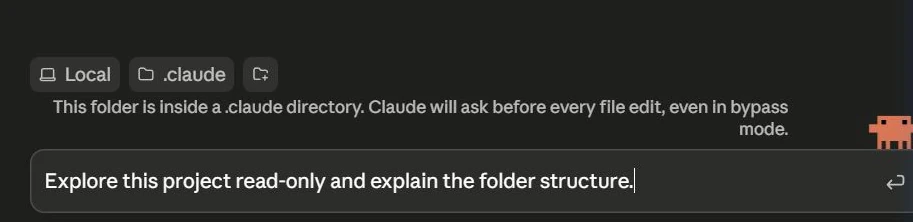
Begin with a question, not an edit - the capture shows this exact prompt typed and ready to send. In Ask permissions mode Claude reads files and runs safe commands to build context, and because you only asked it to explain, nothing changes on disk. This is the safest way to confirm Claude understands your project before it writes anything. Success looks like a streamed summary with no diff stats indicator appearing - because nothing changed.
- 1Each session is isolated. A session is one conversation with its own chat history, project folder, and changes - parallel sessions never interfere.
- 2Steer any time. Click the stop button (or press Esc) to interrupt, or type a correction and press Enter to redirect without stopping the current action.
Voiceover Start gently and read-only: ask Claude to explore the project read-only and explain the folder structure, so you both share the same picture.
Consider Plan mode for anything bigger
Open the mode selector (or press Cmd+Shift+M on macOS / Ctrl+Shift+M on Windows) and switch to Plan mode before a large change
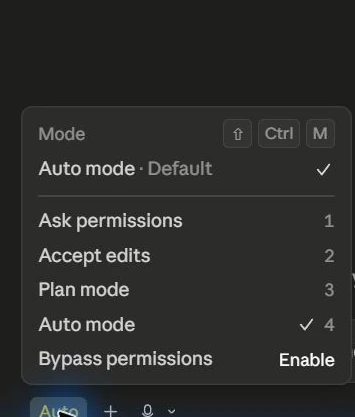
Plan mode lets Claude read files and run commands to explore, then propose an approach without editing your source code. It is the recommended way to start complex tasks - review the plan, then switch back to Ask permissions or Accept edits to execute. Note: the CLI's Shift+Tab mode cycling does not apply in the desktop app; use the mode menu instead.
- 1Plan, then code. For a refactor or multi-file change, start in Plan mode so Claude maps the approach before touching files.
- 2Not Shift+Tab here. Shift+Tab cycles modes in the terminal CLI only. In the app, use the mode selector or Cmd+Shift+M (Ctrl+Shift+M on Windows).
Voiceover For anything bigger, press Cmd or Ctrl Shift M and switch to Plan mode so you can review the approach first.
Run /init to draft a CLAUDE.md
Type /init in the prompt box and press Enter
$ /initAnalysing codebase: build tooling, tests, conventions...Proposed a new file: CLAUDE.md✔ Opening the diff view so you can review before anything is written.
/init analyzes your codebase and generates a starting CLAUDE.md with the build commands, test instructions, and conventions it discovers. CLAUDE.md is the markdown file Claude reads at the start of every session, so this becomes your project's persistent memory. If a CLAUDE.md already exists, /init suggests improvements rather than overwriting it.
- 1What /init writes. Build and test commands, project layout, and conventions Claude can infer - refine it afterward with rules it could not discover on its own. Aim to keep it under 200 lines.
- 2Reads other agents' configs. If your repo has AGENTS.md.cursorrules, or .windsurfrules, /init reads them and folds the relevant parts into the generated CLAUDE.md.
Voiceover Type slash init, and Claude will draft a CLAUDE.md file describing how your project is set up.
Review the generated CLAUDE.md as a diff
Read the proposed CLAUDE.md in the diff view, then click Accept to write it
# # Proposed new file: CLAUDE.md+ ## Commands+ build: npm run build test: npm test+ ## Conventions+ 2-space indent; components live in src/components/[ Accept ] [ Reject ], nothing is written until you choose
Because you are in Ask permissions mode, the new CLAUDE.md appears as a proposed change with Accept and Reject buttons - it is not written until you accept. Skim it for accuracy: wrong build commands or invented conventions are worth fixing before you keep them.
- 1Accept or Reject. Accept writes the file; Reject declines, and Claude asks how you would like to proceed differently. Your files stay untouched until you accept.
- 2Keep it tight. Target under 200 lines - shorter CLAUDE.md files consume less context and Claude follows them more reliably.
Voiceover Read the generated CLAUDE.md as a diff, check it reflects your project, then click Accept to write it to disk.
Ask for one small edit
Type a focused request like "Fix the TODO in src/utils.js and add a short comment" and press Enter
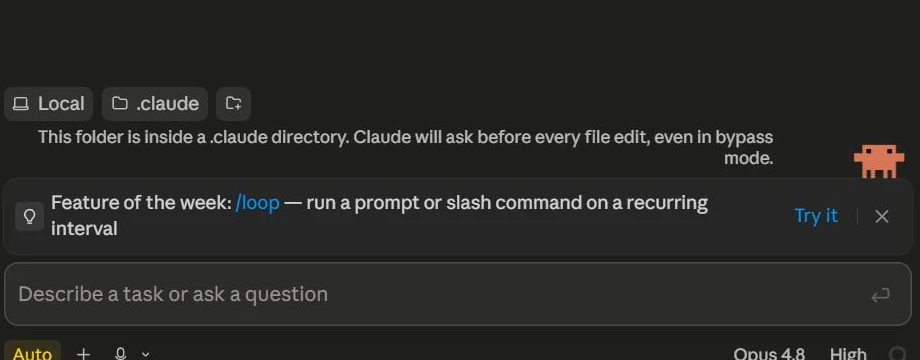
Give Claude a single, well-scoped task so the resulting diff is easy to verify. In Ask permissions mode Claude proposes the edit and pauses - this keeps you in control and makes the review meaningful rather than a rubber stamp. You'll know Claude has finished when the +12 -1 stats indicator appears - that's your cue for the next step.
- 1Add context with @. Type @ followed by a filename to pull a specific file into the conversation, attach images and PDFs with the attachment button, or drag and drop files into the prompt.
- 2Smaller is safer. One change per request keeps the diff readable and the accept/reject decision clear.
Voiceover Now ask for one small change, like fixing the TODO in a file and adding a short explanatory comment.
Open the visual diff via the +12 -1 indicator
Click the +12 -1 diff stats indicator to open the diff viewer
Claude: Fixed the TODO in src/utils.js and added a short comment.✔ +12 -1 View changes# # Click the indicator (or press Cmd/Ctrl+Shift+D) to open the diff viewerFiles changed (1): src/utils.js +12 -1
When Claude changes files, a stats indicator showing lines added and removed (for example +12 -1) appears. Clicking it opens the diff viewer with a file list on the left and the changes for each file on the right - the same review surface you used for CLAUDE.md. You can also toggle the diff pane with Cmd+Shift+D (Ctrl+Shift+D on Windows).
- 1Click here. The +12 -1 badge is your gateway to the full file-by-file diff - always open it before accepting.
- 2Review file by file. Use the left-hand file list to step through every changed file, not just the first one.
Voiceover Open the visual diff by clicking the plus twelve minus one indicator to see exactly what changed.
Comment on a line to request a tweak
Click a line in the diff, type your feedback and press Enter, then submit all comments with Cmd+Enter (Ctrl+Enter on Windows)
+ const result = parseTotals(data);# # Click the line to open a comment box[Comment] Use the existing formatTotals helper here instead.Press Cmd+Enter (Ctrl+Enter on Windows) to submit all comments
Clicking any line opens a comment box; type your feedback and press Enter to add that comment. Add notes on several lines, then submit them together with Cmd+Enter (Ctrl+Enter on Windows). Claude reads your comments and produces a revised diff you can review again - an iterative loop entirely under your control.
- 1Batch your notes. Comment on multiple lines first, then submit them all at once with Cmd+Enter (Ctrl+Enter on Windows).
- 2Optional: Review code. Click Review code in the diff viewer's top-right toolbar to have Claude evaluate its own diff for logic errors, security issues, and obvious bugs before you accept.
Voiceover Click a specific line, type your feedback inline, then submit it with Cmd or Ctrl Enter to request a tweak.
Approve the change
When the diff looks right, click Accept to apply it to your files
Revised diff: src/utils.js +10 -1[ Accept ] [ Reject ]✔ Changes written to src/utils.js
Accept writes the change to disk; Reject declines and prompts Claude to try a different approach. This is the deliberate approval gate - your working tree only changes the moment you click Accept.
- 1This is the gate. Nothing is written to your files until Accept - so review first, approve second.
- 2Changed your mind?. Reject sends Claude back to rework the change; you lose nothing because the edit was never written.
Voiceover When the change looks right, click Accept to apply it, and only then does it actually write to disk.
Save a learning to memory
Tell Claude "add this to CLAUDE.md" to persist a project rule, or run /memory to see what is loaded
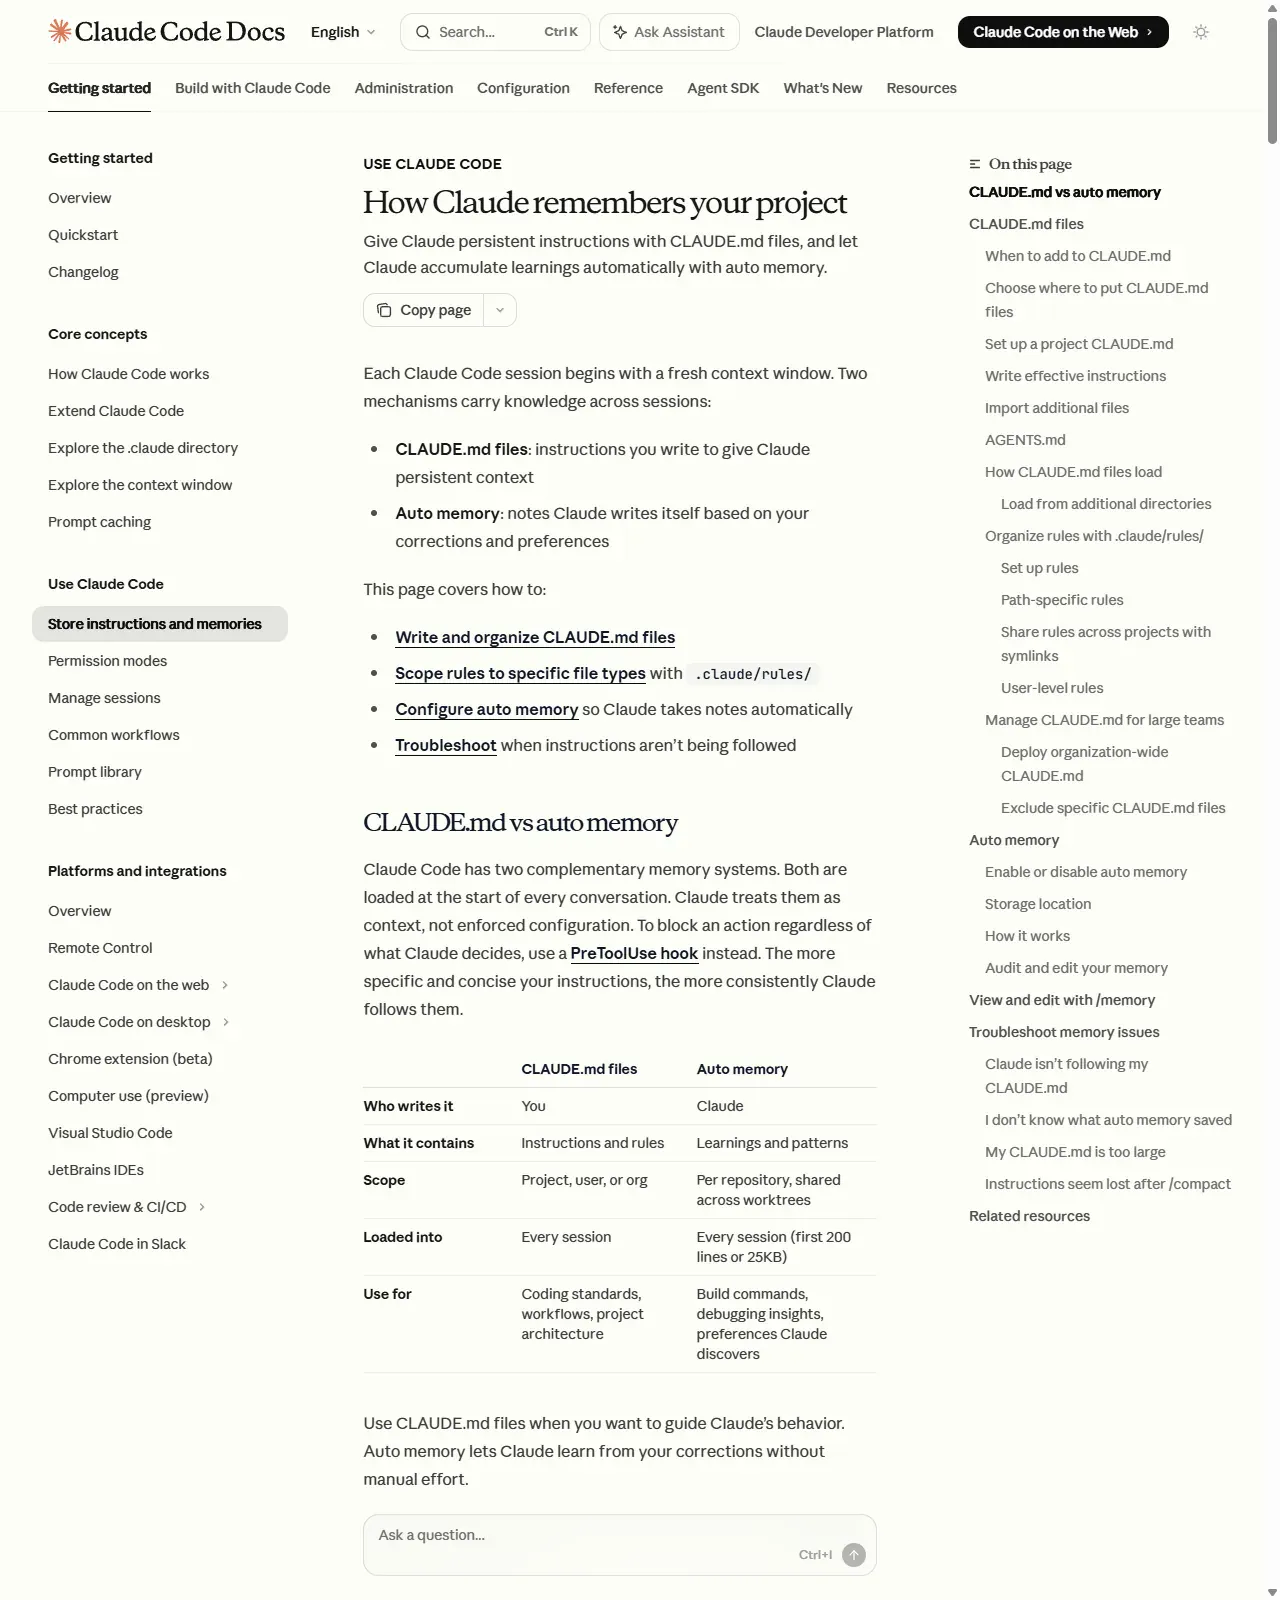
Run /memory any time to list the CLAUDE.md, CLAUDE.local.md, and rules files loaded in the session, toggle auto memory on or off, and open the auto memory folder. Asking Claude to "add this to CLAUDE.md" records a durable rule you write; a plain "remember ..." goes to auto memory, which Claude builds up on its own across sessions. The docs page shown here lays the two memories out side by side - worth a skim once you have both kinds saved. Success: /memory lists ./CLAUDE.md among the loaded files.
- 1Two memories. CLAUDE.md is what you write; auto memory is what Claude saves itself - both load at the start of every session.
- 2Audit it anytime. Run /memory to see exactly which instruction files are loaded; select any one to open and edit it - they are plain markdown.
Voiceover Save anything worth remembering by saying add this to CLAUDE.md, or by running the slash memory command.
Finish the session (and try skills next)
Wrap up, then type / in the prompt box (or click + > Slash commands) to browse skills, and click + New session in the sidebar (Cmd+N / Ctrl+N) to start fresh
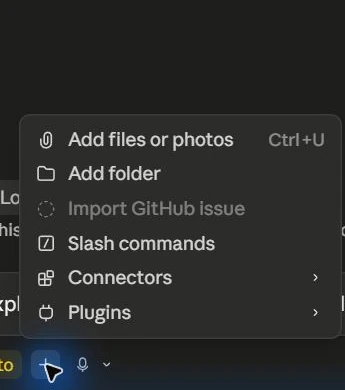
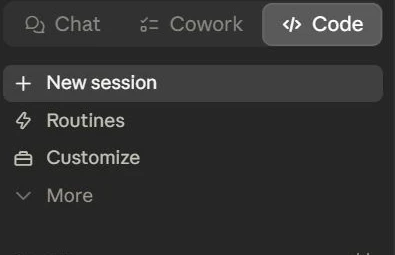
You have completed a full safe loop: explore, draft memory, edit, review, approve. To go further, type / or open the + menu next to the prompt box and choose Slash commands to browse built-in commands, your skills, project skills, and plugin skills - skills are reusable prompts (like a code-review checklist) you invoke with / or that Claude loads automatically when relevant. Click + New session in the sidebar to start fresh work in its own isolated Git worktree - the sidebar capture in the gallery shows the control, just under the Chat / Cowork / Code switch.
- 1Skills live in folders. A skill is a SKILL.md file in ~/.claude/skills (personal) or .claude/skills (project); type / and pick it by name to run one.
- 2Parallel work. + New session gives each task its own Git worktree, so sessions never step on each other's changes.
Voiceover To finish, type slash to browse the available skills, then start a fresh session with New, running in its own worktree.
Reference screens
Course screenshots and visual references for the lesson flow. Re-check the live product before paid delivery or public launch.



End-to-end recap
- Open the Claude app, sign in, and click the Code tab; in the prompt area select Local from the environment dropdown and click Select folder to point Claude at your project.
- Switch the permission mode from its Auto default to Ask permissions so every change is a reviewable diff - start read-only by asking for an overview before any edit (switch to Plan mode for bigger tasks).
- Run /init to draft a CLAUDE.md, then accept it from the diff view; this becomes your project's persistent memory loaded every session.
- Request one small edit, open the diff via the +12 -1 indicator, comment on lines if needed (submit with Cmd/Ctrl+Enter), then click Accept - files only change on approval.
- Persist learnings with "add this to CLAUDE.md" or audit them with /memory, then use / (or the + menu's Slash commands) and + New session to scale into skills and parallel worktree-isolated work.
Voiceover script & storyboard
Read-aloud narration for recording the video, an intro line, one line per screen in order, then an outro. Pair each line with its matching step above.
- IntroHere's a calm, practical walkthrough of using Claude Code inside the Claude app, from install to your first reviewed change.
- 1Start by downloading the Claude app installer, running it, then launching the app and signing in with your account.
- 2Once you're in, click the Code tab at the top centre to switch from chat over to coding.
- 3Select Local, then click Select folder and point Claude at the project you want to work on.
- 4Pick a model that suits the task, then switch the permission mode from its Auto default to Ask, so every edit pauses for your review.
- 5Start gently and read-only: ask Claude to explore the project read-only and explain the folder structure, so you both share the same picture.
- 6For anything bigger, press Cmd or Ctrl Shift M and switch to Plan mode so you can review the approach first.
- 7Type slash init, and Claude will draft a CLAUDE.md file describing how your project is set up.
- 8Read the generated CLAUDE.md as a diff, check it reflects your project, then click Accept to write it to disk.
- 9Now ask for one small change, like fixing the TODO in a file and adding a short explanatory comment.
- 10Open the visual diff by clicking the plus twelve minus one indicator to see exactly what changed.
- 11Click a specific line, type your feedback inline, then submit it with Cmd or Ctrl Enter to request a tweak.
- 12When the change looks right, click Accept to apply it, and only then does it actually write to disk.
- 13Save anything worth remembering by saying add this to CLAUDE.md, or by running the slash memory command.
- 14To finish, type slash to browse the available skills, then start a fresh session with New, running in its own worktree.
- OutroThat's the core loop: explore read-only, plan when it matters, review every diff, and approve only what you're happy to keep.
Resources
- docClaude Code overview (all surfaces, including Desktop)
- docGet started with the desktop app (Code tab quickstart)
- docUse Claude Code Desktop (permission modes, diff view, sessions, keyboard shortcuts)
- docHow Claude remembers your project (CLAUDE.md, /init, /memory, auto memory)
- docExtend Claude with skills (SKILL.md, slash commands)
Checkpoint